Daytona Twin restoration

channel27

Active member
vacBacker
Feedback
12 (100%)
Credits
1,291CR
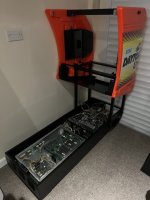
It’s been many years in the making, but I’ve finally started the restoration of my Daytona USA twin driver that was rescued from under a tarp where it had sat for many years.
It’s just a shell with no electronics or game boards, and whilst the MS9 CRT tubes were present, there were no monitor chassis.

The good: -
- It’s a Daytona USA twin!
- The plastics are in good shape..
- Although rusty, the metalwork is solid underneath all the rot.
- Non-electronics wise, it’s 90% complete.

The bad: -
- No electronics.
- No topper.
- No coin tower and the rear wiring cover looks like it's been ran over by a tank
- There's only 1 dashboard which is heavily burned with cigarettes and the steering wheel is mouldy
- Rust on all metalwork including the CRT frames

The ugly: -
I've posted some of these a few times before but here they are again to demonstrate the "Before" state...
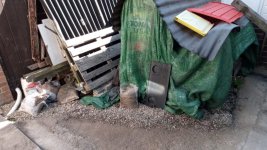
tarp.jpg

What have we here?
tarp2.jpg

RUST!!!
tarp3.jpg

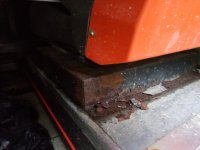
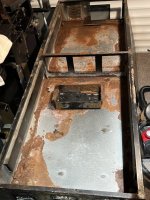
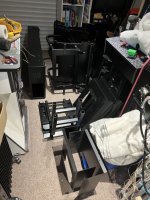
Once it was home and stripped: -
rust1.jpg
rust2.jpg

I’ve been collecting spares for this machine for many years, so I should have everything I need to bring it back to life (if my Sega Rally stops eating Force Feedback boards!). So the plan of attack is to get it all shot blasted and powder coated before rebuilding with all original Model 2 electronics. I’ve got a good few working Daytona stacks which should hopefully keeping this thing going for the foreseeable…

I'll update the thread as I get stuff done.

First things first, side panels cleaned: -
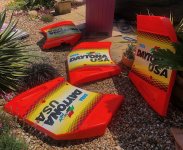
sides.jpg
 
Last edited:

channel27

Active member
vacBacker
Feedback
12 (100%)
Credits
1,291CR
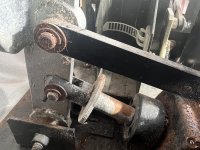
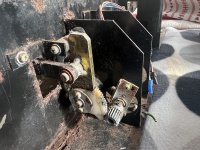
Pedals

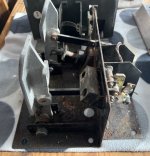
Rust and grime: -
pedals_before1.jpeg
pedals_before2.jpeg
pedals_before3.jpeg

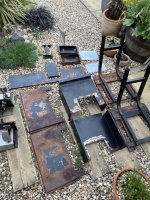
Stripped and ready for paint: -
pedals_before4.jpeg

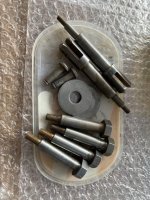
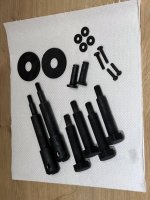
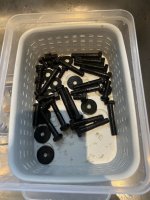
Bolts soaked in white vinegar to remove the rust. Unfortunately, this also removed the black oxide coating: -
pedals_bolts1.jpeg

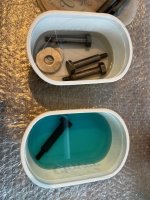
So... Bluing to make them black again. Not all of these were black originally, but I like the finish and it's a protective coating against rust: -
pedals_bolts2.jpeg
pedals_bolts3.jpeg

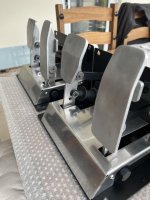
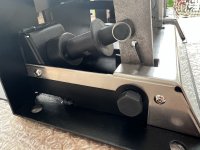
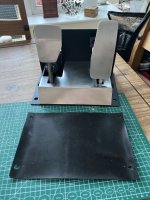
Frames painted, metalwork polished and all rebuilt!
pedals_after1.jpeg
pedals_after2.jpeg
pedals_after4.jpeg

EDIT: I've been asked for a bit more detail on how these were done so I thought I'd add it here: -

- The fixings (bolts, screws etc) were treated as above.
- The metal frame was sanded down to remove the old paint and treated with rust treatment: https://www.toolstation.com/rustins-rust-converter-250ml/p97400.
- Then it was primed with grey primer and given a good few light coats of satin black. (I guess they could have been shot blasted and powder coated but they're right down inside the machine so a painted finish was fine.) Paints are as follows: Hycote Grey Primer - https://www.amazon.co.uk/HYCOTE-XUK03015-Hycote-Primer-400ml/dp/B003MLIFN8, Hycote Satin Black - https://www.amazon.co.uk/Hycote-Satin-Black-400ml-XUK0271/dp/B000LD6MVW
- The brightwork and pedals themselves were sanded with wet and dry sandpaper from 240 to 3000 grit. It takes ages but the result is worth it. I used a drill attachment for the lower grits and then hand sanded when it got to 1000 and above.
- The rubber damper on the brake pedal was replaced by a section of hose. It's thinner than the original rubber but I'll see how it holds up once I'm stepping on it in anger: https://www.ebay.co.uk/itm/113923748340?var=414206252989
 
Last edited:

channel27

Active member
vacBacker
Feedback
12 (100%)
Credits
1,291CR
The powder coating is back!
powdercoating.jpeg

More bluing for the cabinet bolts once the rust was removed...
bolts1.jpeg
bolts2.jpeg

Electronics
I sourced these sundry board many years ago from someone breaking a wooden sided twin. Everything seems to work other that one of the amps which I've swapped out. The FFB boards are untested, but I've got a few spares if they turn out to be duds. Hopefully there'll be a modern repro available soon for both this and my Sega Rally which eats them for breakfast :(.
- The wooden board on the right has been stripped of its electronics, primed and painted in matt black to cover the watermarks from 25 years of spilt coke... The wooden board on the left will be given the same treatment.
- The electronics themselves have had 20 odd years of dust removed and the wiring tidied up. (Including a one way Mate-n-lok connector to replace a blob of solder joining 3 100v wires that was hanging in the breeze :oops:)
- The main stack's fans have been replaced with new ones.
- The PSUs will be serviced with all new caps.

electronics.jpg

Rebuild started!
Left side first. It'll be the AC wiring next and then the CRT can so in.
The original cabinet fans were rusted beyond belief. I'd replace them anyway but was surprised by how expensive the original spec Sunon fans were. £80 in total for the 4 that go front and rear in the two machines o_O

rebuild1.jpeg
 
Last edited:

channel27

Active member
vacBacker
Feedback
12 (100%)
Credits
1,291CR
Looking mint ,what's the mixture the bolts are sitting in

It’s a chemical blackening solution that gives steel a black oxide finish.

I’m using this kit: -
https://www.ebay.co.uk/itm/363615811215

Some of the bolts were caked in rust but after a week in white vinegar they look like new. This puts the oxide back on that the vinegar takes off along with the rust.
 

Lukey13

Active member
Feedback
3 (100%)
Credits
120CR
I cant believe how nice them bolts have come out!... Where did you get the white vinegar from and how long did you soak them?
I vaguely recall using some 'white vinegar' for something many years ago but don't remember having any great results like this.. Will deffo be looking to pick up one of these blacking kits too.
This is looking like one beautiful Daytona restoration coming along, bravo.
 

channel27

Active member
vacBacker
Feedback
12 (100%)
Credits
1,291CR
I cant believe how nice them bolts have come out!... Where did you get the white vinegar from and how long did you soak them?
I vaguely recall using some 'white vinegar' for something many years ago but don't remember having any great results like this.. Will deffo be looking to pick up one of these blacking kits too.
This is looking like one beautiful Daytona restoration coming along, bravo.

I get the white vinegar from Amazon: https://www.amazon.co.uk/gp/product/B084WZ47MP

For the really caked up stuff I soak them for 3 days or so and then rinse and repeat with new vinegar. In between soaks you can use a metal washing-up scourer or wire brush to remove anything that's loose. It works faster in a hot room so I leave them in the conservatory.

After a soak the vinegar will look like this. There are bolts in there somewhere!

047c2391-05a3-4250-b3c6-fe0166718e13.JPG

Don't get that gunk on your clothes. It's never coming out!
 

channel27

Active member
vacBacker
Feedback
12 (100%)
Credits
1,291CR
Footplates

I forgot I'd restored the footplates already.
So here's 10 pics of a bit of wood getting some TLC :D

Before. Is that vinyl flooring??
footplate-1.jpeg

20 odd years of grime
footplate-2.jpeg

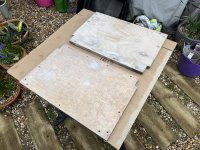
Very rusty metalwork and watermarked wood. Luckily the wood was solid enough but I left it for many days in a hot room to fully dry out.
I decided to paint the wood in matt black to cover the watermarks from spilt drinks and tarpaulin damp... The marks wouldn't be seen without taking the footplate out and looking underneath (the top is covered by ribbed matting) but I'd know the marks were there!
footplate-3.jpeg

Wood sanded and filled with bodywork filler
footplate-4.jpeg

Primed
footplate-5.jpeg

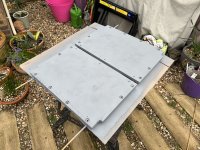
Painted in matt black with new tee nuts. The originals were rusted beyond belief
footplate-6.jpeg

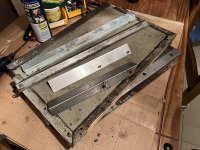
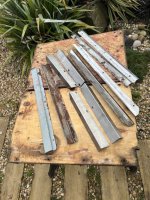
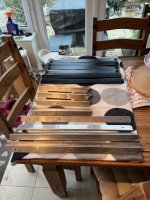
I had to paint the drip tray metalwork that's fixed on the underside of the footplate. They're originally bare metal but the satin black paint covers the pitting that was left after the rust was removed. I guess it had done its job by catching all that spilt coke, but it had taken its toll!
(The other strips at the back are from the underside of the seat cover)
footplate-7.jpeg

Metalwork sanded and polished
footplate-9.jpeg

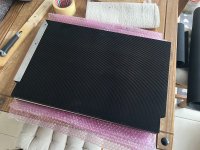
New matting.
footplate-8.jpeg

Rebuilt with new fixings. The heads of the originals were too far gone.
footplate-10.jpeg

Once the cabinet wiring is in I'll fit them to the machines (y)
 
Last edited:

Lukey13

Active member
Feedback
3 (100%)
Credits
120CR
Thanks for tips and links on the vinegar and blacking products, I’ll definitely be using these in future…
This is looking fantastic and loving the attention to detail, eager to see more as it continues coming together! 👍👍
 

channel27

Active member
vacBacker
Feedback
12 (100%)
Credits
1,291CR
Cabinet AC tray wiring

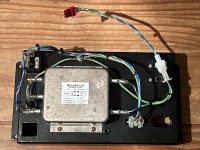
Wired up the master-side AC input tray with a new socket and fuse holder. I couldn't find a 240V/10A switch small enough to fit the 21 x 19mm hole so I'm not bothering with it. It'll be plugged in through a remote control socket and the switch would always be in the on position anyway.

ACTray.jpeg
 

channel27

Active member
vacBacker
Feedback
12 (100%)
Credits
1,291CR
AC wiring
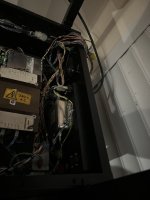
AC tray in and the front and rear fans wired up: -
IMG_3951.jpeg

Pedals
One of my machines had thin rubber matting between the pedals and the plate they sit on. The plates of these machines have some pitting due to rust so I thought I’d use it here.
IMG_3952.jpeg

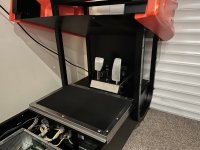
Footplate, pedal plate, pedal upright and the pedals themselves in: -
IMG_3953.jpeg

Getting there!
IMG_3954.jpeg
 
Top