Out Run Resto 2024

iamjimmi

Active member
vacBacker
Feedback
8 (100%)
Credits
479CR
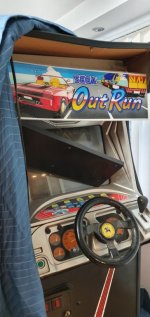
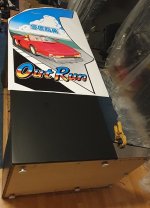
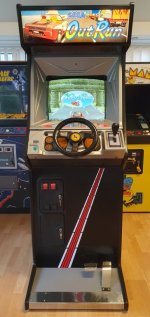
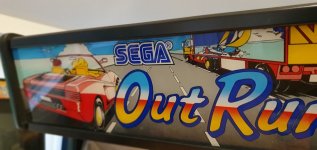
Sharing details of my latest restoration – OutRun.

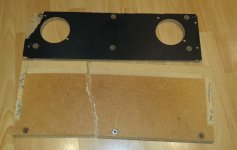
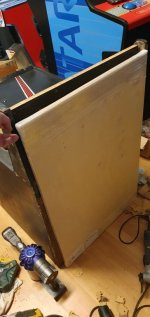
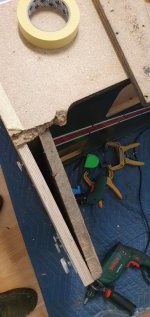
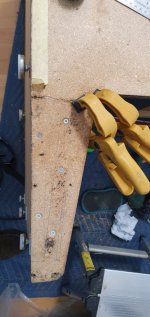
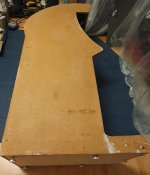
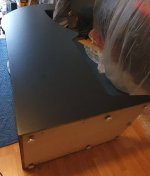
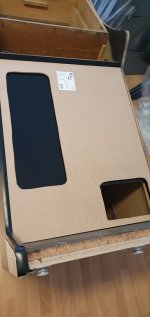
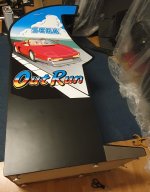
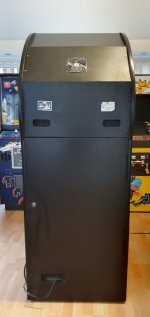
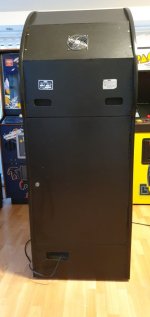
Unfortunately it was damaged during shipping from the US… One of the wooden “legs” had been broken off, the top marquee retaining bracket was badly bent and both the top wooden panel and the speaker panel had been damaged.

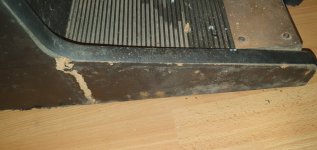
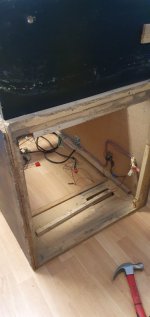
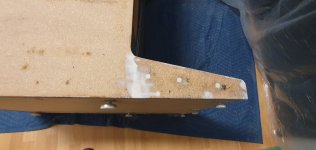
Further inspection revealed that the other wooden “leg” had previously been knocked off and repaired crudely and more seriously the base had evidence of water damage and had completely warped.

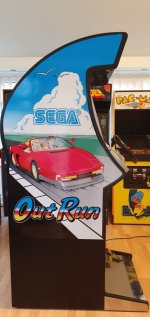
At first inspection the side art looked ok but closer inspection revealed that the best side had been subject to a poor restoration – half the original side art had been removed and then new artwork applied over the remaining art work. And the new art work hadn’t been applied straight.

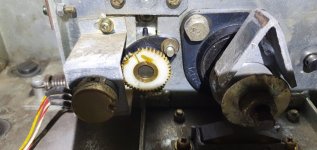
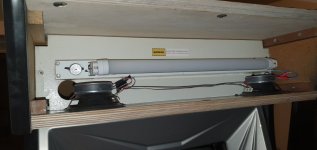
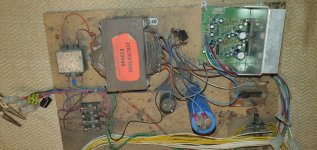
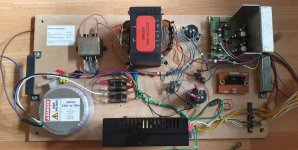
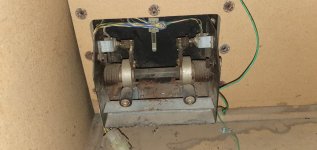
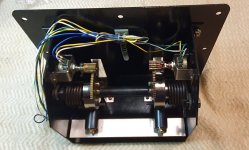
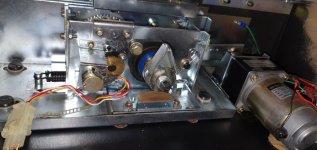
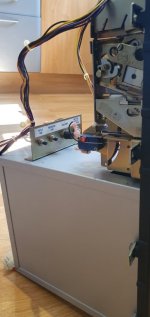
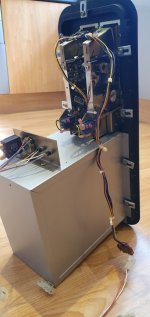
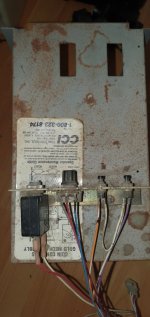
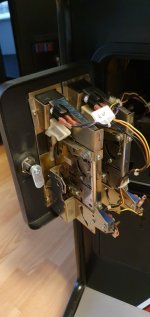
Inside was all complete although I could see at least one gear had cracked.

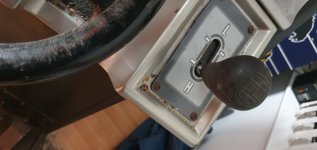
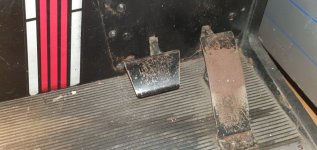
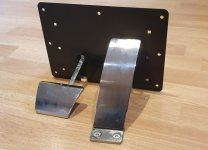
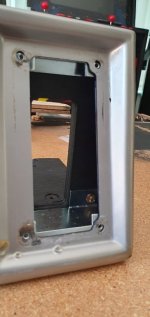
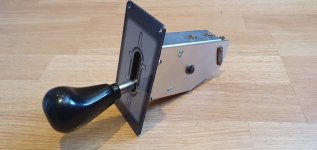
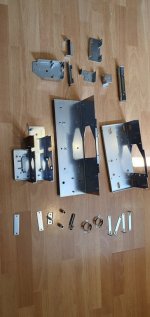
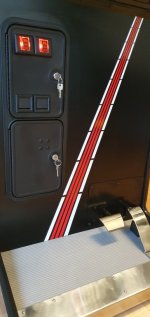
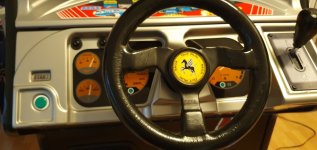
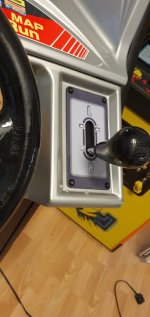
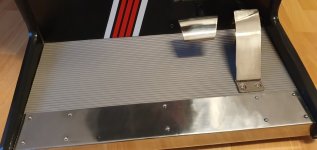
The gear stick housing had been bent (very common on Out Runs) and cracked the plastic dash.
 

Attachments

  • 20221022_181420.jpg
    20221022_181420.jpg
    118.1 KB · Views: 29
  • 20220926_204042.jpg
    20220926_204042.jpg
    109.4 KB · Views: 34
  • 20221115_094810.jpg
    20221115_094810.jpg
    103.9 KB · Views: 33
  • 20220926_195105.jpg
    20220926_195105.jpg
    68.6 KB · Views: 37
  • 20220926_184916.jpg
    20220926_184916.jpg
    62.9 KB · Views: 38
  • 20230218_164949.jpg
    20230218_164949.jpg
    48 KB · Views: 37
Last edited:

iamjimmi

Active member
vacBacker
Feedback
8 (100%)
Credits
479CR
Given the damage, I decided to full resto on this one. First thing to address the broken marquee and speaker panels.

Thanks to Russ J for help with wood work and Gary W for help sourcing a replacing metal retaining bracket.

One of the speakers was damaged, so I upgraded the speakers and changed the fluorescent tube to an LED tube to run cooler.
 

Attachments

  • 20221022_181459.jpg
    20221022_181459.jpg
    75.7 KB · Views: 30
  • 20240121_184258.jpg
    20240121_184258.jpg
    68.4 KB · Views: 27

iamjimmi

Active member
vacBacker
Feedback
8 (100%)
Credits
479CR
Water damaged base removed and replaced.
 

Attachments

  • 20230401_144155.jpg
    20230401_144155.jpg
    43.5 KB · Views: 27
  • 20230331_182706.jpg
    20230331_182706.jpg
    53.4 KB · Views: 25
  • 20230515_201127.jpg
    20230515_201127.jpg
    71.8 KB · Views: 26

iamjimmi

Active member
vacBacker
Feedback
8 (100%)
Credits
479CR
The wooden panel that supported the power supplies and sound amp was very weak due to the water damage, so I replaced the panel, replaced the caps, cleaned everything up, added some handles to help future maintenance and added a 240 - 120 V transformer.
 

Attachments

  • 20230422_164704.jpg
    20230422_164704.jpg
    134.4 KB · Views: 31
  • 20230523_160701.jpg
    20230523_160701.jpg
    138.6 KB · Views: 30
Last edited:

iamjimmi

Active member
vacBacker
Feedback
8 (100%)
Credits
479CR
Pedals next. I went for a Nickel plate that is less of a mirror finish than a chrome finish.
 

Attachments

  • 20230215_194757.jpg
    20230215_194757.jpg
    113.4 KB · Views: 30
  • 20230218_155630.jpg
    20230218_155630.jpg
    95.7 KB · Views: 26
  • 20230317_142414.jpg
    20230317_142414.jpg
    115.2 KB · Views: 25
  • 20230318_172743.jpg
    20230318_172743.jpg
    106 KB · Views: 26
Last edited:

iamjimmi

Active member
vacBacker
Feedback
8 (100%)
Credits
479CR
The plastic dash had been bent by pressure from the changing gears too enthusiastically and a few cracks were showing where the retaining bolts held the dash in place. There were a few cigs burns and other bumps, but I thought the dash condition was too good to replace, so I straightened and strengthen the dash with carbon fibre and fibre glass.
 

Attachments

  • 20230612_125838.jpg
    20230612_125838.jpg
    44.1 KB · Views: 26
  • 20230612_125911.jpg
    20230612_125911.jpg
    62 KB · Views: 26
  • 20230615_094510.jpg
    20230615_094510.jpg
    119.2 KB · Views: 26
  • 20230615_094527.jpg
    20230615_094527.jpg
    98.2 KB · Views: 26

iamjimmi

Active member
vacBacker
Feedback
8 (100%)
Credits
479CR
Gear stick next. I replaced the bent housing, decal, bearings, springs and one side of the housing where the ball bearings had gauged a groove into the metal.
 

Attachments

  • 20230602_142427.jpg
    20230602_142427.jpg
    86.5 KB · Views: 26
  • 20230602_142446.jpg
    20230602_142446.jpg
    77.3 KB · Views: 24

iamjimmi

Active member
vacBacker
Feedback
8 (100%)
Credits
479CR
Now the steering mech. I went to town on this one... chrome plated most of the parts and replaced anything that had worn out including all of the bearings, gears and bumpers. The result is a really tight steering column and a shaker motor that doesn't sound like a shaken rattle can.
 

Attachments

  • 20230106_223338.jpg
    20230106_223338.jpg
    106.1 KB · Views: 27
  • 20230516_151005.jpg
    20230516_151005.jpg
    56.6 KB · Views: 27
  • 20240123_152804.jpg
    20240123_152804.jpg
    106.8 KB · Views: 27
Last edited:

iamjimmi

Active member
vacBacker
Feedback
8 (100%)
Credits
479CR
Coin Door... mixture of powder coating and spraying.
 

Attachments

  • 20230520_154009.jpg
    20230520_154009.jpg
    43 KB · Views: 27
  • 20230520_154033.jpg
    20230520_154033.jpg
    36.6 KB · Views: 24
  • 20230520_153953.jpg
    20230520_153953.jpg
    53.2 KB · Views: 24
  • 20230218_155604.jpg
    20230218_155604.jpg
    69.1 KB · Views: 24
  • 20230325_132959.jpg
    20230325_132959.jpg
    60.5 KB · Views: 24

iamjimmi

Active member
vacBacker
Feedback
8 (100%)
Credits
479CR
Time to get naked. Sides stripped back to bare wood, wood repaired and edges now 90 degrees. Opted for a laminate finish before applying new decals from Olly. The laminate is Formica with a black core - it is a very close finish to the original finish. Because it adds slightly to the width I used 13/16" from T-molding.com (40ft) - thanks to Parism on KLOV for that tip. Also thanks to Parism for tip to build a template for the front to help route the coin door. I painted the rear using a foam roller and slightly watered down BEDEC Multi Surface Soft Satin Black - thanks to itruk for that tip - finish was much less patchy than the spray paint I tried.
 

Attachments

  • 20230723_144139.jpg
    20230723_144139.jpg
    69.1 KB · Views: 24
  • 20230723_152648.jpg
    20230723_152648.jpg
    69.1 KB · Views: 23
  • 20230724_213525.jpg
    20230724_213525.jpg
    75 KB · Views: 23
  • 20240111_171740.jpg
    20240111_171740.jpg
    79.1 KB · Views: 23
  • 20240106_161800.jpg
    20240106_161800.jpg
    45.3 KB · Views: 23
  • 20240112_133709.jpg
    20240112_133709.jpg
    70.1 KB · Views: 24
  • 20240114_144740.jpg
    20240114_144740.jpg
    40.3 KB · Views: 24
  • 20240112_162539.jpg
    20240112_162539.jpg
    74.2 KB · Views: 26
  • 20240112_184322.jpg
    20240112_184322.jpg
    74.8 KB · Views: 36
Last edited:

iamjimmi

Active member
vacBacker
Feedback
8 (100%)
Credits
479CR
New fan fitted (but original fan cover kept and chromed), zinc plated the zinc parts and finally a new floor mat from American Floor Mats (Kleensweep Runner Mats Color: Grey) - it's a perfect replacement for the original mat. The cost of shipping the mat to the UK from American Floormats was insane, so I used to mail forwarding company. Grant worked his magic on the monitor chassis although I might replace the monitor - even after a recap the colours don't really pop and there is some "After Burner" screen burn. And it's finished! Only took a year....
 

Attachments

  • 20240123_144236.jpg
    20240123_144236.jpg
    65.2 KB · Views: 35
  • 20240123_144251.jpg
    20240123_144251.jpg
    103 KB · Views: 36
  • 20240123_144308.jpg
    20240123_144308.jpg
    51 KB · Views: 29
  • 20240123_144433.jpg
    20240123_144433.jpg
    60.6 KB · Views: 28
  • 20240123_144519.jpg
    20240123_144519.jpg
    58.5 KB · Views: 30
  • 20240123_144636.jpg
    20240123_144636.jpg
    35.9 KB · Views: 31
  • 20240123_151740.jpg
    20240123_151740.jpg
    88 KB · Views: 29
  • 20240123_151909.jpg
    20240123_151909.jpg
    50.9 KB · Views: 27
  • 20240123_152002.jpg
    20240123_152002.jpg
    84.2 KB · Views: 28
Last edited:

iamjimmi

Active member
vacBacker
Feedback
8 (100%)
Credits
479CR
Inside...
 

Attachments

  • 20240123_152038.jpg
    20240123_152038.jpg
    62.6 KB · Views: 31
  • 20240123_152058.jpg
    20240123_152058.jpg
    80.2 KB · Views: 28
  • 20240123_152115.jpg
    20240123_152115.jpg
    40.4 KB · Views: 27
  • 20240123_152206.jpg
    20240123_152206.jpg
    51.2 KB · Views: 26
  • 20240123_152456.jpg
    20240123_152456.jpg
    37.2 KB · Views: 26
  • 20240123_152538.jpg
    20240123_152538.jpg
    52.1 KB · Views: 26
  • 20240123_152627.jpg
    20240123_152627.jpg
    59.2 KB · Views: 25
  • 20240123_152655.jpg
    20240123_152655.jpg
    109.8 KB · Views: 24
  • 20240123_152739.jpg
    20240123_152739.jpg
    115.6 KB · Views: 23
  • 20240123_152819.jpg
    20240123_152819.jpg
    104.6 KB · Views: 28

Mr20to5

Active member
vacBacker
Feedback
1 (100%)
Credits
1,331CR
I mean, it's ok, I guess....

Ha! Seriously, what a beauty. Got to love Jim's restorations, a proper nuts and bolts resto, with even those chromed!

Truly tremendous stuff pal. Cannot wait to have a go!

Now, put all those tools away and enjoy the games room this year!
 

Bods

Senior Member
vacBacker
Feedback
3 (100%)
Credits
4,346CR
Blimey, you have been busy Jim :) another classic addition (y)

Sort of machines I usually get this, there is a lot to do on driving games with steering mechs, pedals, shifter. Brilliant Resto mate, looks superb :cool:

The Nickel plate is perfect on Pedals, they don't need full chrome.

when I was building my Mongoose BMX replica from BMX Bandits there were some experts saying it was a Supergoose not Mongoose, how you can tell on an 80's movie I don't know, plus there was more than one bike used in the movie
The Mongoose is Nickel plate so yeah it needs polishing to make it really shine, the Supergoose is full Chrome finish, which ever, it's same frame and you wouldn't know when cleaned up

Steering mech looks awesome, what finish is that?
 

pooman2084

Be Attitude For Gains!
vacBacker
Feedback
25 (100%)
Credits
1,765CR
Man you just have been heart broken when you saw the state of the game on arrival. Was their any shipping insurance to soften the blow and help with the costs of parts etc?
 

iamjimmi

Active member
vacBacker
Feedback
8 (100%)
Credits
479CR
I mean, it's ok, I guess....

Ha! Seriously, what a beauty. Got to love Jim's restorations, a proper nuts and bolts resto, with even those chromed!

Truly tremendous stuff pal. Cannot wait to have a go!

Now, put all those tools away and enjoy the games room this year!
Thanks Neil - great to hear such positive feedback from a man who knows his restorations!

And you are absolutely right, no more tinkering for a while - I'm going to enjoy playing some games now... Unless a well priced Time Traveler or Holosseum comes up in need of some lovin....
 

iamjimmi

Active member
vacBacker
Feedback
8 (100%)
Credits
479CR
Blimey, you have been busy Jim :) another classic addition (y)

Sort of machines I usually get this, there is a lot to do on driving games with steering mechs, pedals, shifter. Brilliant Resto mate, looks superb :cool:

The Nickel plate is perfect on Pedals, they don't need full chrome.

when I was building my Mongoose BMX replica from BMX Bandits there were some experts saying it was a Supergoose not Mongoose, how you can tell on an 80's movie I don't know, plus there was more than one bike used in the movie
The Mongoose is Nickel plate so yeah it needs polishing to make it really shine, the Supergoose is full Chrome finish, which ever, it's same frame and you wouldn't know when cleaned up

Steering mech looks awesome, what finish is that?
Thanks Chris. I had the steering mech chromed. Quite a few parts in the steering mech replaced with NOS parts to get the shaker mechanism working as intended. Over the years the shaking wears the pins, bushes and retaining holes. The result was a lot of rattling - the reason most people unplug the shaker motor.
 
Top