Well my AES console turned up the other day and got around to turning it on Saturday morning, had a quick play on a couple of games and turned it off, went about my day, went out at night, got hammered and woke up sunday with a world class hangover, decided i wanted to do a bit of tinkering and thought i would install a unibios in my new AES console (its been played for 15 minutes, why not!)
being my first AES console i didnt know what to expect when i opened it and was not happy when i saw that the bios is not socketed (only ever dealing with MVS before i am used to most Bios' being socketed)
I looked at the different options available:
1) Remove the Original bios completely and solder a new chip straight in
2) Remove the Original bios completely and install a socket for holding the new unibios
3) Install a new socket over the original chip and piggyback the new unibios
4) Piggyback a unibios chip directly over the original SNK bios
Well option 2 + 3 were straight out, i didnt have a socket
Option 1 would be nice and could be quite professional looking but not as useful as options 2 or 3 as they would allow me to update the bios in the future, but lazyness prevailed and option 4 was the quickest and most simple mod (in my opinion, other opinions are available!) so it was quickly chosen
Right then i set about getting what I needed:
Solder
Flux
Wire (small piece, i used Kynar but you can use any)
15k 1/4w Resistor
Unibios chip
Warning!
Please note that I absolutely suck at soldering, i know this and you will soon know this!
Instructions:
1) Turn AES Console Upside down

2) Remove the 2 Screws that are visible

3) Remove the sticky feet on the top left, top right and bottom right and remove the screws

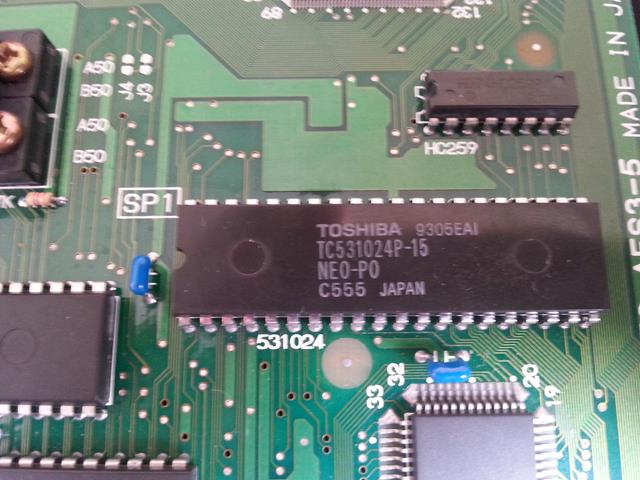
4) Locate the original Bios chip

5) Cut Pin 2 of the original bios

6) Lift Pin 2 of the unibios and place over the top of the original bios
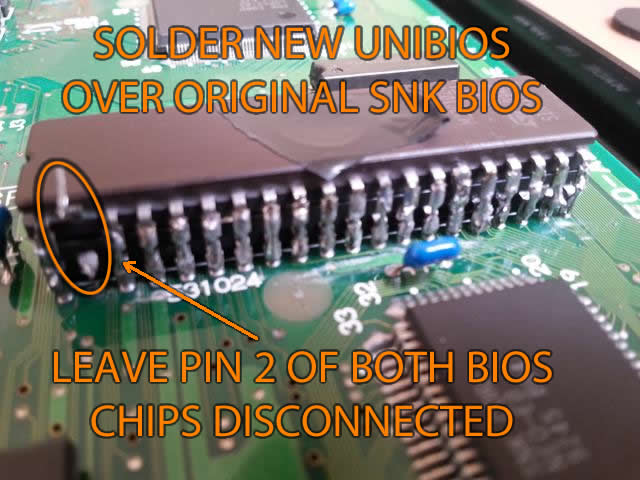
7) Solder the 39 remaining legs of the unibios to the legs of the original bios - gently apply some solder at the bottom and drag your iron to the top
8) Solder a wire from pin 2 of the unibios (top chip) to Leg 20


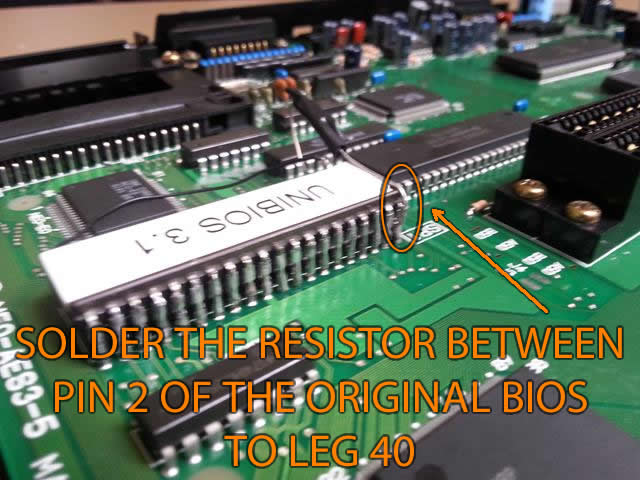
9) Solder the resistor from pin 2 of the original bios to Leg 40


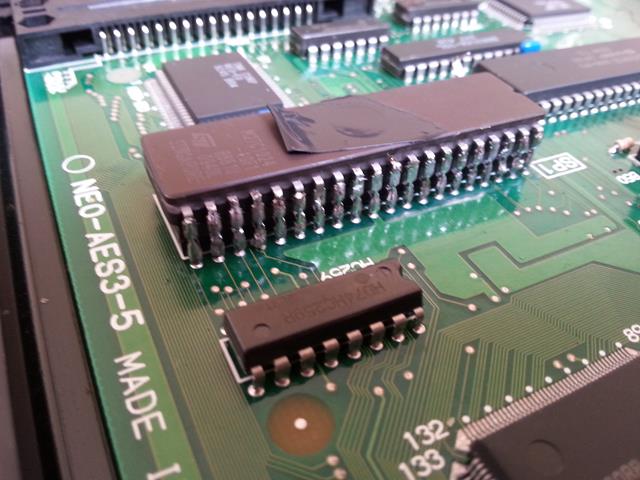
10) Reassemble console and test it works

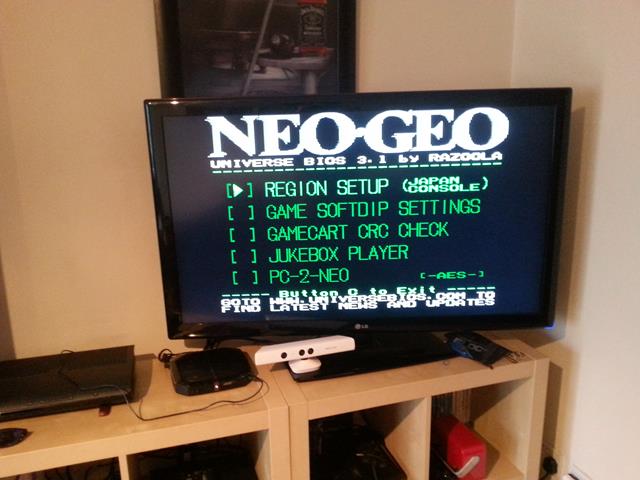
Phew! - it worked, the game booted up perfectly, get in!
turned it off and changed the game, turned it back on and........i got a load of garbled graphics, the usual type of thing i have seen when working on MVS boards that have got issues!
so swapped back to the game that worked previously and it did the same with the garbled graphics - hmmmm
so i went back and tested each leg with my continuity tester, a few of them were not showing a good connection so i went back and re-soldered those legs, re-checked with my tester and they were all showing ok, turned it on and it was working properly, swapped to a few different carts and all was working great!
a job well done!
being my first AES console i didnt know what to expect when i opened it and was not happy when i saw that the bios is not socketed (only ever dealing with MVS before i am used to most Bios' being socketed)
I looked at the different options available:
1) Remove the Original bios completely and solder a new chip straight in
2) Remove the Original bios completely and install a socket for holding the new unibios
3) Install a new socket over the original chip and piggyback the new unibios
4) Piggyback a unibios chip directly over the original SNK bios
Well option 2 + 3 were straight out, i didnt have a socket
Option 1 would be nice and could be quite professional looking but not as useful as options 2 or 3 as they would allow me to update the bios in the future, but lazyness prevailed and option 4 was the quickest and most simple mod (in my opinion, other opinions are available!) so it was quickly chosen
Right then i set about getting what I needed:
Solder
Flux
Wire (small piece, i used Kynar but you can use any)
15k 1/4w Resistor
Unibios chip
Warning!
Please note that I absolutely suck at soldering, i know this and you will soon know this!
Instructions:
1) Turn AES Console Upside down
2) Remove the 2 Screws that are visible
3) Remove the sticky feet on the top left, top right and bottom right and remove the screws
4) Locate the original Bios chip
5) Cut Pin 2 of the original bios
6) Lift Pin 2 of the unibios and place over the top of the original bios
7) Solder the 39 remaining legs of the unibios to the legs of the original bios - gently apply some solder at the bottom and drag your iron to the top
8) Solder a wire from pin 2 of the unibios (top chip) to Leg 20
9) Solder the resistor from pin 2 of the original bios to Leg 40
10) Reassemble console and test it works
Phew! - it worked, the game booted up perfectly, get in!
turned it off and changed the game, turned it back on and........i got a load of garbled graphics, the usual type of thing i have seen when working on MVS boards that have got issues!
so swapped back to the game that worked previously and it did the same with the garbled graphics - hmmmm
so i went back and tested each leg with my continuity tester, a few of them were not showing a good connection so i went back and re-soldered those legs, re-checked with my tester and they were all showing ok, turned it on and it was working properly, swapped to a few different carts and all was working great!
a job well done!