stevearcade
The Trevor Horn of UKVAC
Hey guys,
Well I've been a busy bee the last couple of days getting my Astro City sorted. Bought this from Strykr last week and since getting it have done a few things.
First things first, I gave it a clean and bought some new sticks and buttons as the panel wasn't populated. Sanwa JLF sticks in Green and Pink (as per what these cabs would come with) and Sanwa OBSF buttons.


Then the speakers, the speakers in there weren't a matched pair. One was Sega branded speaker, but the cone was poked in and the other looked like a generic speaker. Both looked pants and sounded pants. I replaced them with these:
http://monacor.co.uk/products/speakerbuilding-hifi-4/vnr/101650/
They are a marked improvement, with much better range and punch. Pretty impressive for a 3" driver. Also, they're shielded, just in case.
Now, onto the innards. Yes, it looks a bit messy, but I assure there's structure and simplicity to it. My woody had a MAME PC de-cased and fitted in there. The problem with Candies is that they actually better suit a small-cased PC. However, I have no case and the PC was a Dell with an odd fitment inside and a replacement was not simple or cheap. Therefore, I cut an L-shaped piece of wood to fit around the coin bucket section and fitted the PC to that. I put feet on it so it was raised above some of the cabling on the floor of the cab. It's all JPAC'd in and I put a connector on the 6 button kicks for the next step.

I also mounted an ArcadeForge SyncStrike (Sync Stripper) and 2 Dual Strikes (PS3 controller interfaces). I chopped up a JAMMA extension harness I had and made a JAMMA loom that went goes out to the audio/video feeds from the PS3 Scart and controls to the Dual Strike. The kick buttons are wired to a connector, so when I pop over the JAMMA connector, I also undo the the kick harness molex and plug it into the PS3 Loom molex (In the above picture, you can see a connector hanging off the JPAC kick button fittings).
For the sound, I wired in an amp designed for use in cars and boats and other small scale applications. It's fixed in place with the double sided stuff used to hold car registration plates on. It runs off 12V so can be wired to the JAMMA power and it drives the speakers better than the stock Astro Amp did.
I built a project box (also held in place with with the double sided sticky stuff) for a PC "on" button, a "coin" button and 2 PSHome buttons (for P1 and P2). I also put a switch on it for switching the amp feed over from the PC to the PS3.

Then is was all good to go and the moment of truth for if the PS3 would actually display.
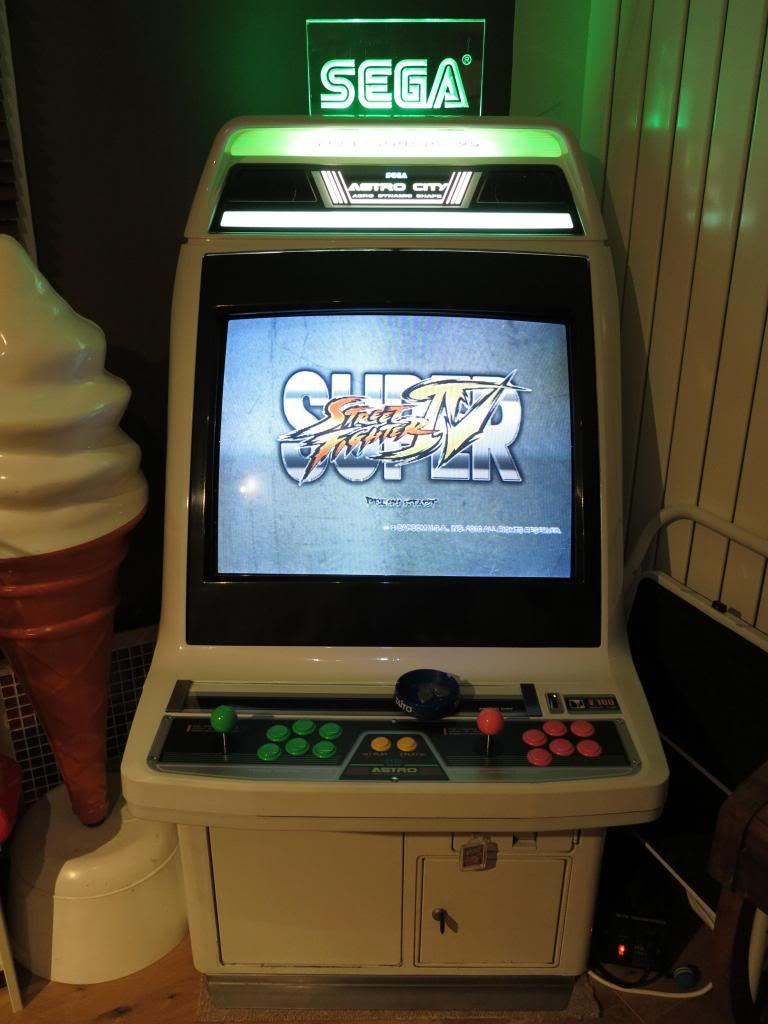


All in all, I'm very pleased. The PS3 sits under the TV and is still wired via HDMI. Some long Scart and USB leads run round the skirting board to the cab on the other side of the living room. Very discreet. The cab looks great, takes up less space than my Video Master, it's screen is massive and in good condition. And finally, I can play Street Fighter IV on an arcade machine .
Well I've been a busy bee the last couple of days getting my Astro City sorted. Bought this from Strykr last week and since getting it have done a few things.
First things first, I gave it a clean and bought some new sticks and buttons as the panel wasn't populated. Sanwa JLF sticks in Green and Pink (as per what these cabs would come with) and Sanwa OBSF buttons.
Then the speakers, the speakers in there weren't a matched pair. One was Sega branded speaker, but the cone was poked in and the other looked like a generic speaker. Both looked pants and sounded pants. I replaced them with these:
http://monacor.co.uk/products/speakerbuilding-hifi-4/vnr/101650/
They are a marked improvement, with much better range and punch. Pretty impressive for a 3" driver. Also, they're shielded, just in case.
Now, onto the innards. Yes, it looks a bit messy, but I assure there's structure and simplicity to it. My woody had a MAME PC de-cased and fitted in there. The problem with Candies is that they actually better suit a small-cased PC. However, I have no case and the PC was a Dell with an odd fitment inside and a replacement was not simple or cheap. Therefore, I cut an L-shaped piece of wood to fit around the coin bucket section and fitted the PC to that. I put feet on it so it was raised above some of the cabling on the floor of the cab. It's all JPAC'd in and I put a connector on the 6 button kicks for the next step.
I also mounted an ArcadeForge SyncStrike (Sync Stripper) and 2 Dual Strikes (PS3 controller interfaces). I chopped up a JAMMA extension harness I had and made a JAMMA loom that went goes out to the audio/video feeds from the PS3 Scart and controls to the Dual Strike. The kick buttons are wired to a connector, so when I pop over the JAMMA connector, I also undo the the kick harness molex and plug it into the PS3 Loom molex (In the above picture, you can see a connector hanging off the JPAC kick button fittings).
For the sound, I wired in an amp designed for use in cars and boats and other small scale applications. It's fixed in place with the double sided stuff used to hold car registration plates on. It runs off 12V so can be wired to the JAMMA power and it drives the speakers better than the stock Astro Amp did.
I built a project box (also held in place with with the double sided sticky stuff) for a PC "on" button, a "coin" button and 2 PSHome buttons (for P1 and P2). I also put a switch on it for switching the amp feed over from the PC to the PS3.
Then is was all good to go and the moment of truth for if the PS3 would actually display.
All in all, I'm very pleased. The PS3 sits under the TV and is still wired via HDMI. Some long Scart and USB leads run round the skirting board to the cab on the other side of the living room. Very discreet. The cab looks great, takes up less space than my Video Master, it's screen is massive and in good condition. And finally, I can play Street Fighter IV on an arcade machine .


