Im currently restoring a Dragons Lair and had in the past removed my old and damaged overlay and replaced it with a Quater Arcade version (as many have). Unfortunately the panel has delaminated in a number of places so its time to replace it. I was never very impressed with the quality of it in the first place and there are no good alternatives or anything available that comes close to the original.
This time im not using anybody elses, Im making my own.
As a bit of a background I have been a games artist in one shape or another for years, first game was ELF on the Amiga and Atari ST. Ive done loads of game box art front covers & magazine covers / ads too, so I hopefully have the skills to get this to a good place.
The original CPO was printed as a 4 colour process (CMYK) with overlapping coloured dots that use Cyan, Magenta, Yellow & Black to create what the eye perceives to be a full colour image. White is the substrate being printed onto so where you dont print creates the highlights.

As the original artwork to the CPO has never materialised all we have to work with (other than the one sketch I purchased from Jason Finn of the front lower section) are scans and photography taken from original control panels. Those scans and captures by default include the CMYK printing process dot pattern.

Original Don Bluth sketch of the lower portion of the control panel.
There are at least two (likely more) versions available, printed from a scan found on Dragons Lair Fans and this is what all printers (Ebay sellers) are using to print from.
The other is a very old scan that Quarter Arcade in the USA bought from ‘This Old Game’ years ago and then sold through with no further copies being available.
All current versions that I have seen are (in my opinion) compromised in colour, image quality and accuracy.
The Quarter Arcade version is a reflection of the technology used at the time of capture. The scan is terrible by today’s standards, edge detail is is non-existent and the colours are completely wrong, the art is not cropped correctly from side to side and a large portion of the edge of the art is missing. The ‘SWORD’ text uses the correct (scanned) font and there are no cut out black holes like the original, however, the overall quality is unfortunately very poor.

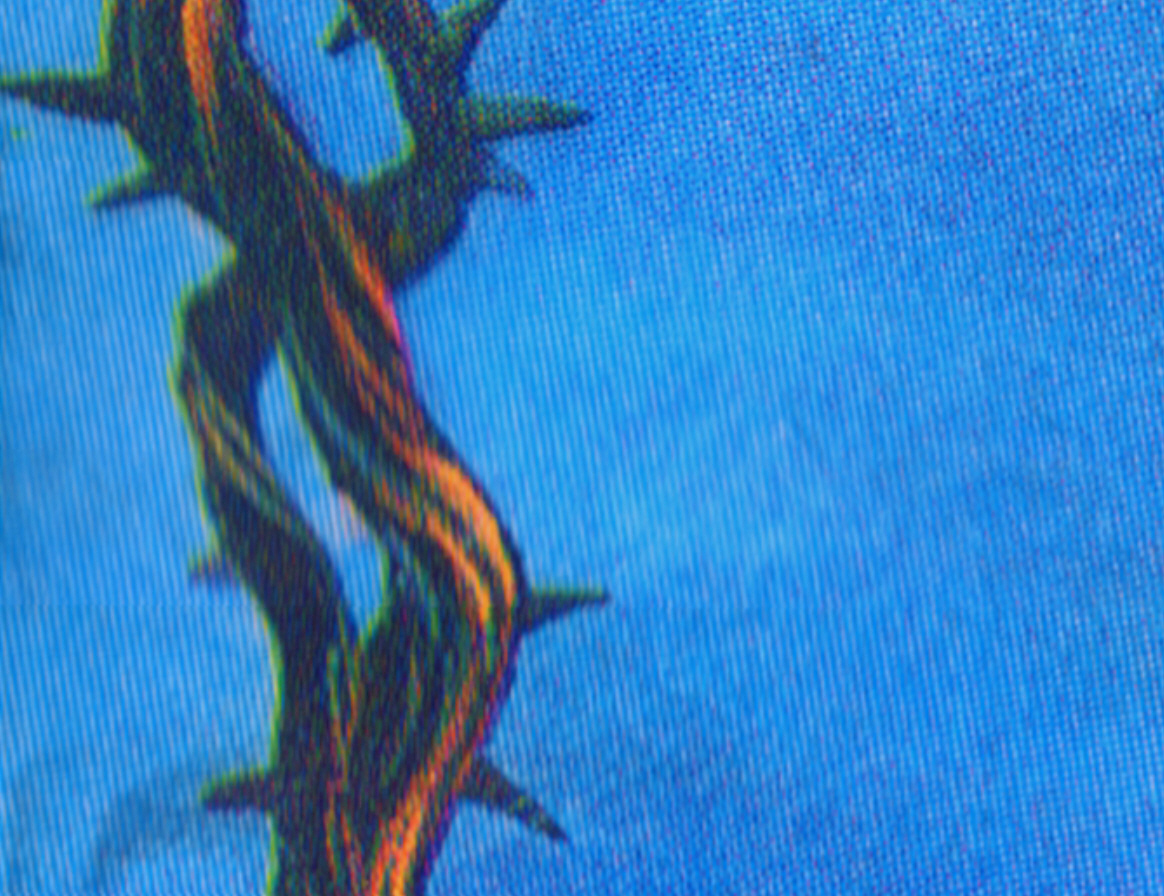
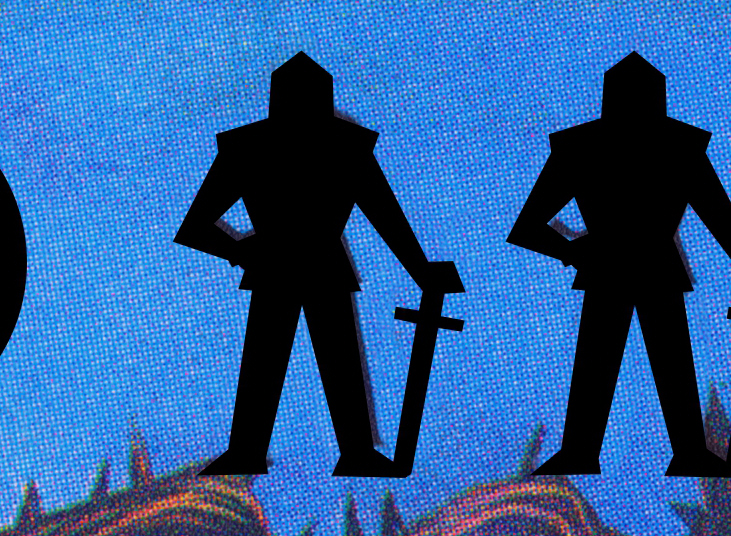
The Dragons Lair Fans version is closer to a correct colour match but horrendously over saturated and has an incorrect font used for the ‘SWORD’ text and the 1 & 2 Player icons are the wrong shape. The scanner used was a lower quality unit as can be seen in the chromatic aberration (green and red fringing) visible throughout the image, but especially obvious on the snake and knight.
Black hole cut out marks have also been added making exact alignment with the control panel a requirement in order to fit the art properly.
I have seen derivative versions of this artwork where the black holes have been filled in but the art retains the extreme over saturation of colour and chromatic fringing. The black bars, top middle and bottom are razor sharp and do not contain any edge texture that should be present. This is the same for the knight icons and the ‘SWORD’ text.
It is cropped correctly to the sides but not top and bottom.


As you can see there is green and red fringing to the image from a cheap scanner head.
When compared to my original scans and photographic reference its easy to see how over saturated the entire thing is too.

And now there is my version that’s been generated from old scans and new scans from a number of sources.
I did reach out to the guy who had the original scans used in the DLF version but he had sadly lost them and I wanted to sart from a clean and accurate slate.
I have worked hard to replicate the colour pallett of the original and dial in as much detail as possible, giving a clear crisp image with natural colours that are not over saturated.
Its got the correct font used for 'SWORD' and the correct shaped knight icons in the correct positions. There are no cutout holes making mounting it much less tricky.
Here are some comparisons of the three versions.

Quater Arcade Left, DLF Center, My version Right.

Quater Arcade Left, DLF Center, My version Right.
And the complete image.

Due to the scans being from a CMYK output what you see is pretty much what you will get from the printer.
I’m currently having it digitally output onto Lexan and have spent quite some time tracking down the correct thickness and texture of material I think was used in the original.
Should have the printed CPO back next week ready for install on the control panel.
This time im not using anybody elses, Im making my own.
As a bit of a background I have been a games artist in one shape or another for years, first game was ELF on the Amiga and Atari ST. Ive done loads of game box art front covers & magazine covers / ads too, so I hopefully have the skills to get this to a good place.
The original CPO was printed as a 4 colour process (CMYK) with overlapping coloured dots that use Cyan, Magenta, Yellow & Black to create what the eye perceives to be a full colour image. White is the substrate being printed onto so where you dont print creates the highlights.
As the original artwork to the CPO has never materialised all we have to work with (other than the one sketch I purchased from Jason Finn of the front lower section) are scans and photography taken from original control panels. Those scans and captures by default include the CMYK printing process dot pattern.
Original Don Bluth sketch of the lower portion of the control panel.
There are at least two (likely more) versions available, printed from a scan found on Dragons Lair Fans and this is what all printers (Ebay sellers) are using to print from.
The other is a very old scan that Quarter Arcade in the USA bought from ‘This Old Game’ years ago and then sold through with no further copies being available.
All current versions that I have seen are (in my opinion) compromised in colour, image quality and accuracy.
The Quarter Arcade version is a reflection of the technology used at the time of capture. The scan is terrible by today’s standards, edge detail is is non-existent and the colours are completely wrong, the art is not cropped correctly from side to side and a large portion of the edge of the art is missing. The ‘SWORD’ text uses the correct (scanned) font and there are no cut out black holes like the original, however, the overall quality is unfortunately very poor.
The Dragons Lair Fans version is closer to a correct colour match but horrendously over saturated and has an incorrect font used for the ‘SWORD’ text and the 1 & 2 Player icons are the wrong shape. The scanner used was a lower quality unit as can be seen in the chromatic aberration (green and red fringing) visible throughout the image, but especially obvious on the snake and knight.
Black hole cut out marks have also been added making exact alignment with the control panel a requirement in order to fit the art properly.
I have seen derivative versions of this artwork where the black holes have been filled in but the art retains the extreme over saturation of colour and chromatic fringing. The black bars, top middle and bottom are razor sharp and do not contain any edge texture that should be present. This is the same for the knight icons and the ‘SWORD’ text.
It is cropped correctly to the sides but not top and bottom.
As you can see there is green and red fringing to the image from a cheap scanner head.
When compared to my original scans and photographic reference its easy to see how over saturated the entire thing is too.
And now there is my version that’s been generated from old scans and new scans from a number of sources.
I did reach out to the guy who had the original scans used in the DLF version but he had sadly lost them and I wanted to sart from a clean and accurate slate.
I have worked hard to replicate the colour pallett of the original and dial in as much detail as possible, giving a clear crisp image with natural colours that are not over saturated.
Its got the correct font used for 'SWORD' and the correct shaped knight icons in the correct positions. There are no cutout holes making mounting it much less tricky.
Here are some comparisons of the three versions.
Quater Arcade Left, DLF Center, My version Right.
Quater Arcade Left, DLF Center, My version Right.
And the complete image.
Due to the scans being from a CMYK output what you see is pretty much what you will get from the printer.
I’m currently having it digitally output onto Lexan and have spent quite some time tracking down the correct thickness and texture of material I think was used in the original.
Should have the printed CPO back next week ready for install on the control panel.
Last edited:
")