Slam raffle IJ System one Restore

Ravage

Administrator
Staff member
vacBacker
Feedback
2 (100%)
Credits
2,359CR
Like the pinball thats in this year's south coast slam, theres also a chance to bag a System One cab with Indiana Jones and the Temple of Doom in it! Generously donated by pheonixarcade.com, I've commenced replacing the artwork and restoring the cab!

First job is to remove all the major bits like marquees, glass, montiors, pcbs etc:

ijvid-a01.JPG


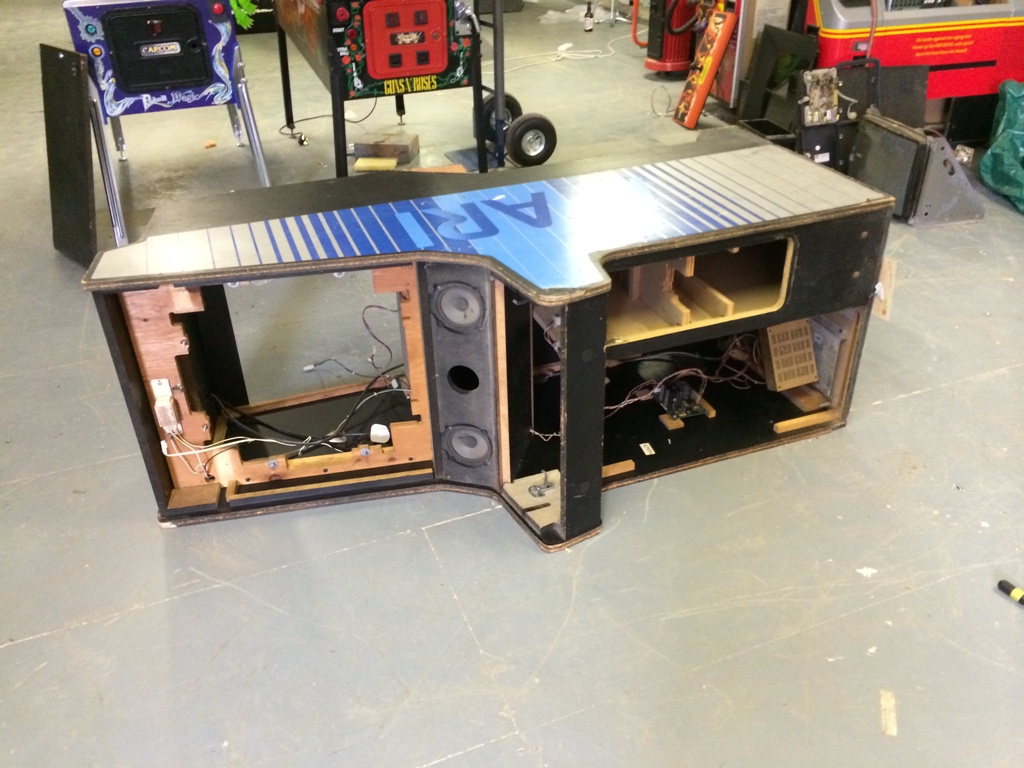
Step 2: On its sides and t-moulding removed:
ijvid-a02.JPG


Step 3: Hot air gun and scraper time!:

ijvid-a03.JPG


And hour later and the sides done:

ijvid-a04.JPG


More to follow....
 

Ravage

Administrator
Staff member
vacBacker
Feedback
2 (100%)
Credits
2,359CR
Ok... A little update from this afternoons work:

First off I used tatty_adams random orbital sander to take off a good portion of the residual glue:

ijvid-b01.JPG


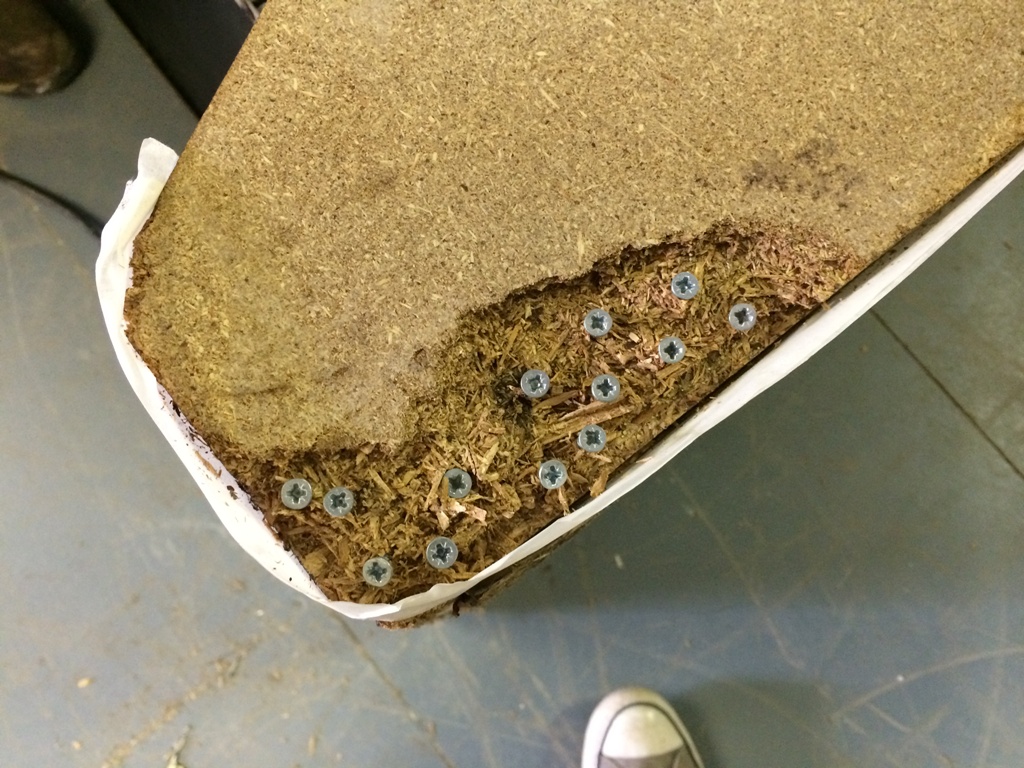
As theres large holes in the corners (surprise) skitz once told me to screw in screws to make for a firmer purchase of the filler - so whack in a pile!

ijvid-b02.JPG


Personally I use two layers of masking tape around the edge/over the t-moulding to a) protect the slot and be, its very forgiving and curves nicely for the bends... Having said that, the front corner on this side needs rebuilding so I used some scrap bits of foam to create a sharp 90 degree bend:

ijvid-b03.JPG


Ok very dull but out comes the isopond's P38 car filler (again a skitz special but also allot firmer yet forgiving than woodfiller):

ijvid-b04.JPG


So at the end of play I've left it to set rock hard after the second filling which I'll sand in the morning....

ijvid-b05.JPG


To be continued...
 

Ravage

Administrator
Staff member
vacBacker
Feedback
2 (100%)
Credits
2,359CR
Ok so another quick update: So its filled, sanded, filled again, sanded and a final fill required and we're now here:

ijvid-c01.JPG


With the front corner nice a sharp:

ijvid-c02.JPG


Ok. so now onto the other side. Again the back is a bit smashed but otherwise this side doesnt look as bad. So.. screws'n'masking tape time:

ijvid-c03.JPG


Once I've filled it I notice that the back edge has worn heavily and some 3-4mm has disappeared into chipboard dust hell. So using two straight pieces I masked up the end to build it out and attempt to resurrect the curves corners:

ijvid-c05.JPG


So then its filled, as the P38 starts to fill I apply the masking tape on top of the filler so that its roughly starts the curve and leaves a pretty good straight edge, along with stopping gravity pulling the filler down:

ijvid-c06.JPG


Once its set and a quick sand and voilà:

ijvid-c07.JPG


Ive also used a hacksaw and subsequently a stanley knife and electrical screwdriver blade to create the t-moulding channel too!

So filling is done! Last job that time permits is to use some satin black plastikote spray paint to darken up the t-moulding channels and around the edge of the sides to reduce the edge of the artwork showing the chipboard/filler beneath:

ijvid-c10.JPG


So thats about it - another two shots of the control panel area and back sprayed with light layer of the satin black seeing I also did so small filling there too - note the paint is still wet and probably will need a couple of applications!

ijvid-c08.JPG


ijvid-c09.JPG


More to follow...
 

Ravage

Administrator
Staff member
vacBacker
Feedback
2 (100%)
Credits
2,359CR
Next update!

So, after a useful link from PAC-MAN, I've opted to re-vinyl this cab: heres the link he sent me: http://www.mdpsupplies.co.uk/ritramamatt.asp although I needed to buy the 1200mm wide roll. Wasn't that expensive either. Its very thin and thus unforgiving with any dust if you have some on the prepared surface. Unfortunately I've got a very dusty unit and we got some grit blowing about in the atmosphere and the result is OK... I will do the other side and if I get a better resultI'll treat this as a practise run as I've not attempted this method before. Anyhow heres it cut to size roughly:

ijvid-d01.JPG


Held in place with handy transformers and roughly shaped to the edges with about 4-5cm hanging out:

ijvid-d02.JPG


So.. time to start applying - gulp! Firstly peeled the back back some 15cm and folded it underneath whilst keeping the last transformers (weights) to hold it still in place. Then using my rubber roller I got for £4.20 off amazon- http://www.amazon.co.uk/gp/product/B003BBDFQ6/ref=oh_details_o02_s00_i00?ie=UTF8&psc=1 I apply the first part rollering it onto the surface:

ijvid-d03.JPG


So now its a case of pulling the backing from the underside about 3-5cm and rollering it down until I finally get to the bottom of the side:

ijvid-d04.JPG


Phew! So now using a snap-off blade stanley knife I start to remove the excess - I generally cut to the curvesso it hangs down and can make a slight crease. I then hold the spare vinyl flat and cut into the excess at a fine angle until I reach the straight edges then trace it. I used 1 snap off blade for the back and then a fresh one for the front as the glue residue and sharpness is key here!!

So... Here it is:

ijvid-d05.JPG


ijvid-d06.JPG


SO thats about it for today: I left my new t-moulding at home otherwise would have fitted that now, but I couldnt resist using a offcut I'd kept from a previous restore to see how it'll look as a teaser:

ijvid-d07.JPG


SO thats it for this update - as I say, I will do the other side and attempt to get a cleaner surface and then maybe redo this side but its acceptable I guess.

Stay Tuned...
 

Ravage

Administrator
Staff member
vacBacker
Feedback
2 (100%)
Credits
2,359CR
Update time!

So its time to apply the artwork itself to the vinyl: instead of using my roller I used a regular yellow duster and swept left and right over the artwork as I peeled it from the underside. Looks pretty good!:

ijvid-e01.JPG


ijvid-e02.JPG


T-Moulding then applied (I'll detail this more on the second side!)

ijvid-e03.JPG


ijvid-e04.JPG


Very pleased with the result!

Remember - raffle tickets can now be bought from me if you/someone you know cant make it. It sure is going to look real pretty and its all for charity!
 
Top