Afterburner

t-m

Active member
vacBacker
Feedback
2 (100%)
Credits
333CR
Martin delivered this the other week, you might recognise it
smiley1.gif

ab1_zpswr7kzxhv.jpg


Anyway, the cabs not in to bad shape which is good because me doing lots of woodwork would be a disaster.

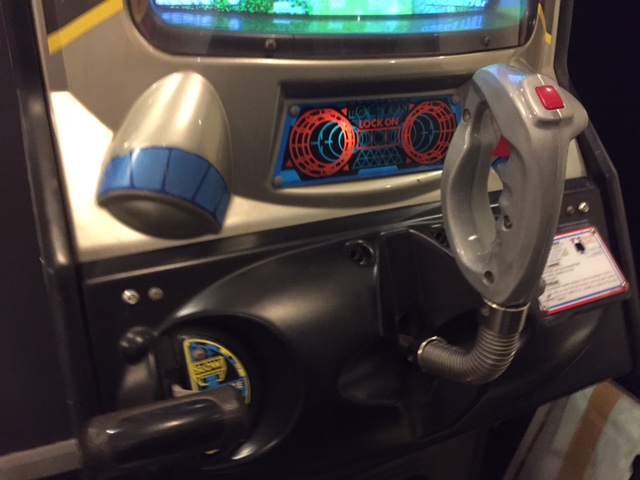
There's some wiring messed about with but mainly seems to be in the coin mech area, needs working out and tidying.

ab2_zpsy5yxwpqi.jpg


Lots of dust but it's all there

ab3_zpsgmlb0z99.jpg


I'm thinking that I want to get it working then workout the cosmetics. First job get the monitor fixed; While this would be a good time to learn about monitor repair but in the interests of speed it's being sent off to be fixed.

ab4_zps0hdfqoam.jpg
 

t-m

Active member
vacBacker
Feedback
2 (100%)
Credits
333CR
OK so I had the night off so could spend a bit of time on it. First, start with an easy win - I'd removed a lock on another cab as it was the wrong size but it was perfect for the back door of this.
25C264AF-1189-4F08-8BB6-387F198F6853_zpshcrpokvn.jpg


Had a look at the yoke, a bit of wire hackery here but not too bad. I'll unwind the tape at some point and check/tidy it. One thing that needs checking is the earthing, seems to have been cut in a couple of places and rewired at some point.

19DE9966-2AA8-481E-BB71-0884564B7FEE_zps5u99mvb8.jpg


But, eww! the rubber bump stop on one side has degraded into a sticky mess.
smiley39.gif
Will have to clean this up and find/make some replacement here, i have plans!

7DE0F49E-C81D-4578-8A89-4BABF409122F_zpsrepqxsae.jpg


Unravelled all that bodged wiring near the coin mech, just seems that someone has patched in a new mech and credit board at some point, then later extended the wires to the service switch. This will all tidy up, there's loads of useless wire and the counter is disconnected.

BE41BCD5-5F43-43ED-814B-116593B39EF9_zpslu6mvqw0.jpg


Time to pull the transformer and related bits, all nicely on molex connectors ... except for the earth bonding and half the connections on this +5v bus bar for some reason. I also spotted the earth bonding didn't extend to the switcher case, or the monitor frame for that matter.

456D9C0E-52C2-45BE-A2B8-DA4B129E262A_zpslsuvghxw.jpg


And here it is, it needs cleaning up and checking over. There's lots of stuff going on here, the switcher is +5v only for the PCB. A 12v psu hangs off the transformer for the audio amp which is also on here. A bridge rectifier and cap power the shaker motor and three relay boards switch the lamps and motor.

DFC0A4BF-FD51-47E9-8151-927B90C45E4D_zpsp9s5y0rf.jpg


The chassis has already been sent off ... more on that later.
 

t-m

Active member
vacBacker
Feedback
2 (100%)
Credits
333CR
and the monitor chassis is back...
IMG_2716_zpskbpc7jkv.jpg


OK, the eagle eyed among you will notice that it's not the same chassis as before. Turned out that was a mtc9110 for a 28" tube! Thanks to gunblade for sorting this out.
smiley20.gif
Once i've finished cleaning up the power brick and fixed the grounds I can power this thing up
smiley1.gif
 

t-m

Active member
vacBacker
Feedback
2 (100%)
Credits
333CR
Much time passes... many shiny things have been distracting me! But it's time to give the Afterburner some attention, after all it's repaired pcb has been sat in a box for months!
abIMG_3605_zps5oib2bql.jpg


Lets fire it up ...

abIMG_3607_zpsq3dc6ml6.jpg


Woohoo! She lives! ... can't play it though as i've pulled the CP to bits
smiley9.gif
. Get on with cleaning that up and back together so I can at least have a go. Start with the control handle, get it cleaned up and resprayed.

abIMG_3609_zpsuofay7fk.jpg
 

t-m

Active member
vacBacker
Feedback
2 (100%)
Credits
333CR
Never let it be said I rush things!
smiley4.gif


Finally installed the newly repainted control handle and new goose neck trim. New stainless bolts for the instruction card, handle, etc. I replaced the standard lamps with LED bulbs, they seem to work fine.

afterburner_control_panel.JPG


Next job, tidy up the bezel.
 
Top