Finally got some time to do a write-up for this. Shinobi
was a game I loved as a kid and it was always going to be a strong candidate
for a Dino King cabinet conversion. I know this game has already been done
several times into a Dino cab, but I wanted to do a full artwork conversion
which I don’t think has been done before.
As most of you reading this will already know, Shinobi
was never sold in a dedicated cabinet, it was only sold as a conversion kit. That
meant gutting out a dedicated machine and installing a kit supplied by Sega to
convert an existing game. As with my previous Dino cab conversions, I wanted to
try and use as much original hardware as I can (both in the existing Dino cab
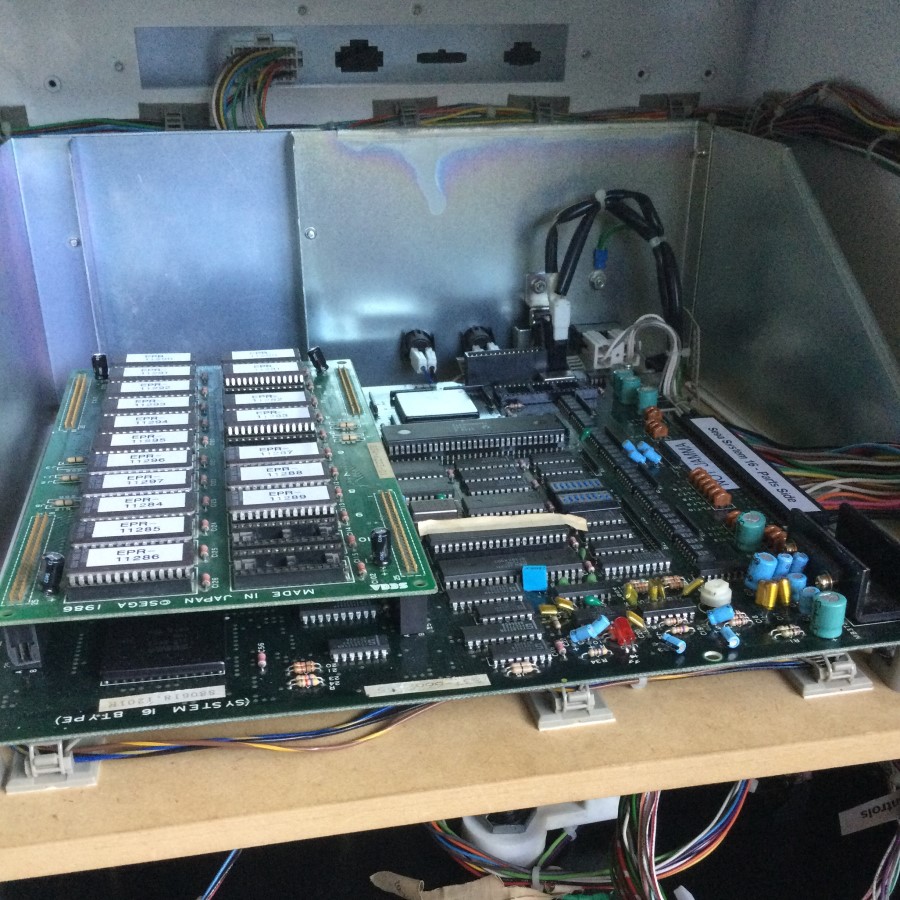
and with the converted game). In this case I’ll be using an original Sega System
16 pcb and an almost complete original Sega wiring harness. I also have the
original Shinobi manual which is a bonus too.
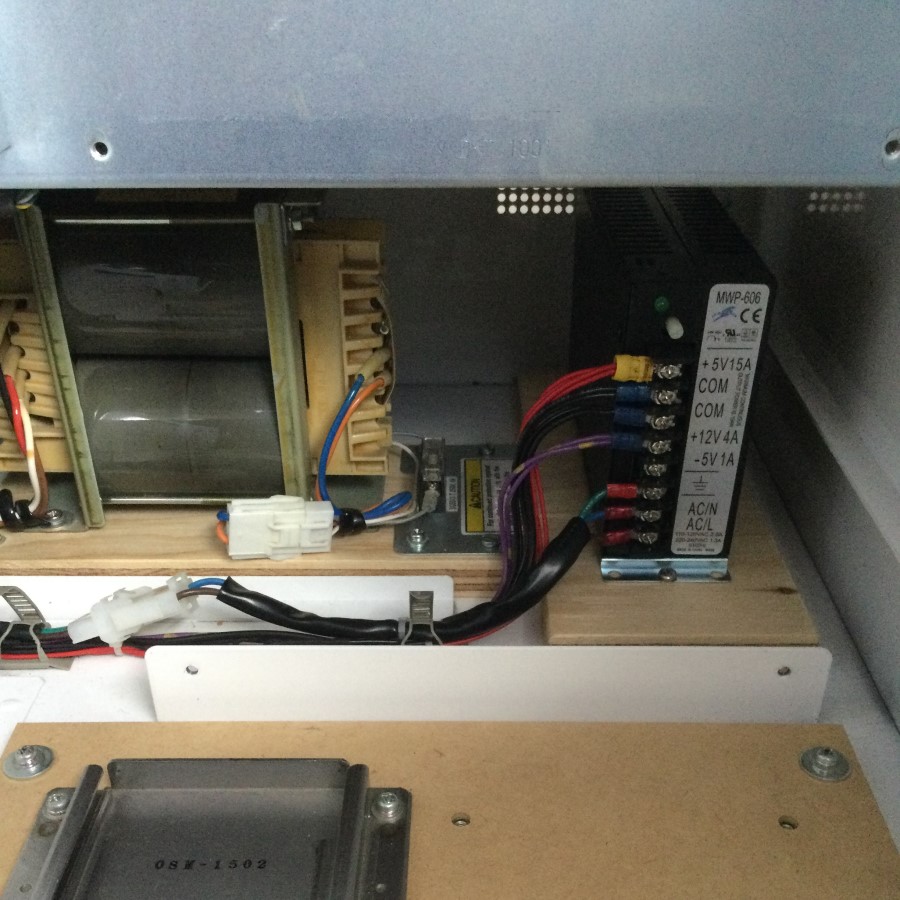
The wiring conversion is almost identical to my other 3
previous games. This involves replacing the existing rectangular MDF transformer
base in the bottom of the machine for a new “T” shaped base that can also accommodate
a switch mode power supply, then wire the new power supply into the machine’s
mains AC, then fit a wiring harness between the new power supply and pcb. ..
As I’ve got my hands on an original Sega wiring harness
for the System 16 pcb, my job is made a lot easier since I only have to add in some
JST connectors to connect to the Dino King’s existing front door, monitor and
meter connections. As an additional extra, I’ll also wire in a 3 pin JST
connector (+5v/GND/+12v) to the harness should I wish to add a PI2Jamma setup
to the cabinet in the future.
The System 16 pcb fits fine on the top shelf inside the
cabinet, this will replace the actual Dino King pcb. The bottom shelf is unused
and is currently storing a control panel for a future project. This shelf could
easily be used to sit another smaller pcb or the PI2Jamma setup. I’ve also made
up a System 16 to JAMMA adapter harness too, so I can plug in the adapter to
the original Sega harness and run a JAMMA board. Just a point of note that the
original Sega harness does not carry -5v, so I added a connector to the adapter
harness so a wire can be run down direct to the power supply should I need to
run a JAMMA board that requires the -5v.
Picture of my Sega 16 to JAMMA adapter…

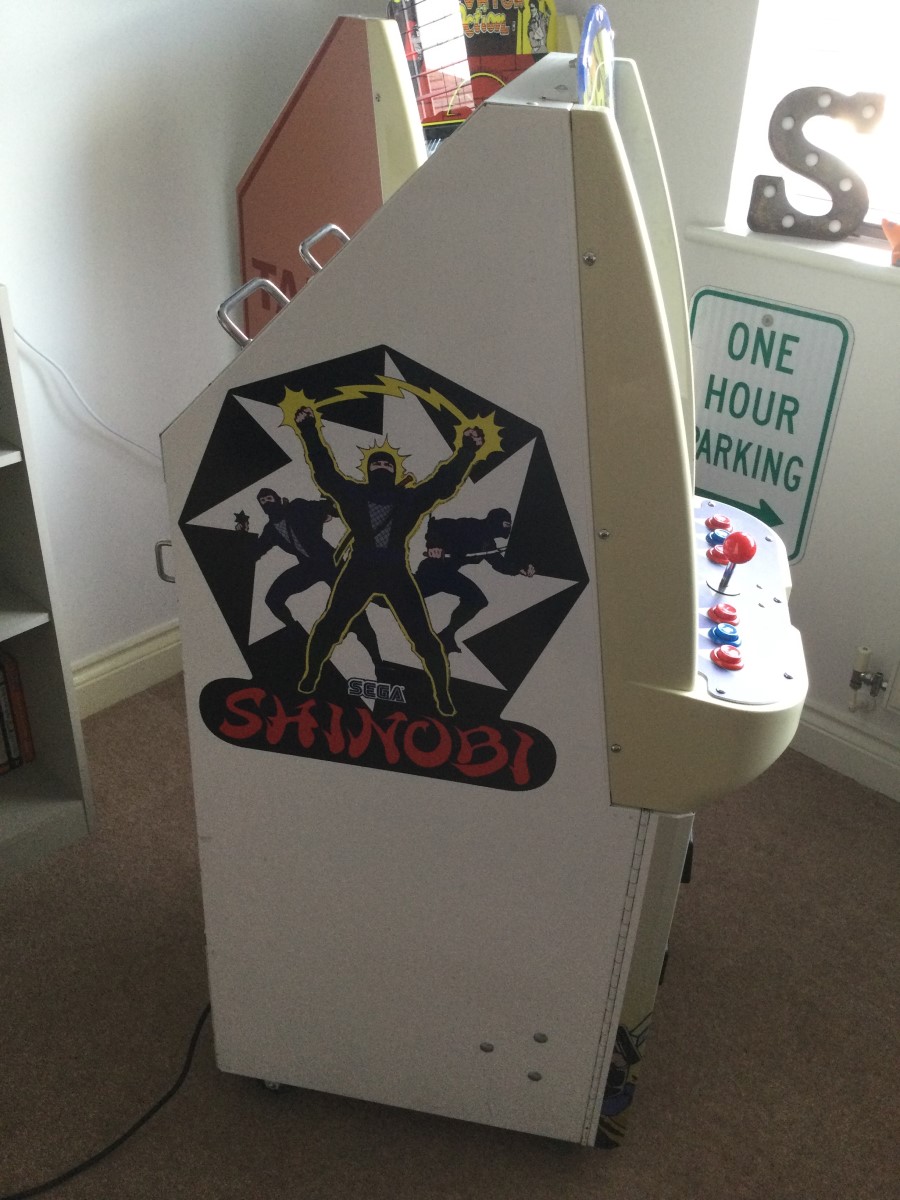
The white cabinet is generally in a very nice condition, which
it will need to be as the side art is a lot smaller than my previous cabinets
and it won’t be covering many imperfections. I wanted a control panel overlay
that matched Shinobi rather than a generic layout and I also wanted some front
door art in the Shinobi theme too. “Muddymusic” sorted out the artwork for me
and “virtvic” made up the stainless steel control panel.
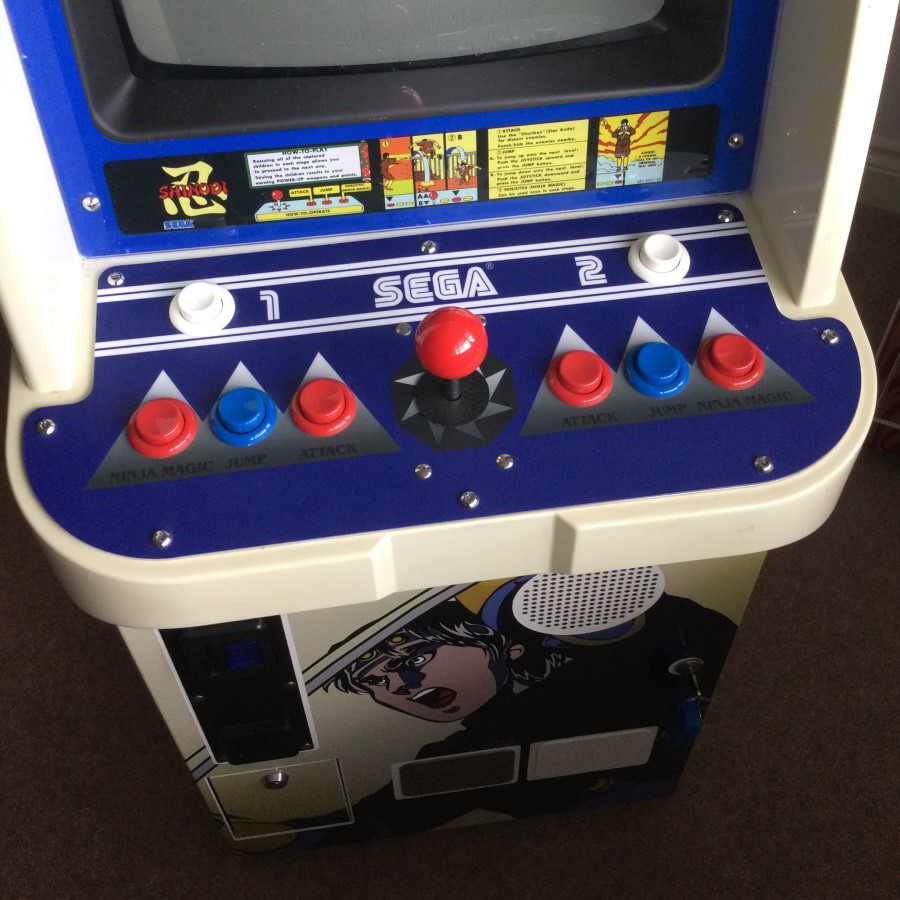
Here‘s a look at the panel. As in all my other
conversions, I’m using leaf switches and buttons. The CPO is in Muddy’s Lexan
matt print. The button layout is based on the diagram in the original Shinobi manual
and the panel is wired to the Flinnster de-facto 21-pin connector standard.
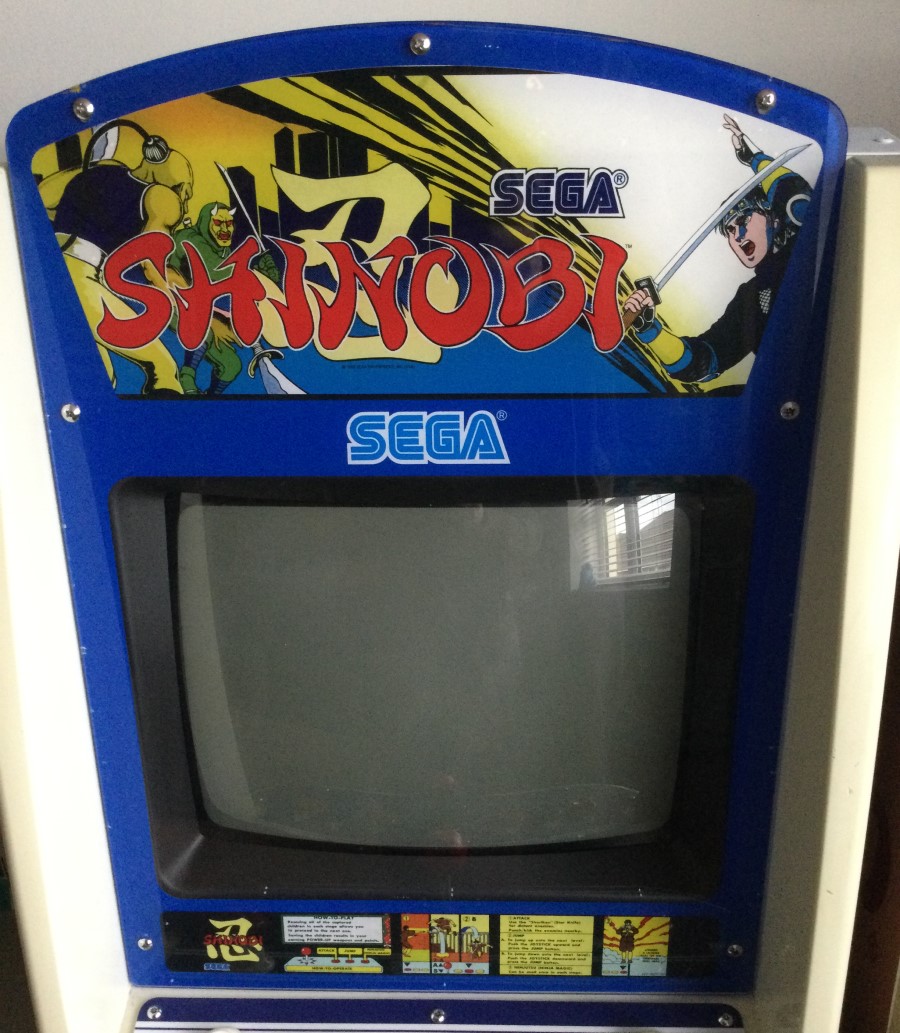
The monitor bezel is an original Sega blue Perspex one
from a MKI Dino cabinet (the orange coloured machine). It’s a simple case of
peeling off the 2 Dinosaur King stickers stuck from behind the Perspex, leaving
just the blue surround and Sega logo, then adding some suitable Shinobi ones.
Bottom door art with a replacement blue coin reject
insert to complete the look. I also made up a Sega insert coin legend that’s
inside the Suzo Happ reject button. As with my other conversions, the Excel
credit board has been set to 1 coin/1 play, 10p a play and Window 4 (the 10p
line) of the SR3 coin validator has been reprogrammed to accept US quarters.

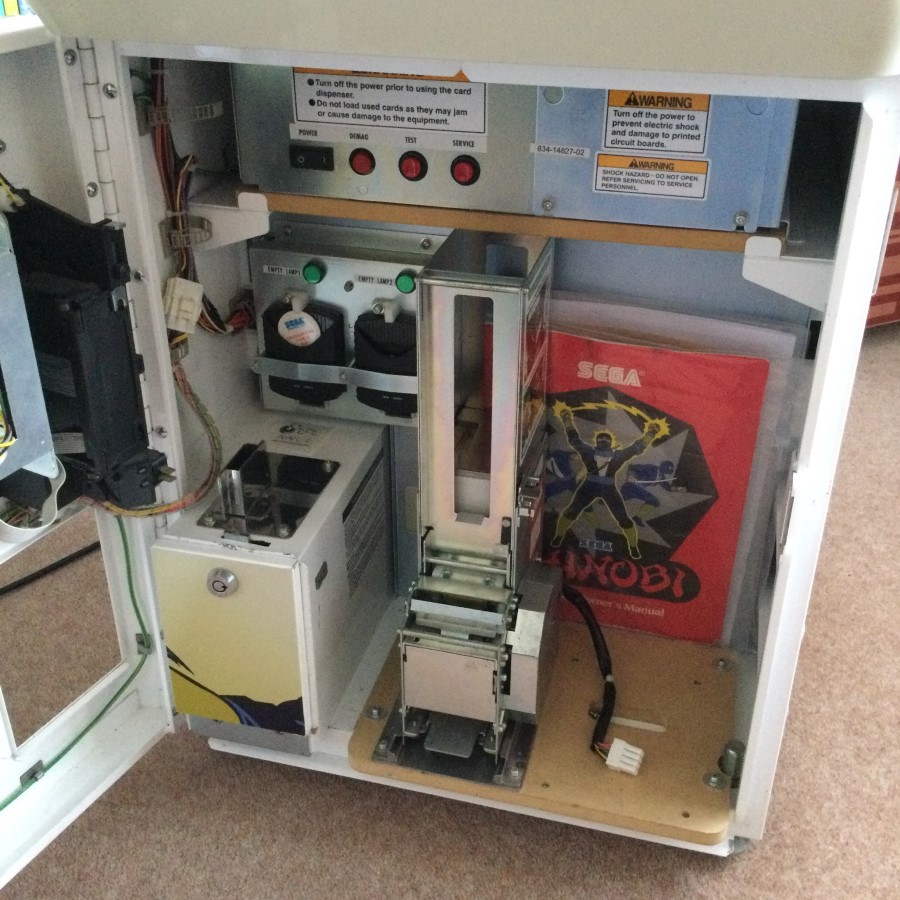
Inside of the front door, I try and keep everything
original if I can.
Inside the back of the machine. The pcb fits nicely on the top shelf.
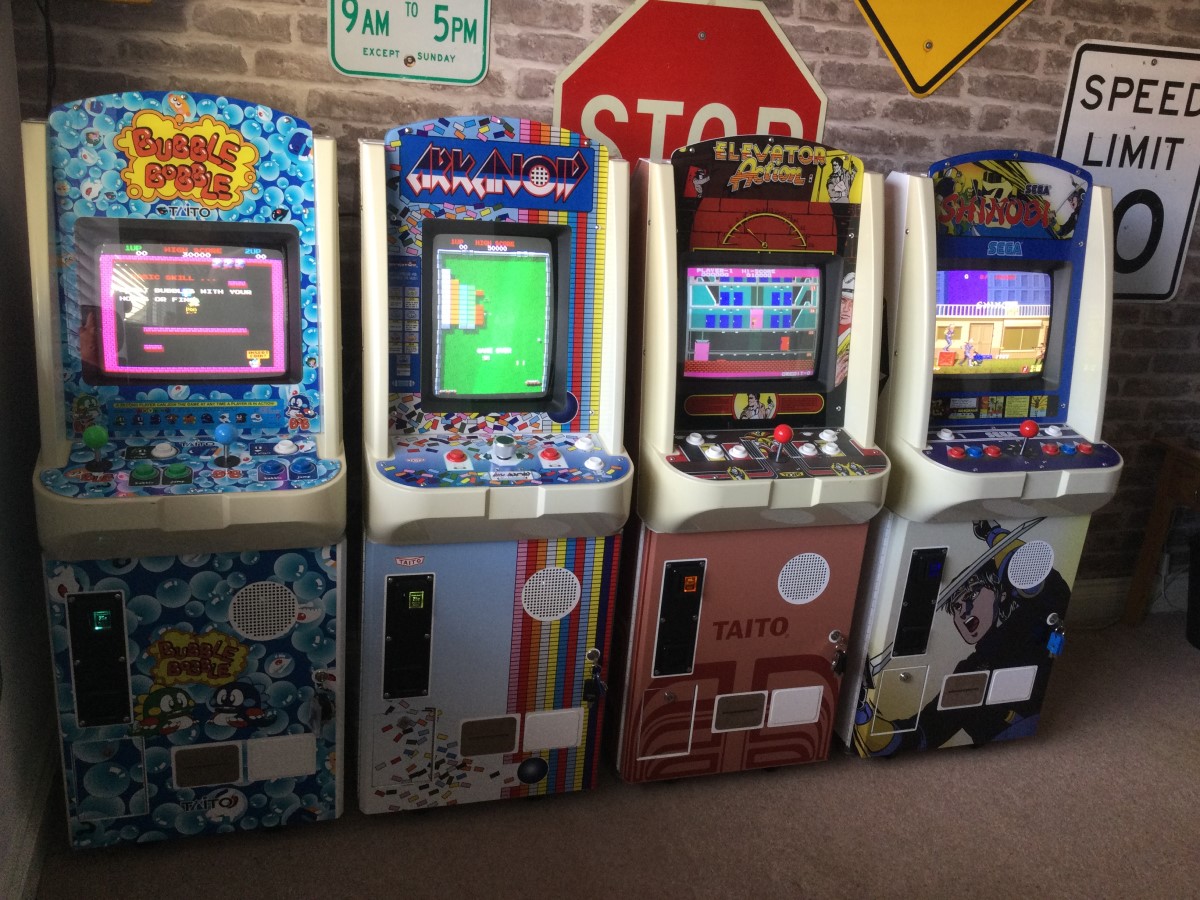
Pictures of the finished conversion and artwork…


The current line-up of completed conversions. Robotron will
be added soon!
was a game I loved as a kid and it was always going to be a strong candidate
for a Dino King cabinet conversion. I know this game has already been done
several times into a Dino cab, but I wanted to do a full artwork conversion
which I don’t think has been done before.
As most of you reading this will already know, Shinobi
was never sold in a dedicated cabinet, it was only sold as a conversion kit. That
meant gutting out a dedicated machine and installing a kit supplied by Sega to
convert an existing game. As with my previous Dino cab conversions, I wanted to
try and use as much original hardware as I can (both in the existing Dino cab
and with the converted game). In this case I’ll be using an original Sega System
16 pcb and an almost complete original Sega wiring harness. I also have the
original Shinobi manual which is a bonus too.
The wiring conversion is almost identical to my other 3
previous games. This involves replacing the existing rectangular MDF transformer
base in the bottom of the machine for a new “T” shaped base that can also accommodate
a switch mode power supply, then wire the new power supply into the machine’s
mains AC, then fit a wiring harness between the new power supply and pcb. ..
As I’ve got my hands on an original Sega wiring harness
for the System 16 pcb, my job is made a lot easier since I only have to add in some
JST connectors to connect to the Dino King’s existing front door, monitor and
meter connections. As an additional extra, I’ll also wire in a 3 pin JST
connector (+5v/GND/+12v) to the harness should I wish to add a PI2Jamma setup
to the cabinet in the future.
The System 16 pcb fits fine on the top shelf inside the
cabinet, this will replace the actual Dino King pcb. The bottom shelf is unused
and is currently storing a control panel for a future project. This shelf could
easily be used to sit another smaller pcb or the PI2Jamma setup. I’ve also made
up a System 16 to JAMMA adapter harness too, so I can plug in the adapter to
the original Sega harness and run a JAMMA board. Just a point of note that the
original Sega harness does not carry -5v, so I added a connector to the adapter
harness so a wire can be run down direct to the power supply should I need to
run a JAMMA board that requires the -5v.
Picture of my Sega 16 to JAMMA adapter…
The white cabinet is generally in a very nice condition, which
it will need to be as the side art is a lot smaller than my previous cabinets
and it won’t be covering many imperfections. I wanted a control panel overlay
that matched Shinobi rather than a generic layout and I also wanted some front
door art in the Shinobi theme too. “Muddymusic” sorted out the artwork for me
and “virtvic” made up the stainless steel control panel.
Here‘s a look at the panel. As in all my other
conversions, I’m using leaf switches and buttons. The CPO is in Muddy’s Lexan
matt print. The button layout is based on the diagram in the original Shinobi manual
and the panel is wired to the Flinnster de-facto 21-pin connector standard.
The monitor bezel is an original Sega blue Perspex one
from a MKI Dino cabinet (the orange coloured machine). It’s a simple case of
peeling off the 2 Dinosaur King stickers stuck from behind the Perspex, leaving
just the blue surround and Sega logo, then adding some suitable Shinobi ones.
Bottom door art with a replacement blue coin reject
insert to complete the look. I also made up a Sega insert coin legend that’s
inside the Suzo Happ reject button. As with my other conversions, the Excel
credit board has been set to 1 coin/1 play, 10p a play and Window 4 (the 10p
line) of the SR3 coin validator has been reprogrammed to accept US quarters.
Inside of the front door, I try and keep everything
original if I can.
Inside the back of the machine. The pcb fits nicely on the top shelf.
Pictures of the finished conversion and artwork…
The current line-up of completed conversions. Robotron will
be added soon!


