Discs of Tron environmental restoration

Alpha1

Do the Shake and 'VAC
Staff member
vacBacker
Feedback
91 (99%)
Credits
5,278CR
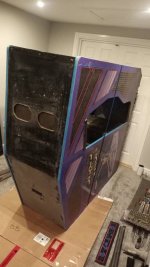
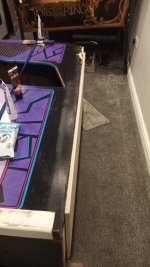
So welcome to the new forum. I've been saving this for this new forum software as the old one would have taken 500 years to convert and upload my pictures!

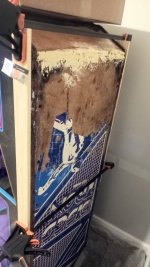
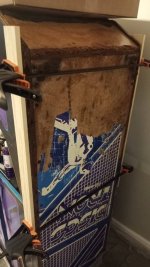
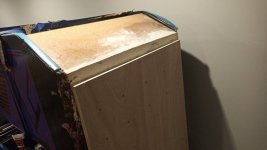
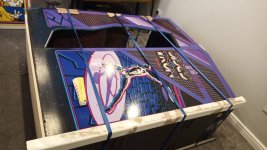
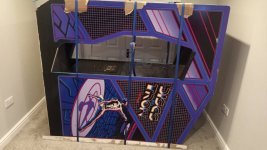
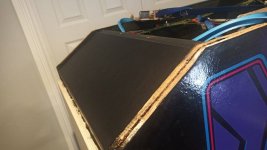
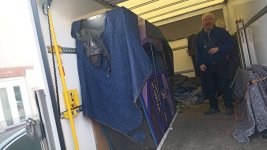
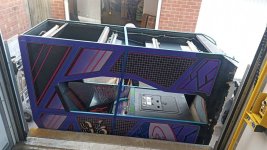
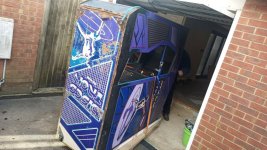
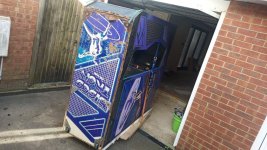
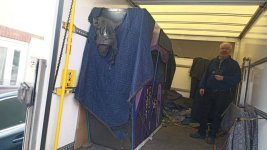
This Discs of Tron environmental (EDOT) was found and bought in a bulk buy from Europe in the late 1990s/early 2000s.

Sadly the original owner and one of the first members of ukvac, Frank Suffling, died and the machine was sold to me along with other machines that were auctioned off on JAMMA+ for the family to raise funds for them.

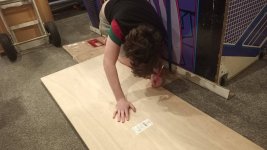
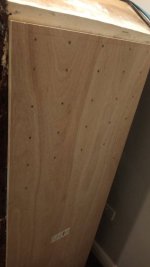
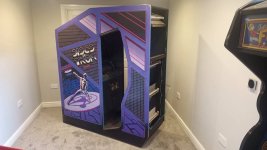
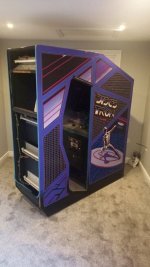
I promised his brother I would restore it. It took me 12 years but I have, and I reached out to his brother at Christmas to share with him the pictures of it fixed and fully working.

This thread is the mammoth 7 month journey it took me to do that restore.
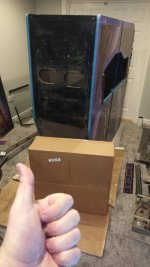
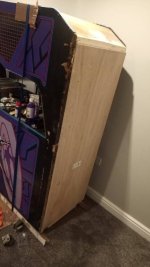
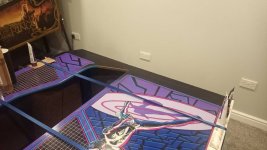
 

Alpha1

Do the Shake and 'VAC
Staff member
vacBacker
Feedback
91 (99%)
Credits
5,278CR
One of George Gomez's greatest!

@The Deliveryman magic van turned up and helped me get the machine from storage to home to start the restoration.

Stay tuned.
 

Attachments

  • IMG_20220201_115439.jpg
    IMG_20220201_115439.jpg
    125.2 KB · Views: 30
  • IMG_20220201_120131.jpg
    IMG_20220201_120131.jpg
    144.5 KB · Views: 31
  • IMG_20220201_120352.jpg
    IMG_20220201_120352.jpg
    156.9 KB · Views: 30
  • IMG_20220201_120357.jpg
    IMG_20220201_120357.jpg
    161.7 KB · Views: 30
  • IMG_20220201_115441.jpg
    IMG_20220201_115441.jpg
    117.2 KB · Views: 32
Last edited:

Alpha1

Do the Shake and 'VAC
Staff member
vacBacker
Feedback
91 (99%)
Credits
5,278CR
Right so I get the thing inside the gameroom.

The game has a flat base with six leg levellers that collapse as they can't take the weight. This means they all suffer from hideous drag damage.

I've been hoarding parts for years and have ready:

New CPO (update: can't find the CPO! :( )
Spare boardset
New rear glass artwork
New floor decal
Manual

Assessing the game I decide to tackle the base and make it beautiful before standing it upright to strip and restore.

Anyhow it's in!
 

Attachments

  • IMG_20220202_204601.jpg
    IMG_20220202_204601.jpg
    61.6 KB · Views: 31
  • IMG_20220202_145314.jpg
    IMG_20220202_145314.jpg
    56.9 KB · Views: 32

Alpha1

Do the Shake and 'VAC
Staff member
vacBacker
Feedback
91 (99%)
Credits
5,278CR
So let's assess the bottom damage. It's pretty rough and will need filler. Luckily it's all in the black so should restore well.

I decide to stick a skid pan on the thing to raise the edges to stop it from happening again.

Various pictures of the start of the process. I pull off some of the vinyl get my gear out and make a jig and start sorting the base.
 

Attachments

  • IMG_20220221_171235.jpg
    IMG_20220221_171235.jpg
    105.7 KB · Views: 30
  • IMG_20220221_173737.jpg
    IMG_20220221_173737.jpg
    61 KB · Views: 27
  • IMG_20220221_172755.jpg
    IMG_20220221_172755.jpg
    107.2 KB · Views: 27
  • IMG_20220221_172758.jpg
    IMG_20220221_172758.jpg
    56.1 KB · Views: 26
  • IMG_20220221_173733.jpg
    IMG_20220221_173733.jpg
    62.1 KB · Views: 26
  • IMG_20220224_170938.jpg
    IMG_20220224_170938.jpg
    47.6 KB · Views: 28
  • IMG_20220224_170924.jpg
    IMG_20220224_170924.jpg
    51.1 KB · Views: 29
  • IMG_20220223_161209.jpg
    IMG_20220223_161209.jpg
    75.2 KB · Views: 29
  • IMG_20220223_200231.jpg
    IMG_20220223_200231.jpg
    71.9 KB · Views: 31

Alpha1

Do the Shake and 'VAC
Staff member
vacBacker
Feedback
91 (99%)
Credits
5,278CR
As it's just chipboard and gets crumbly, I use wood hardener as recommended by the wood filler companies. I remove any loose bits and get to work.

I leave the jig in place for around 5 days.
 

Attachments

  • IMG_20220223_161207.jpg
    IMG_20220223_161207.jpg
    75.1 KB · Views: 30

Alpha1

Do the Shake and 'VAC
Staff member
vacBacker
Feedback
91 (99%)
Credits
5,278CR
Whilst it's stood up on its back I want to accomplish two things.

Sort the rear 45 degree section and stick the skid pan on. I decide on marine ply.

Max helps me which was nice!
 

Attachments

  • IMG_20220228_202630.jpg
    IMG_20220228_202630.jpg
    76.6 KB · Views: 30
  • IMG_20220228_202223.jpg
    IMG_20220228_202223.jpg
    115.1 KB · Views: 28
  • IMG_20220302_224750.jpg
    IMG_20220302_224750.jpg
    37 KB · Views: 28
  • IMG_20220302_223118.jpg
    IMG_20220302_223118.jpg
    68.9 KB · Views: 30
  • IMG_20220228_211303.jpg
    IMG_20220228_211303.jpg
    49.7 KB · Views: 30

Alpha1

Do the Shake and 'VAC
Staff member
vacBacker
Feedback
91 (99%)
Credits
5,278CR
I now have to position the 700lb lump to lay it down to start the prep work for sorting the bottom edges.

I'll tackle one side at a time.
 

Attachments

  • IMG_20220403_174046.jpg
    IMG_20220403_174046.jpg
    121.1 KB · Views: 28
  • IMG_20220404_164330.jpg
    IMG_20220404_164330.jpg
    56 KB · Views: 27
  • IMG_20220402_113840.jpg
    IMG_20220402_113840.jpg
    130 KB · Views: 28
  • IMG_20220404_211956.jpg
    IMG_20220404_211956.jpg
    69.9 KB · Views: 30

Alpha1

Do the Shake and 'VAC
Staff member
vacBacker
Feedback
91 (99%)
Credits
5,278CR
Boom one side more or less done other than some refinements.

Time to tackle the other side.
 

Attachments

  • IMG_20220404_164418.jpg
    IMG_20220404_164418.jpg
    108.7 KB · Views: 30

Alpha1

Do the Shake and 'VAC
Staff member
vacBacker
Feedback
91 (99%)
Credits
5,278CR
As it lay it down ready to tackle the other side I check out the pantone colours for any touch ups it might need and clean the top section.
 

Attachments

  • IMG_20220403_172834.jpg
    IMG_20220403_172834.jpg
    51.9 KB · Views: 26
  • IMG_20220403_172219.jpg
    IMG_20220403_172219.jpg
    63.2 KB · Views: 23
  • IMG_20220403_172220.jpg
    IMG_20220403_172220.jpg
    66 KB · Views: 23
  • IMG_20220403_172728.jpg
    IMG_20220403_172728.jpg
    94 KB · Views: 23
  • IMG_20220403_174033.jpg
    IMG_20220403_174033.jpg
    97.8 KB · Views: 26

Alpha1

Do the Shake and 'VAC
Staff member
vacBacker
Feedback
91 (99%)
Credits
5,278CR
Found some more time yesterday and this evening to continue on the game. I'm nearly at the finish line on the second side.
 

Attachments

  • IMG_20220412_085922.jpg
    IMG_20220412_085922.jpg
    70.3 KB · Views: 23

Alpha1

Do the Shake and 'VAC
Staff member
vacBacker
Feedback
91 (99%)
Credits
5,278CR
Finished the remaining side.

I'll stand it up tomorrow 🥳
 

Attachments

  • IMG_20220414_215209.jpg
    IMG_20220414_215209.jpg
    103.8 KB · Views: 26

Alpha1

Do the Shake and 'VAC
Staff member
vacBacker
Feedback
91 (99%)
Credits
5,278CR
Time to install the Happ Controls pica vinyl back on the rear end that I took off.

Many thanks to @Equites for supplying it when I posted a wanted.

Almost time to stand it up.
 

Attachments

  • IMG_20220415_153154.jpg
    IMG_20220415_153154.jpg
    174.1 KB · Views: 23
  • IMG_20220415_153607.jpg
    IMG_20220415_153607.jpg
    69.8 KB · Views: 22
  • IMG_20220415_154134.jpg
    IMG_20220415_154134.jpg
    80.4 KB · Views: 27

Alpha1

Do the Shake and 'VAC
Staff member
vacBacker
Feedback
91 (99%)
Credits
5,278CR
Got into the coin door and I've removed the control panel which is utterly filthy!! 🤢🤢🤢🤢🤢🤢😱😱😱😱😱
 

Attachments

  • IMG_20220416_213133.jpg
    IMG_20220416_213133.jpg
    150.6 KB · Views: 30

Alpha1

Do the Shake and 'VAC
Staff member
vacBacker
Feedback
91 (99%)
Credits
5,278CR
When I played an edot in the arcades around 1989-91 I always remember the carpet backed leaning area.

I started to take off metal work to be repainted/powder coated and I was amazed at the carpet.

Original colour appears purple.

IMG_20220416_215503.jpg
 
Top