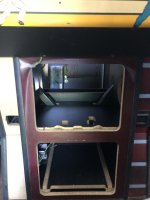
Electrocoin - Xenon / Neo Geo 4 / 6 slot /Goliath Restoration and Projects

Flyback2021

Active member
vacBacker
Feedback
41 (100%)
Credits
2,205CR
Back on the xenon saddle today ! Felt good.
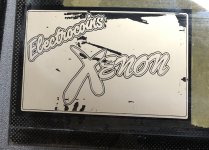
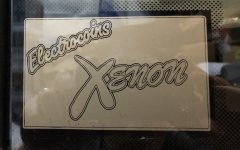
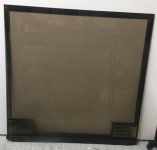
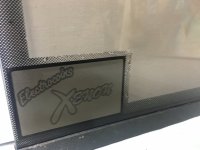
Looking at a few pieces of original glass with screen-print losses.My plan is to make a screen at some point with all the elements of design so can fully recreate. In the meantime however where possible I will touch in and use a stencil (below) to recreate the square pattern which is nearly always partially lost.
The exact ink match used on original design is silver enamel.

8F9B4487-079E-4074-B278-97E6A34357D8.jpeg


One completed.

9C07D3CA-E7A0-4E65-9B8B-4B5881B4FDB4.jpeg

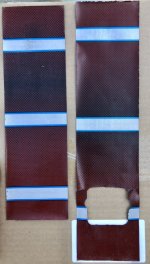
Vinyl Chequered pattern.
31CD867B-DB69-4743-B635-80E1188FDED0.jpeg

The most complete piece of glass I have and ironically was from the outside cabinet all those years ago.
60972383-EB0F-4C71-B270-E7A20CC6FF4B.jpeg
 
Last edited:

Flyback2021

Active member
vacBacker
Feedback
41 (100%)
Credits
2,205CR
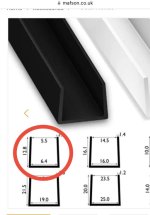
Looking at the ‘Xenon’ glass and sourcing replacement pvc U channel which goes top and bottom of the glass to keep it tight in the retainer but also stop it cracking on the marquee retainer lock.
AF29DAC1-AA65-4416-BC64-CA7E81E6C7C0.jpeg37C8E7AF-59CF-48C6-9198-4E0B9F5890FF.jpeg
630AB87E-DD94-4F83-BDB8-71DDEB988F8B.jpeg
This Comes in 1 meter lengths and is an excellent replacement
 

Flyback2021

Active member
vacBacker
Feedback
41 (100%)
Credits
2,205CR
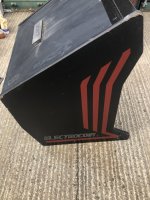
Time to divide and conquer .Splitting a Xenon today into its 2 halves
for transporting. Not done this before but the intelligent design and build from Electrocoin makes it straightforward.
Once the monitor is out the entire top section can be unbolted for easy moving in a small van.
View from above of the draw layout.
EC7B6C26-31F0-4367-A209-B858B950DBDF.jpeg18CE22D4-CD9F-40C2-8B6B-352D94964FCA.jpegDDCA03AB-679B-482C-82CA-B62A00ADB856.jpeg

Top Section ready for transport

208867D0-94D3-41B2-8842-F1A995AB057A.jpeg
 
Last edited:

ENAY

Newbie
Credits
5CR
Hello there,

Sorry for randomly posting in your thread, but if I may, I'd like to ask a couple of questions.

Very brief background about myself, I own about 17 JAMMA pcbs, started collecting in 1994, mostly scrolling beat-em-ups. I did have a Toobin' cabinet at one point but a few years later sold it.

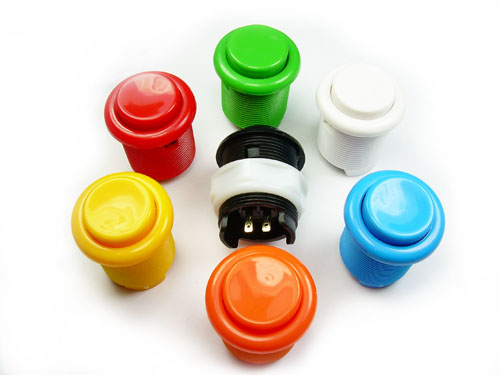
I'm looking for the name of the buttons and perhaps the joystick used in ye old Electrcoins Xenon as surprisingly I am finding this quite difficult.

The buttons I see in this picture


(Sorry...My OCD wants me to say the red button should be on the left and blue on the right, green on the top, basically the NeoGeo order but without yellow)

So long story short, I want to mod an arcade stick for my PlayStation and looking into buying parts. I emigrated from the UK to Japan some years ago and I actually live near some shops In Akihabara Tokyo, which sell arcade machine parts.
I went through their entire catalogue and pushed a ton of buttons and waggled a ton of sticks, so to speak.

NONE of them felt anything remotely like the silky touch of the cabinets I played in my youth and yearly visits to Vauxhall Holiday Park in Great Yarmouth where they had all these lovely Electrocoin Goliath and especially the Electrocoin Xenon cabinets. The touch of the cabinets, the red joysticks and the buttons. Suffice to say I felt a great sense of joy reading though some of the posts and seeing all the photos.

Looking briefly through a few topics here. I did notice in Flyback2021's post and the Neo Geo cabinets, which other than the yellow button seems to use similar parts.
I'm sure you're familiar with but in Japan they go crazy for these Sanwa buttons and the like, which feel more like touch buttons and push buttons (you can gently rest your finger on and they trigger)
They're flat and very thin and in my opinion, they feel pretty tacky if I'm being honest. They don't sell proper arcade buttons at all, in my opinion of course.

So far, the nearest I have been able to find is what I have learned are called "Leaf" switches.


These buttons are concave and slightly thin. I don't mind these ones actually, probably my second favourite and the most common arcade button I remember growing up (I recall these being popular in the Mortal Kombat cabinets)
The Electrocoin Xenon concave ones are much thicker and pop out almost twice as much.

Now the Electrocoins Xenon and Neo Geo cabinet on this site, these ones looks the real deal! Even the Neo Geo has the red joystick! That's the joystick I remember with its trademark 4 screws at each corner bursting out on top of the decal (Interesting design choice that)

...but then I saw the underside of these buttons on a separate photo and they are clicky clicky microswitched!

The ones in Great Yarmouth were silent buttons (and silent joystick too) with a button press feel that I have till this day never managed to replicate ever since... well certainly not in any Japanese arcade anyway (been here nearly 20 years while my PCBs are in storage, hope they all still work after all this...)

I suspect the switches are probably something like this


Although I have yet to confirm this, likely anyone who bought these 40+ year old cabinets has replaced the old switch types with new ones (such as the microswitches in the photo I discovered)

Anyway sorry this post got a bit long, and rambly.

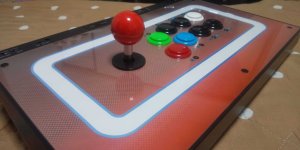
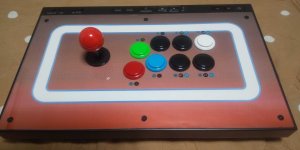
PS This is how my stick looks so far by the way, I designed the underlay myself, trying to go for a Xenon theme, but it looks quite poor though, it's printed out on paper and the color contrast is very pale, didn't look the same as on my PC monitor, plus I'm not a great artist.
DSC_0652.JPGDSC_0651.JPG
 

Flyback2021

Active member
vacBacker
Feedback
41 (100%)
Credits
2,205CR
Hi there,
This thread is Electrocoin stuff that I have been working through over the last couple of years.
Love your xenon themed stick , very nice indeed ! Nice to see a Xenon being represented in Japan , very cool.
The buttons original to these cabinets would have been Leaf switch buttons. 81DCE2E4-4503-422E-A6D6-FF9430C20C16.jpegCheck ebay or place a wanted add on the forum if you require ?
The Electrocoin red joysticks below are becoming harder to find even in the UK . I believe this type of Joystick was custom made for Electrocoin cabinets.
red stick.jpeg

red 2.jpeg

If the original overlay is in good condition I keep the button screws for the joysticks but I find now with the reproduction cpo's sometimes the pressure of the screw head can slighly delaminte the overlay so now I opt for welding in threads on the underside of the panel which makes the playing a bit nicer and the overlay lools great also.

If you need any further help send me a message . best Ant ;-)
 

Flyback2021

Active member
vacBacker
Feedback
41 (100%)
Credits
2,205CR
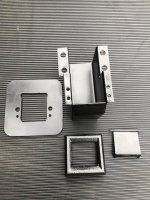
Return coin -dismantle - rust removal - respray and install.
Tough bit of snookering screwing in the M3 6mm bolt to engage the outer casing trim with the internal metal return .

Here’s how it all goes together.
14A5D0D2-009A-4581-BF04-7DB5CFDE4A1D.jpegA43DA7E3-D36A-4A7B-8ACB-A12EB596523B.jpeg8A87D5F0-2E54-43D9-B10B-D78939025BD0.jpegBA7C25B1-5915-4A59-A8E8-4B8ACE8D2FFD.jpegF55B658F-F730-4941-93D1-CA61BC1A5170.jpegD4B85517-8CA3-480E-9829-6F1323DF3E4F.jpegE2BBAB9F-EA34-4685-A945-99872491E95B.jpeg06082939-6300-4E14-81CC-D088273FDB4B.jpeg
 
Last edited:

yoganuggy

Active member
vacBacker
Feedback
2 (100%)
Credits
648CR
@Flyback2021 Great job on this!!!


For the glass metal holder, I use CQFD U-shaped channel and an L shape, rivet them together then slide a plastic U shape holder in the U channel. Everything spray painted with "rustoleum hammered finish black".

For the glass I have tinted toughed glass from a local glass maker. But...... missing the border artwork......

Could you please share more details on your silver enamel sticker and checkered boarder pattern for the glass border? That would complete the glass repro.

Your looks absolutely stunning!!
 

Flyback2021

Active member
vacBacker
Feedback
41 (100%)
Credits
2,205CR
@Flyback2021 Great job on this!!!


For the glass metal holder, I use CQFD U-shaped channel and an L shape, rivet them together then slide a plastic U shape holder in the U channel. Everything spray painted with "rustoleum hammered finish black".

For the glass I have tinted toughed glass from a local glass maker. But...... missing the border artwork......

Could you please share more details on your silver enamel sticker and checkered boarder pattern for the glass border? That would complete the glass repro.

Your looks absolutely stunning!!
Hi Mate
I bulk ordered this plastic u channel for top and bottom of glass from this place. - 12.8 x 6.4 is the one
Plastic u channel pvc
I am working on being able to produce a full glass repro solution soon.
I currently have restored the screen print logo with Silver enamel where lost.
The chequered border which has normally disintergrated will have to be screen printed , I have done sections with a stencil but laborious hopefully I can come up with something better and easier.
Going to check in with Olly @muddymusic about some other Xenon repro bits also
 
Last edited:

ENAY

Newbie
Credits
5CR
Thank for your kind posts and also awesome pictures. I'm not sure what it is about that red joystick, back in the day I'd hold it like a wine glass and it felt really great, can't seem to do that comfortably without any other joystick, it also a bit of a nobbly feel about it. Can't really describe it. It's great to see it up close again and see what it looks like underneath.

So I use these joysticks known as the

QANBA Gravity V8​

It does feel nice to move, like those red joysticks. Not as nice to hold but very close.

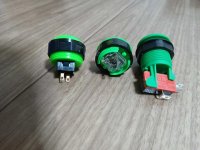
I looked online about the leaf switches and man are they huge! I actually have 3 other button types, I tried taking shots of them all together. Not sure what order these pics will attachas

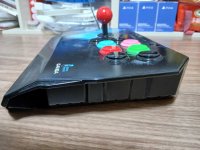
So I have a second arcade stick which I can't modify the decal on because it's plastic, it's decent, I modified the button order and coloured it like this so it works well on PlayStation, the trouble that you can probably immediately see from the screenshot is how thin this and my other stick is. The clicky clicky microswitch button I have, even that doesn't fit inside, and those leaf switches.... no chance unfortunately.

Not sure if you have either of the other two button types, they are actually not too bad, they are both silent and they both have fairly satisfying silent presses.
Unfortunately both are quite thin and not concave. I actually got these quite recently but a bit too lazy to immediately swap them in either joystick. I guess I was holding off at maybe buying another stick / figuring out these Electrocoin buttons.

It does seem though that I am out of luck as just one of these leaf buttons appears to take up half the space inside these stick cases.
I did find those hybrid leaf things that you can swap out for a microswitch.

Always one of these times where I wish I was in a shop somewhere just being able to test out and visualise all these buttons and joysticks in the flesh to see how big everything is. Those microswitch buttons, well I have a full set, not just the green one, but they seem quite a lot lower quality than the screenshots after they arrived in the post, felt like a bit of a con, but hey ho, live and learn.

Well for now I am not sure what I really want. Seems like the old skool classics just aren't great for home arcade sticks and their dimensions.
 

Attachments

  • 20260830_192837.jpg
    20260830_192837.jpg
    161.3 KB · Views: 3
  • 20260830_192752.jpg
    20260830_192752.jpg
    95.7 KB · Views: 2
  • 20260830_192816.jpg
    20260830_192816.jpg
    112.5 KB · Views: 3
  • 20260830_193324.jpg
    20260830_193324.jpg
    94.5 KB · Views: 3
  • 20260830_193358.jpg
    20260830_193358.jpg
    122.9 KB · Views: 8

yoganuggy

Active member
vacBacker
Feedback
2 (100%)
Credits
648CR
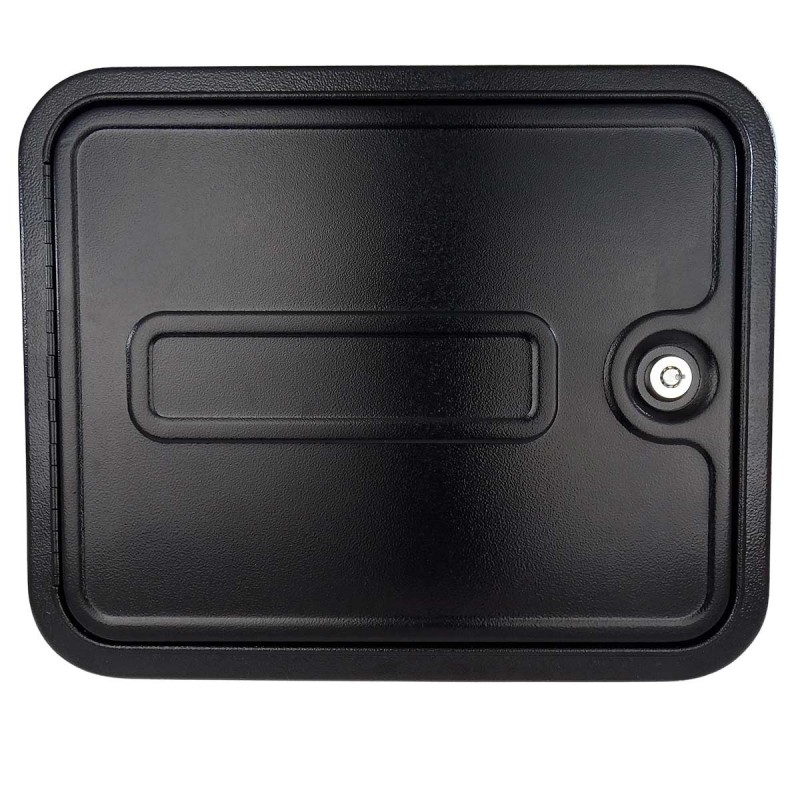
I think the red joysticks were made by IL (Industrias Lorenzo). They still make the cash box door used in these cabs:


Same Industrias Lorenzo joystick base as found on the red joystick:
 
Last edited:

Flyback2021

Active member
vacBacker
Feedback
41 (100%)
Credits
2,205CR
I think the red joysticks were made by IL (Industrias Lorenzo). They still make the cash box door used in these cabs:


Same Industrias Lorenzo joystick base as found on the red joystick:
Nice info , thanks for the links!
I was looking for a small Spacer for a joystick I have refurbed so will check out.

I believe it was the moulded red joystick element which were made exclusively for Electrocoin by IL industries .
 

Flyback2021

Active member
vacBacker
Feedback
41 (100%)
Credits
2,205CR
Thank for your kind posts and also awesome pictures. I'm not sure what it is about that red joystick, back in the day I'd hold it like a wine glass and it felt really great, can't seem to do that comfortably without any other joystick, it also a bit of a nobbly feel about it. Can't really describe it. It's great to see it up close again and see what it looks like underneath.

So I use these joysticks known as the

QANBA Gravity V8​

It does feel nice to move, like those red joysticks. Not as nice to hold but very close.

I looked online about the leaf switches and man are they huge! I actually have 3 other button types, I tried taking shots of them all together. Not sure what order these pics will attachas

So I have a second arcade stick which I can't modify the decal on because it's plastic, it's decent, I modified the button order and coloured it like this so it works well on PlayStation, the trouble that you can probably immediately see from the screenshot is how thin this and my other stick is. The clicky clicky microswitch button I have, even that doesn't fit inside, and those leaf switches.... no chance unfortunately.

Not sure if you have either of the other two button types, they are actually not too bad, they are both silent and they both have fairly satisfying silent presses.
Unfortunately both are quite thin and not concave. I actually got these quite recently but a bit too lazy to immediately swap them in either joystick. I guess I was holding off at maybe buying another stick / figuring out these Electrocoin buttons.

It does seem though that I am out of luck as just one of these leaf buttons appears to take up half the space inside these stick cases.
I did find those hybrid leaf things that you can swap out for a microswitch.

Always one of these times where I wish I was in a shop somewhere just being able to test out and visualise all these buttons and joysticks in the flesh to see how big everything is. Those microswitch buttons, well I have a full set, not just the green one, but they seem quite a lot lower quality than the screenshots after they arrived in the post, felt like a bit of a con, but hey ho, live and learn.

Well for now I am not sure what I really want. Seems like the old skool classics just aren't great for home arcade sticks and their dimensions.
You have some very nice button options there! I have the Sanwa buttons on both my candy cabinets.
Next time you are in the UK ,you are welcome to swing by and play some Electrocoin cabinets .
 

ENAY

Newbie
Credits
5CR
You have some very nice button options there! I have the Sanwa buttons on both my candy cabinets.
Next time you are in the UK ,you are welcome to swing by and play some Electrocoin cabinets .

That is very kind of you.

Although it appears to be about a 2 and half hour drive from Sheffield. And not sure my wife would approve, as I've only been back to the UK about 2 times in over 10 years, and my son too. Dreams of being a bachelor boy again hahaha

Yeah like a student buying study books thinking they are going to study hard, doing nothing and then getting inspired again by buying more books again.
I have a surprisingly high amount of buttons now, just laying around. Insprired to make something and then just buying more buttons as a consolation prize for not finding Xenon buttons.

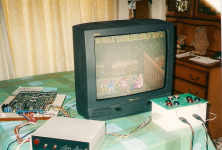
BTW, I have a random photo that I wanted to share, it's from about 1996 or so (I think)

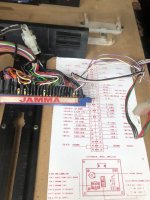
The Super Gun Deluxe that I use (on the left) to power up the board, I have not seen any photos of anything that looks like it.

The reason I bring this up is because the device on the right, I made that to make wiring up the 3rd and 4th controller much less hassle, and you'll notice that the Electrocoins Xenon layout, I was trying to replicate something there as well. Over 30 years ago now, I know I asked my dad to buy some buttons and in the end he found those, which aren't great. they're basically the ones you might get in old fruit machines.

So in this setup the white buttons are "Switch" and "Service", usually I didn't bother with those. The box doesn't require a power supply, it's just a glorified wiring harness, it does need a power connection so to speak, but I'd just connect a pin to one of the power connectors on the far right of the JAMMA loom. You can just see it in the photo, the two wires just not connected anything are the Switch and Service, no need for them on Sunset Riders.

So I had modified my Megadrive joypads, the 9 pins in them, for whatever reason, they have
earth, up , down, left and right, and a b. Just right out the box, but annoyingly they don't have a third button.... Which is why I have that weird setup going on with drilling a literal hole in the Megadrive pads and wiring up the third button, a literal wire wrapped around the controller and requiring a separate connection hanging in mid air...

This is how we played arcade games before MAME I guess?! hahaha

Many games though don't even use more than 2 buttons, but for those that do there is at least a third option.

What I did was wire up button A and start together, so they get triggered together, so any game that required start a and b, that was covered. (A literally piece of paper clip under the button which made the press feel a bit chunky...)
The bloody Konami games with their 2p and 4p hardcoded into the ROMS nonsense.

Often me and my mate, we'd be playing games TMNT as Leonardo and MIchaelangelo only because it was too much hassle wiring up just Donatello.

In this box, the red, green and blue buttons for 3P or 4P was

Green - Insert Credit for your coin door
Red - Button C
Blue - Start (for a Megadrive controller that wasn't modified) or Button D (Like Dungeons and Dragons)

SO at least in games like X-Men or Golden Axe Revenge Of Death Adder, Player 3 or 4 (usually me) could just lean over and press the button when needed (which wasn't often)

Anyway sorry my hacky stuff wasn't specifically anything to do with restoration project. I just thought I'd share it with you since you shared stuff with me.

Cheers
 

Attachments

  • image (2).png
    image (2).png
    1.3 MB · Views: 6

Flyback2021

Active member
vacBacker
Feedback
41 (100%)
Credits
2,205CR
That is very kind of you.

Although it appears to be about a 2 and half hour drive from Sheffield. And not sure my wife would approve, as I've only been back to the UK about 2 times in over 10 years, and my son too. Dreams of being a bachelor boy again hahaha

Yeah like a student buying study books thinking they are going to study hard, doing nothing and then getting inspired again by buying more books again.
I have a surprisingly high amount of buttons now, just laying around. Insprired to make something and then just buying more buttons as a consolation prize for not finding Xenon buttons.

BTW, I have a random photo that I wanted to share, it's from about 1996 or so (I think)

The Super Gun Deluxe that I use (on the left) to power up the board, I have not seen any photos of anything that looks like it.

The reason I bring this up is because the device on the right, I made that to make wiring up the 3rd and 4th controller much less hassle, and you'll notice that the Electrocoins Xenon layout, I was trying to replicate something there as well. Over 30 years ago now, I know I asked my dad to buy some buttons and in the end he found those, which aren't great. they're basically the ones you might get in old fruit machines.

So in this setup the white buttons are "Switch" and "Service", usually I didn't bother with those. The box doesn't require a power supply, it's just a glorified wiring harness, it does need a power connection so to speak, but I'd just connect a pin to one of the power connectors on the far right of the JAMMA loom. You can just see it in the photo, the two wires just not connected anything are the Switch and Service, no need for them on Sunset Riders.

So I had modified my Megadrive joypads, the 9 pins in them, for whatever reason, they have
earth, up , down, left and right, and a b. Just right out the box, but annoyingly they don't have a third button.... Which is why I have that weird setup going on with drilling a literal hole in the Megadrive pads and wiring up the third button, a literal wire wrapped around the controller and requiring a separate connection hanging in mid air...

This is how we played arcade games before MAME I guess?! hahaha

Many games though don't even use more than 2 buttons, but for those that do there is at least a third option.

What I did was wire up button A and start together, so they get triggered together, so any game that required start a and b, that was covered. (A literally piece of paper clip under the button which made the press feel a bit chunky...)
The bloody Konami games with their 2p and 4p hardcoded into the ROMS nonsense.

Often me and my mate, we'd be playing games TMNT as Leonardo and MIchaelangelo only because it was too much hassle wiring up just Donatello.

In this box, the red, green and blue buttons for 3P or 4P was

Green - Insert Credit for your coin door
Red - Button C
Blue - Start (for a Megadrive controller that wasn't modified) or Button D (Like Dungeons and Dragons)

SO at least in games like X-Men or Golden Axe Revenge Of Death Adder, Player 3 or 4 (usually me) could just lean over and press the button when needed (which wasn't often)

Anyway sorry my hacky stuff wasn't specifically anything to do with restoration project. I just thought I'd share it with you since you shared stuff with me.

Cheers
Great photo and a nice set up !
Feel free to keep in touch through DM.
Best. Ant
 
Top