I've been wanting a Robotron for a long time know,my only Roby 'fix' I can get is on MAME which is good but not the same on a PS3 pad

Anyway I've been wanting to have a crack a building one up from scratch after reading the thread on the DLF forum where a guy built a US on from scratch...I have seen a few Euro cabs pop over the last couple of years i've been on here but tbh I would want a mint one and to get a mint one would mean plenty of £££.....
I do prefer the Euro style cab tbh as this was the cab I saw a lot as a kid...
I'm a cabinet maker by trade with full access to a fully equipped Joiners shop so I though i'd have a go at building one myself rather than buying a rough one for a lot of ££ and then start to throw more ££ at it to mint it up,I also fancied to challenge as well
...
I no its not gonna be classed as an 'original' which is fair do's but like I say I fancied the challenge..
I'm gonna be using one of the Jrock boards again for reliability as I don't want to be having boards break down on me every other month (i'm not that technically minded to do all my own board repairs and to farm it out all the time will cost far too much)
My build is a 'faithfull' replica not an 'exact' relpica....
I took all of the measurements from RGP's (James) Euro Robotron including a template of the shape of the cab side....
I will be using proper leaf switchs with 4" red top ball joysticks...
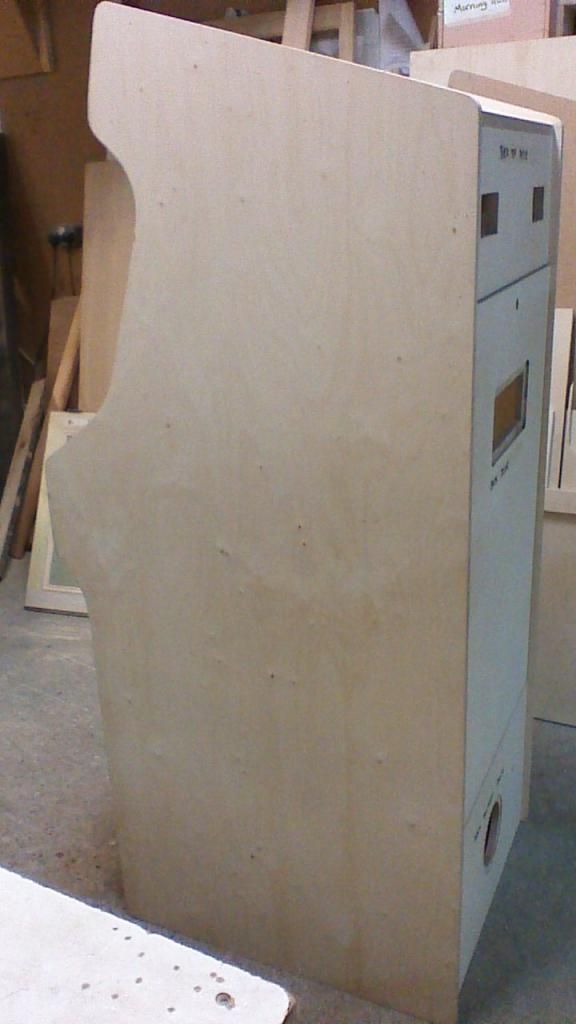
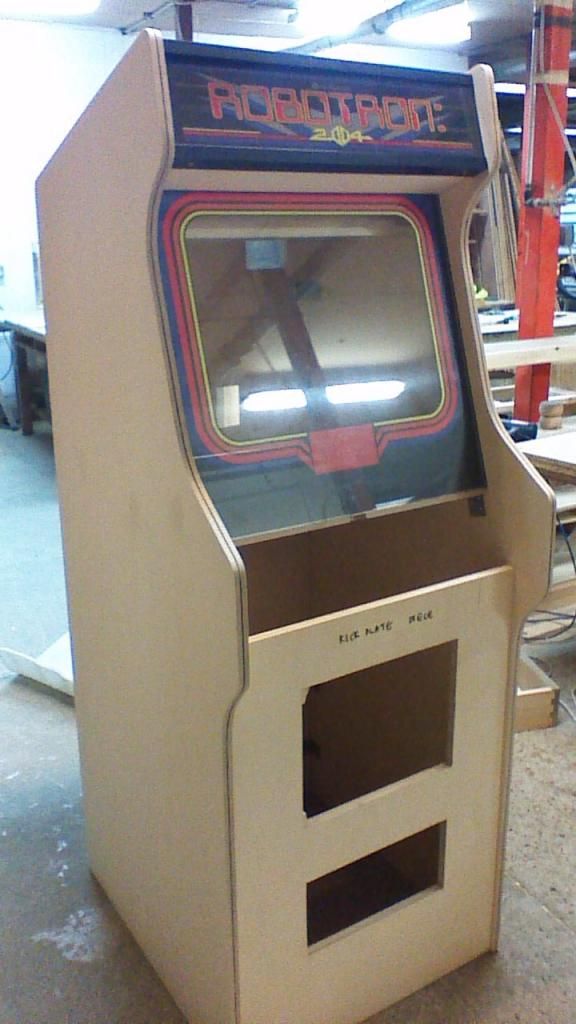
I've used 18mm Birch Ply for the whole carcass as its a great top quality board to use rather than MDF or Chipboard...
Anyway this the work i've done so far...
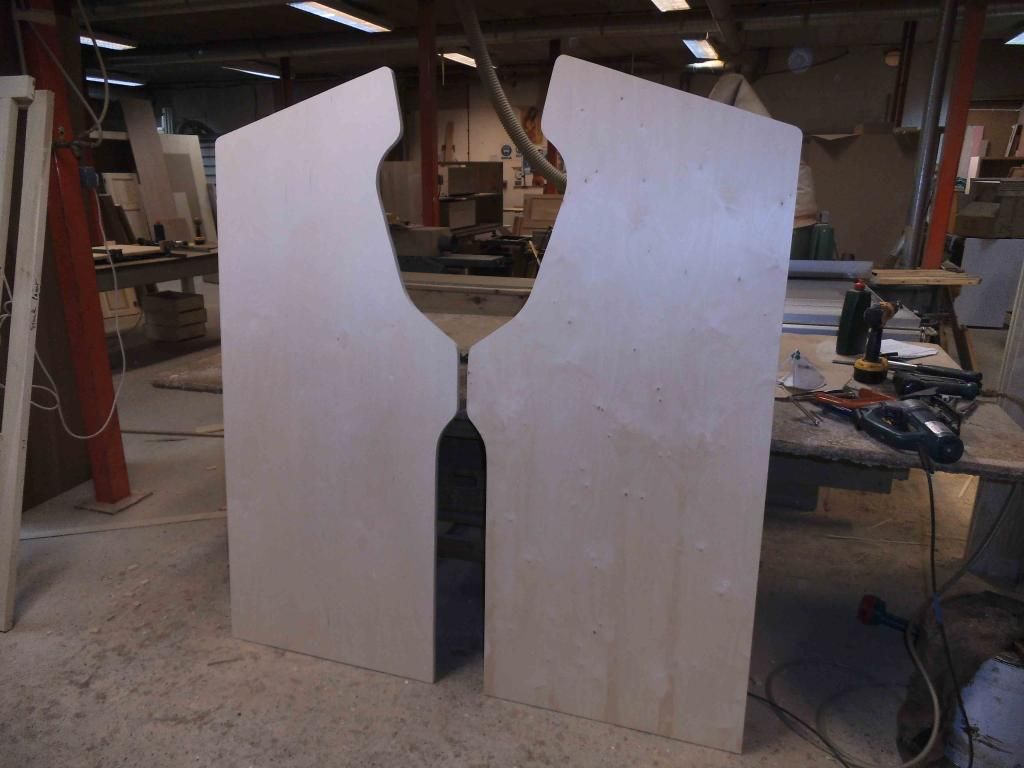
Hardboard template...

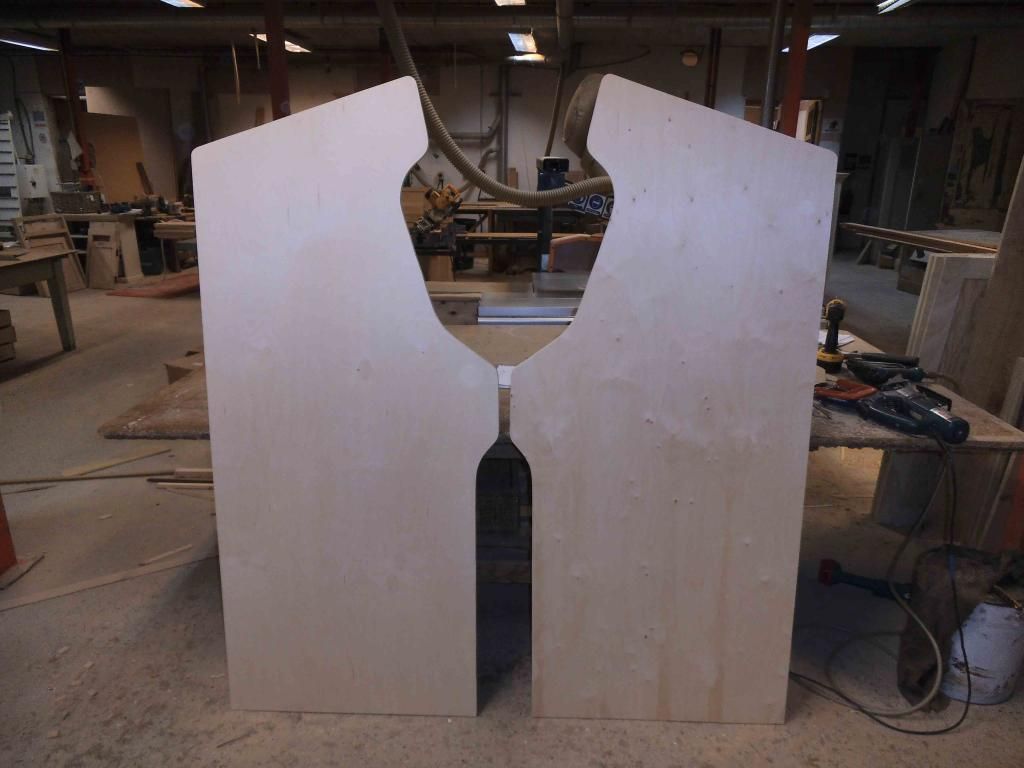
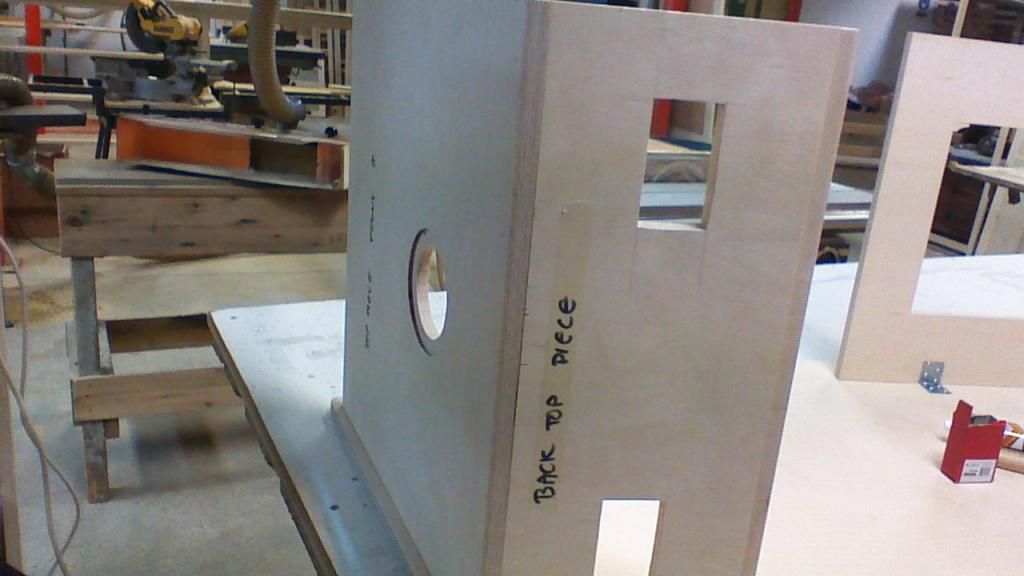
Sides cut out...
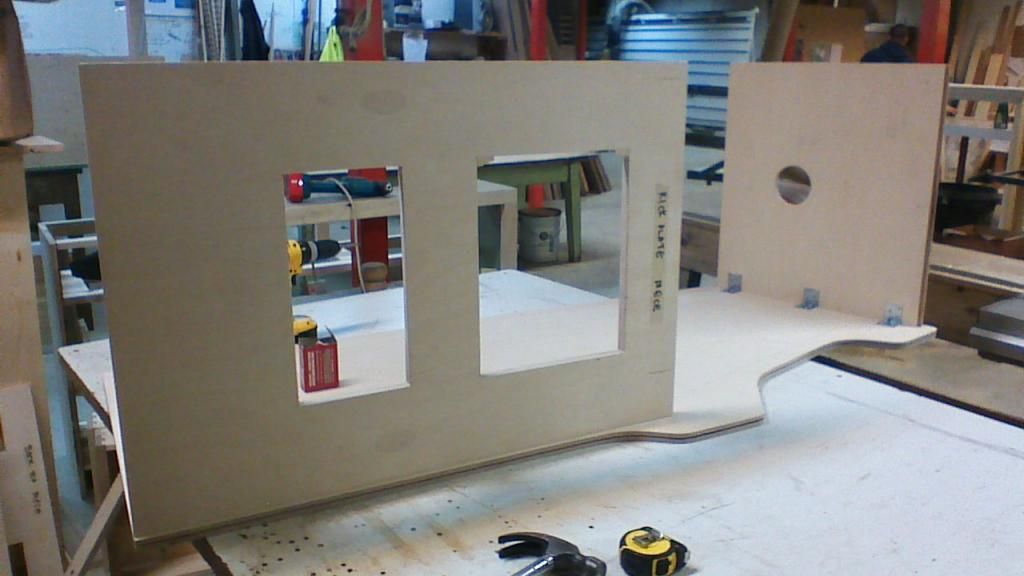
Started building...
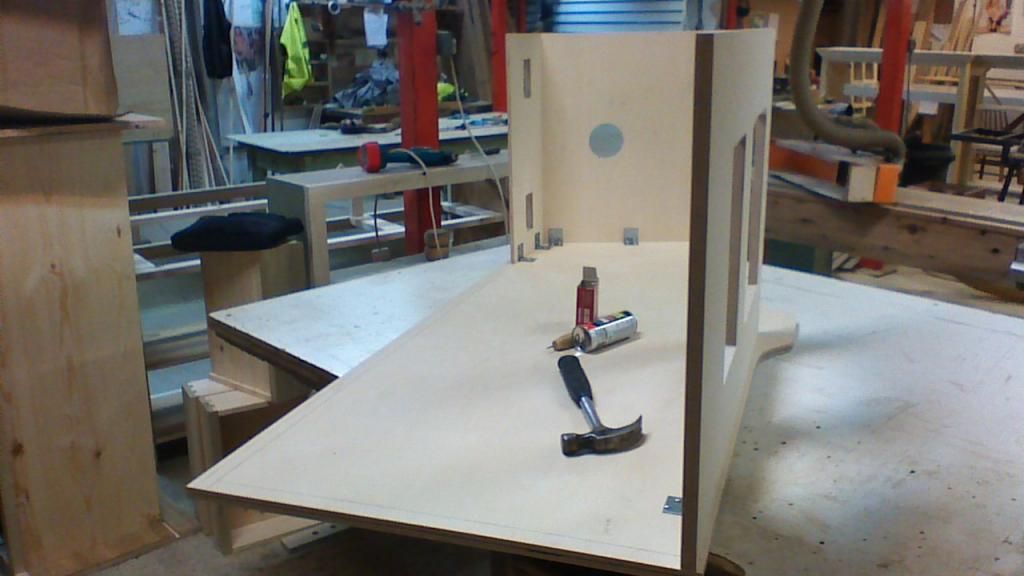
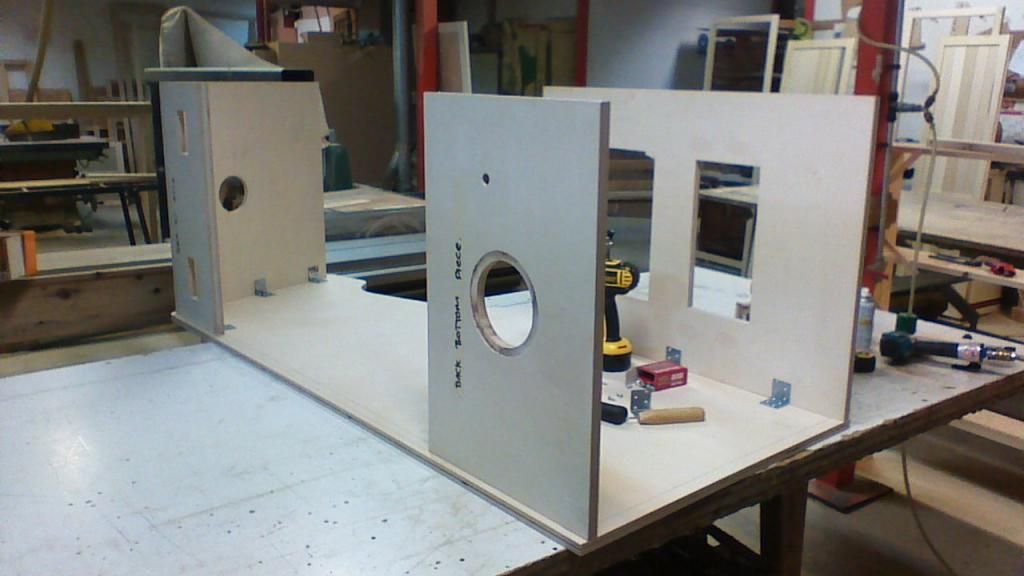
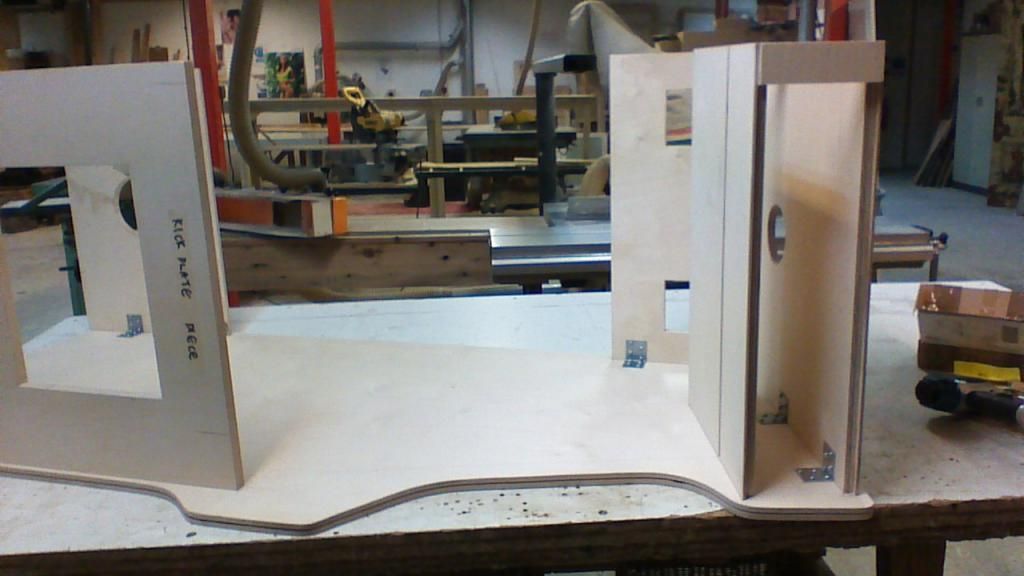
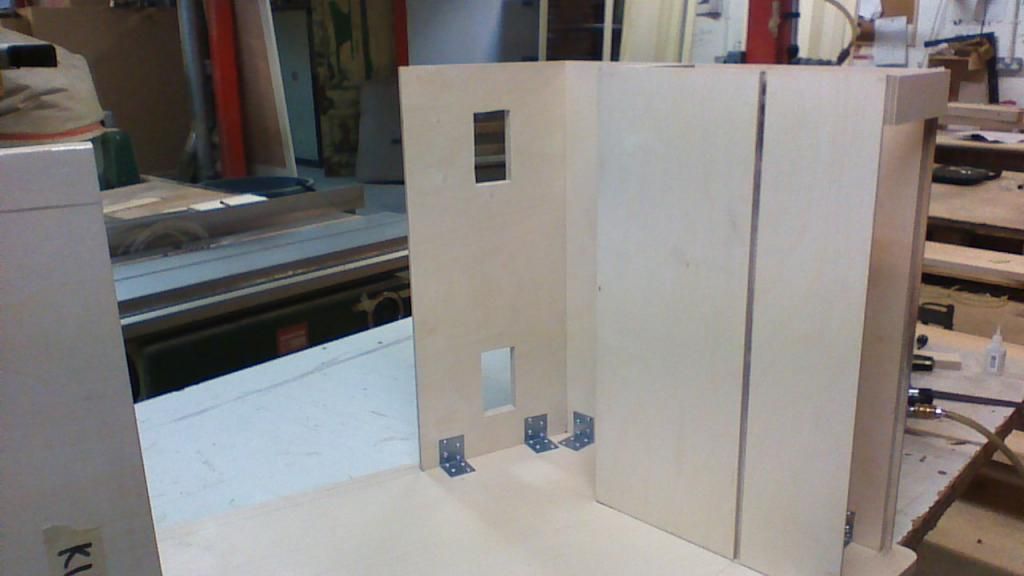
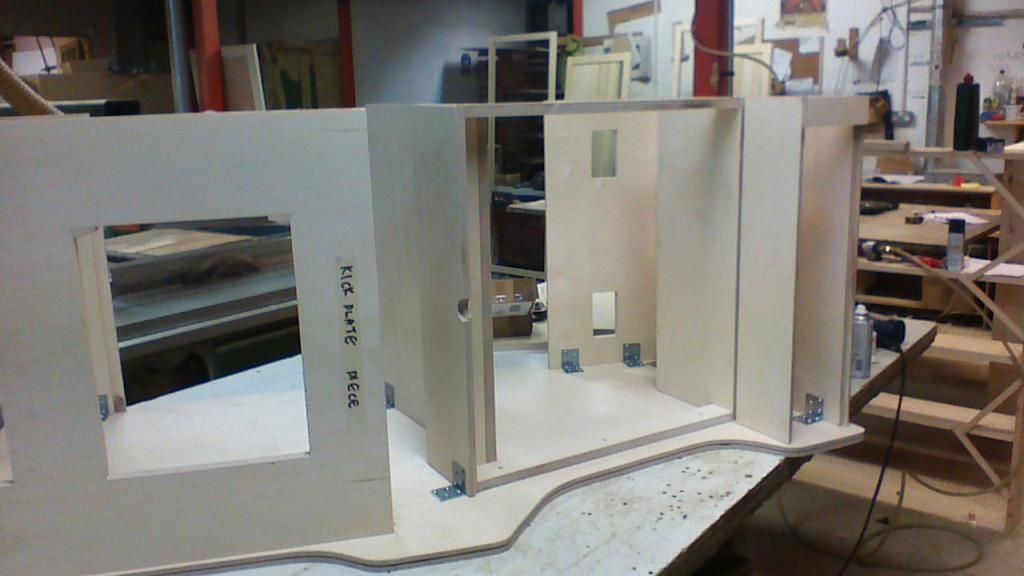
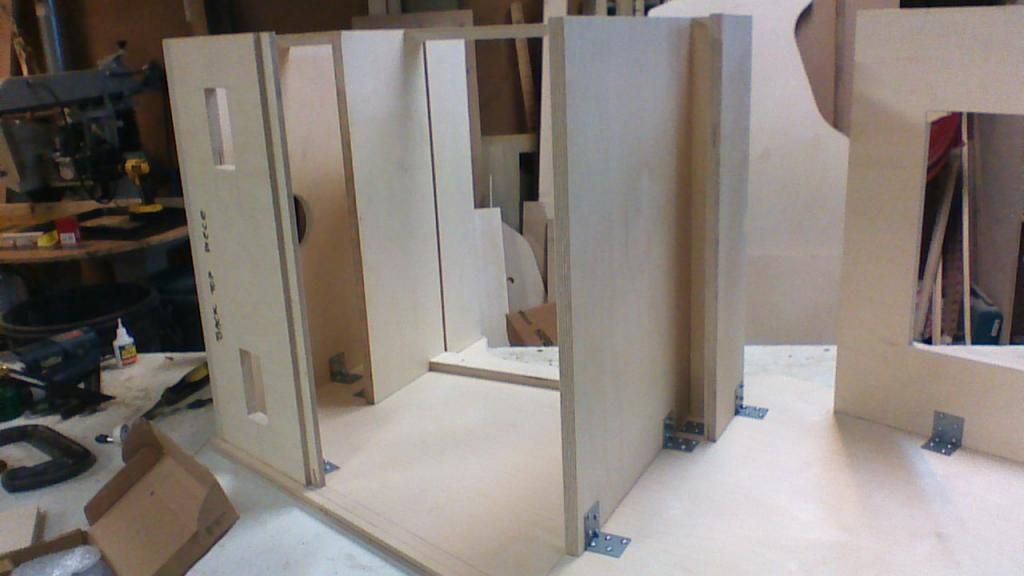
The other side fixed on....
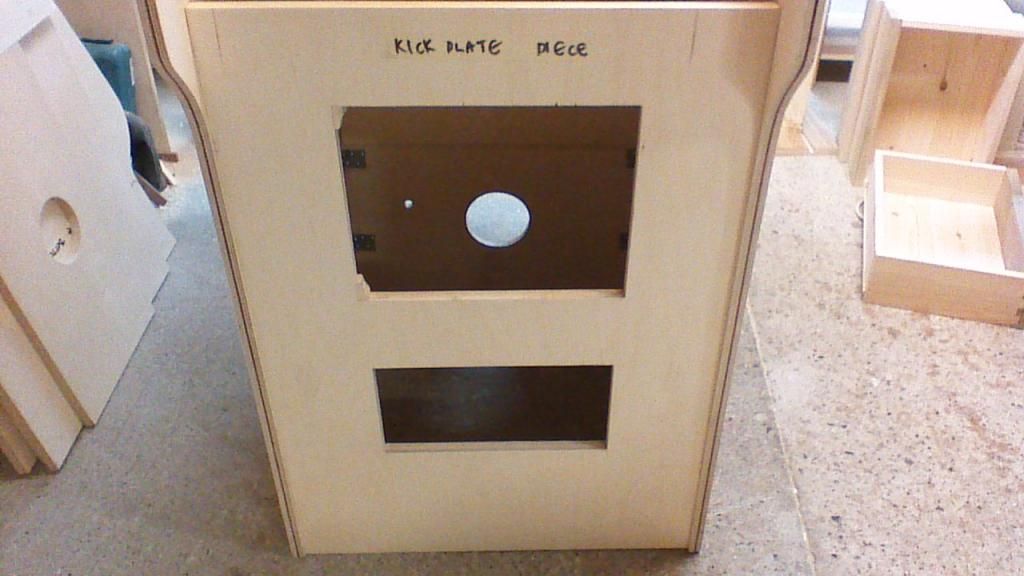
I made the rear door out of Birch Ply as well,the original door is made of metal on the Euro cab (well the one RGP has anyway)...
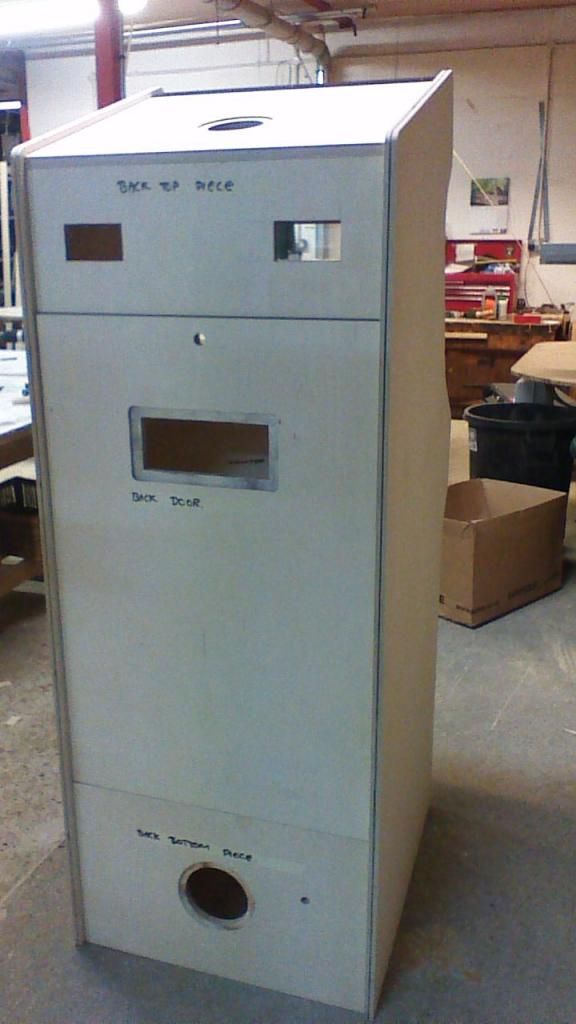
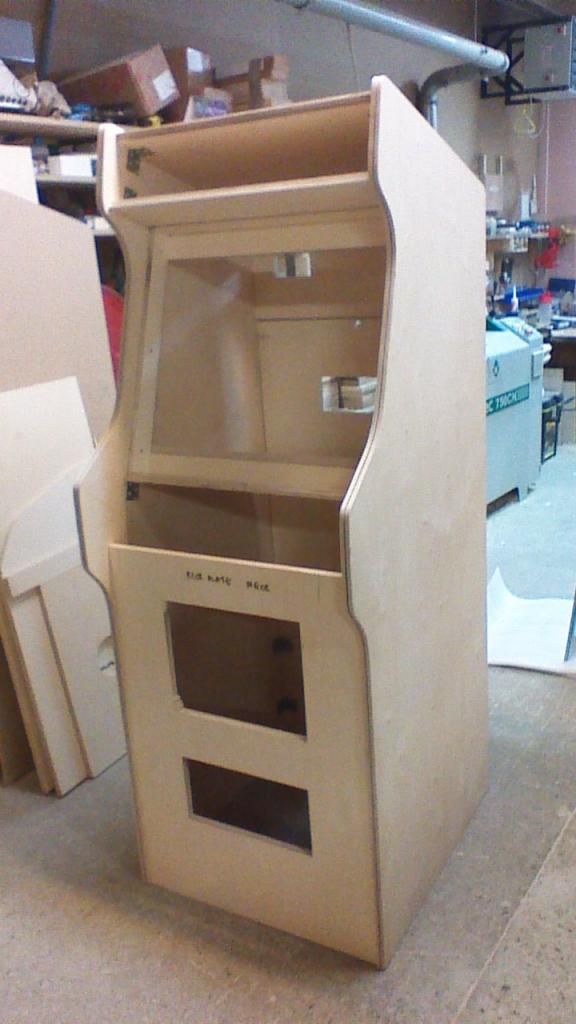
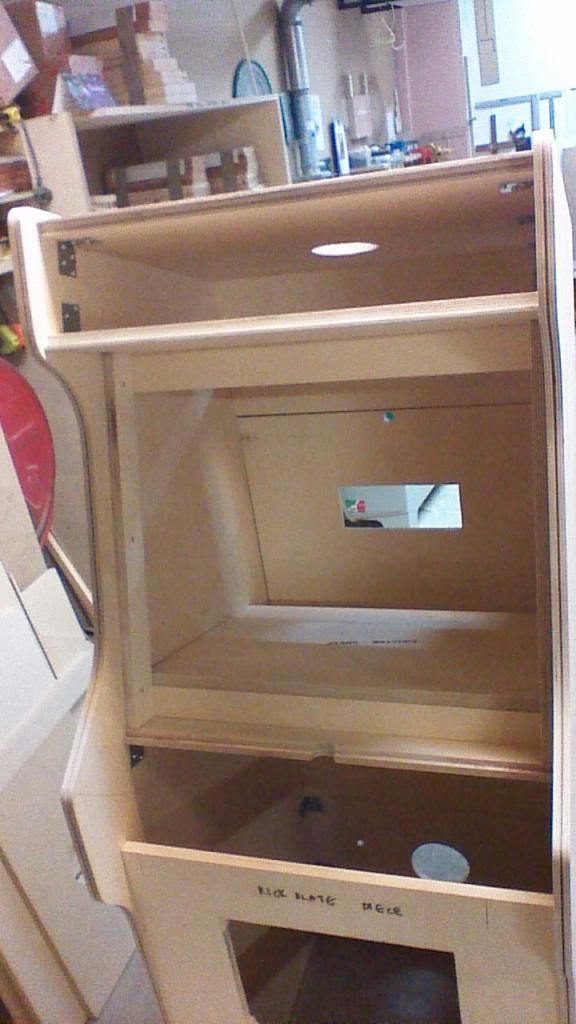
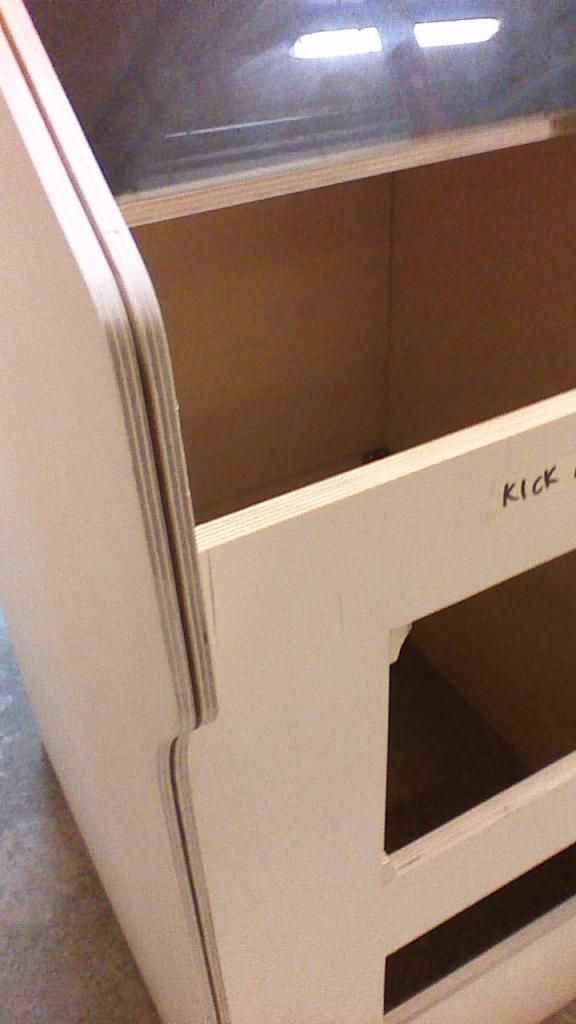
I had to put some small wood fillets in the coin door hole as when I cut the hole out and married up the coin door there were two very small holes you could see in the two corners (the coin door is slightly curved whereas I cut the hole with square corners) and once its all painted up you will not see the fillets...
I'm using a standard black coin door rather than the 3 coin slot silver door that seems to be on all images Euro Robotrons that I have seen....I managed to source a coin box door from the States which I have had powdercoated black as well as the coindoor...
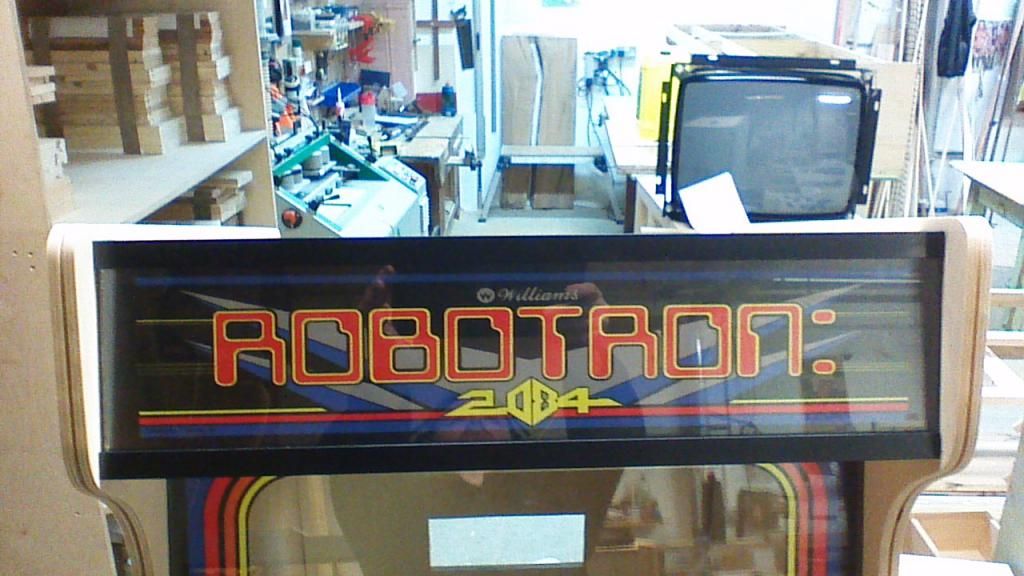
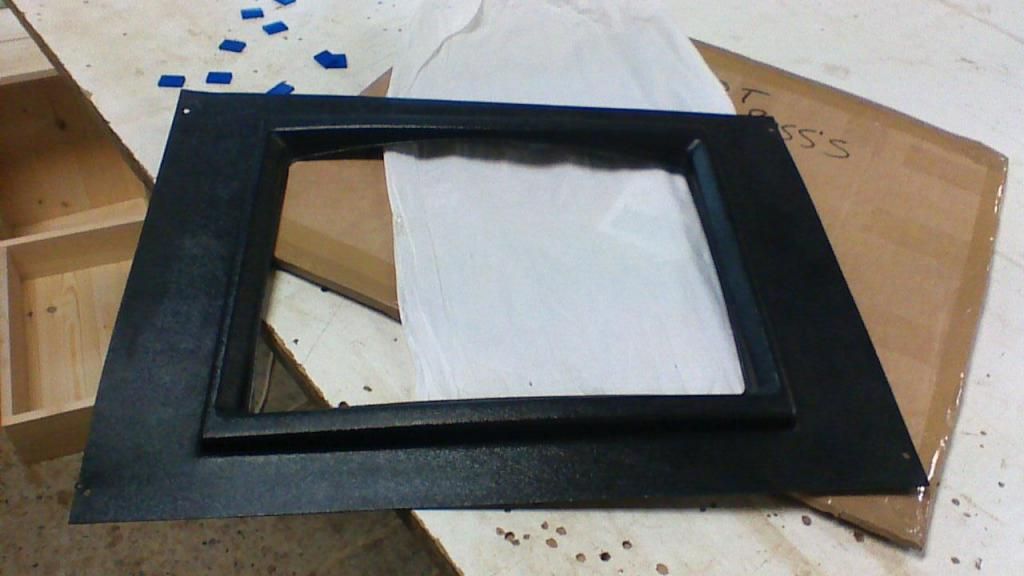
I were on the latest order list from Muddymusic (Olly) regarding the Marquee and bezel...the originals are directly printed onto glassbut unfortunalty that idea wasn't going to happen...I were on the order list that Forcefulfil originally started to which Big Phil took over.The printed glass idea was the first idea but that didn't take off due to the printers not being able to print up white ink.Then decals applied to the reverse side was going to happen but the problem was the marquee let too much light bleed through making it not look quiet right,so I got the designs from Big Phil and got Olly to print me up the bezel onto 1mm pvc which is going to be 'sandwiched' between two 3mm thick panes of glass,same goes with the marquee,the result looks very good imo...
Here's the Marquee and Bezel in situ....

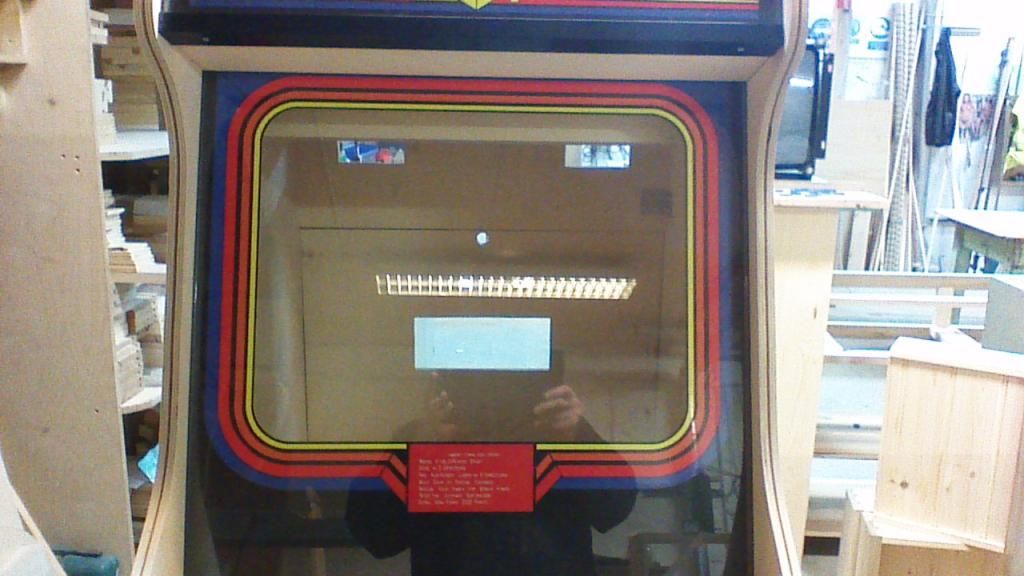
I have used alluminium angled pieces to hold the marquee in place (also I rebated the ply to allow the marque to 'sit in' as well see photos furthur back on this thread)...The two aluminium pieces I had annodised black to go with the correct colour of these pieces (the originals are black plastic)
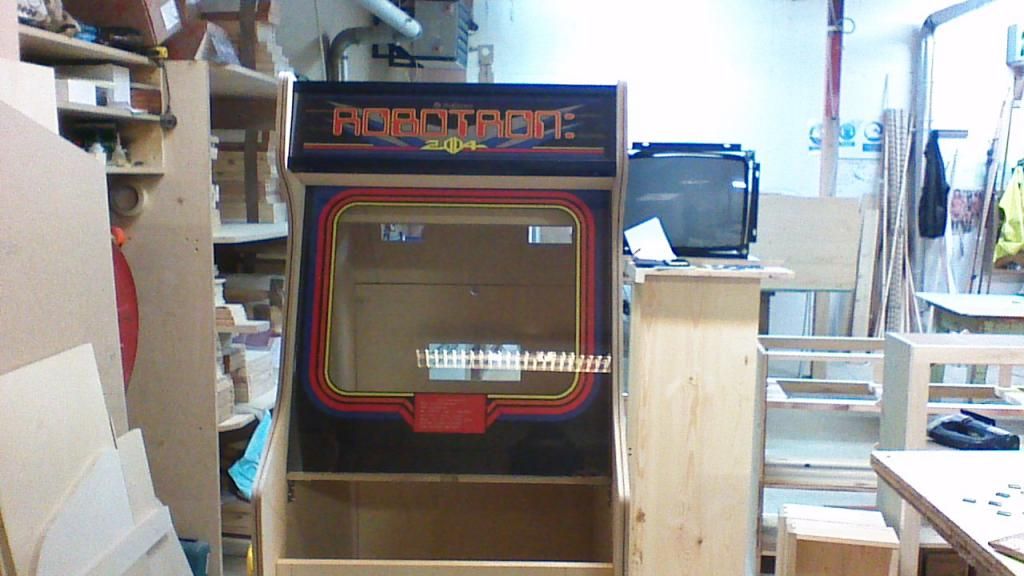
I've routered out the groove for the T-moulding with a 2mm router cutter...as you can see the quality of the Birch ply is far superior than standard Ply...
I do have a black plastic moniter 'shroud' for want of a better word but its off a US Robotron to which i've trimmed down (not in this photo though) to fit snugly in front of the moniter i'm using...
The rest of the vents,speaker etc... aren't the absolute correct ones that came on the Euro Robotron but are a good substitute,like I say i'm 'loosly' basing my build on a Euro cab not doing an exact replica...
I have the side art as well (decals not stencils as stencils for the Euro cab aren't available as far as I no) so I had Olly repro the side art in decal form,also I have the CP art in decal form as well ready for when I get a repro CP made up...
It has to be painted yet which the painter at my work is going to do for me (sprayed not 'rollered' so to speak)
I'll update my thread as I go along with the project...
Sorry for the long thread but I kinda get carried away once I start

Russ....

Russ J2015-01-03 20:12:28
Anyway I've been wanting to have a crack a building one up from scratch after reading the thread on the DLF forum where a guy built a US on from scratch...I have seen a few Euro cabs pop over the last couple of years i've been on here but tbh I would want a mint one and to get a mint one would mean plenty of £££.....
I do prefer the Euro style cab tbh as this was the cab I saw a lot as a kid...
I'm a cabinet maker by trade with full access to a fully equipped Joiners shop so I though i'd have a go at building one myself rather than buying a rough one for a lot of ££ and then start to throw more ££ at it to mint it up,I also fancied to challenge as well
I no its not gonna be classed as an 'original' which is fair do's but like I say I fancied the challenge..
I'm gonna be using one of the Jrock boards again for reliability as I don't want to be having boards break down on me every other month (i'm not that technically minded to do all my own board repairs and to farm it out all the time will cost far too much)
My build is a 'faithfull' replica not an 'exact' relpica....
I took all of the measurements from RGP's (James) Euro Robotron including a template of the shape of the cab side....
I will be using proper leaf switchs with 4" red top ball joysticks...
I've used 18mm Birch Ply for the whole carcass as its a great top quality board to use rather than MDF or Chipboard...
Anyway this the work i've done so far...
Hardboard template...

Sides cut out...


Started building...


The other side fixed on....


I made the rear door out of Birch Ply as well,the original door is made of metal on the Euro cab (well the one RGP has anyway)...


I had to put some small wood fillets in the coin door hole as when I cut the hole out and married up the coin door there were two very small holes you could see in the two corners (the coin door is slightly curved whereas I cut the hole with square corners) and once its all painted up you will not see the fillets...
I'm using a standard black coin door rather than the 3 coin slot silver door that seems to be on all images Euro Robotrons that I have seen....I managed to source a coin box door from the States which I have had powdercoated black as well as the coindoor...

I were on the latest order list from Muddymusic (Olly) regarding the Marquee and bezel...the originals are directly printed onto glassbut unfortunalty that idea wasn't going to happen...I were on the order list that Forcefulfil originally started to which Big Phil took over.The printed glass idea was the first idea but that didn't take off due to the printers not being able to print up white ink.Then decals applied to the reverse side was going to happen but the problem was the marquee let too much light bleed through making it not look quiet right,so I got the designs from Big Phil and got Olly to print me up the bezel onto 1mm pvc which is going to be 'sandwiched' between two 3mm thick panes of glass,same goes with the marquee,the result looks very good imo...
Here's the Marquee and Bezel in situ....


I have used alluminium angled pieces to hold the marquee in place (also I rebated the ply to allow the marque to 'sit in' as well see photos furthur back on this thread)...The two aluminium pieces I had annodised black to go with the correct colour of these pieces (the originals are black plastic)


I've routered out the groove for the T-moulding with a 2mm router cutter...as you can see the quality of the Birch ply is far superior than standard Ply...

I do have a black plastic moniter 'shroud' for want of a better word but its off a US Robotron to which i've trimmed down (not in this photo though) to fit snugly in front of the moniter i'm using...

The rest of the vents,speaker etc... aren't the absolute correct ones that came on the Euro Robotron but are a good substitute,like I say i'm 'loosly' basing my build on a Euro cab not doing an exact replica...
I have the side art as well (decals not stencils as stencils for the Euro cab aren't available as far as I no) so I had Olly repro the side art in decal form,also I have the CP art in decal form as well ready for when I get a repro CP made up...
It has to be painted yet which the painter at my work is going to do for me (sprayed not 'rollered' so to speak)
I'll update my thread as I go along with the project...
Sorry for the long thread but I kinda get carried away once I start
Russ....
Russ J2015-01-03 20:12:28


