Sega Rally 3 rebuild and conversion

Bods

Senior Member
vacBacker
Feedback
5 (100%)
Credits
5,348CR
I've been quite busy with upgrades on this machine on and off as been doing quite a few different jobs, this has taken the longest out of it all
Wanted to make it, well not the ulitmate Multi Driving Game Cab but so you can play as many driving games possible in one cab that gives you close to playing the games to original as possible without ruining the originality of the machine looks wise

Wanted to add a 4 speed Shifter so it can play classic Sega Drivers in full along with the handbrake for Sega Rally 2, in some ways I wish I had 2 of these as well for my Twin as I could have made 3 of these though I'm now rethinking the 6 speed shifters on mine with where i'm going to fit them.
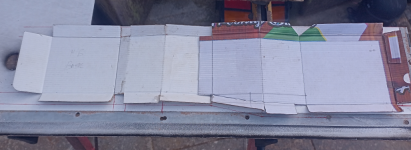
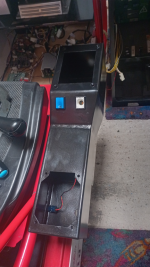
with the Handbrake already attached to the seat I sat in there and tried to work out what I could do and some ideas popped in my head, shifter needed to be much further forward than the handbrake as I did think maybe just replace it with the shifter but it's wrong place so seat apart again to take this off and Pizza box time to realise my ideas in 3D

1791795087561.png

Handbrake can go further back

1791795165960.png

The basic idea of the setup bit like my car

1791795212660.png

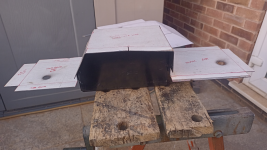
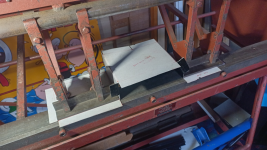
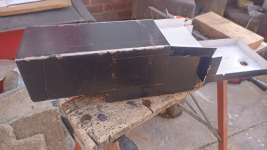
So I can make base and then weld top sections onto that like this handbrake box is made

1791795325702.png

Front box needs to be higher up which complicates things

1791795419877.png

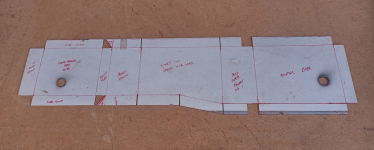
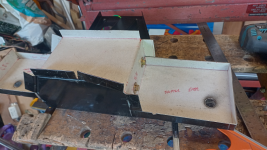
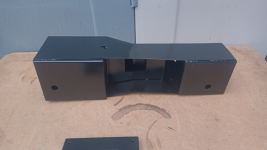
Next is finding some metal to use thats big enough for all sections, just managed it with a few holes in areas not seen so it will do, base I can make from one piece, complicates the bending but sure I can work it out some how

1791795455696.png
1791795613232.png
 
Last edited:

Bods

Senior Member
vacBacker
Feedback
5 (100%)
Credits
5,348CR
As well as the front section needing to be higher up also needs to be wider which further causes headaches

1791795701938.png
1791795745479.png
1791795766888.png
1791795884046.png

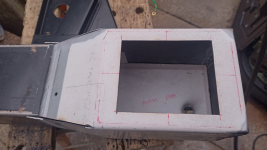
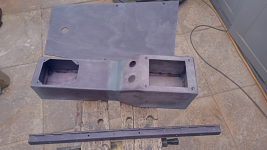
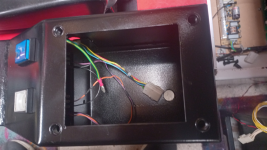
So the only modification to the original handbrake box is 4 holes with the rivet nuts so I can bolt this on at the front and rear inside, hole under the middle section for wires to go through

1791796000988.png
1791796032499.png
1791796082208.png
 

Bods

Senior Member
vacBacker
Feedback
5 (100%)
Credits
5,348CR
Started welding things up like the corners and welded rear box to base

1791796125179.png
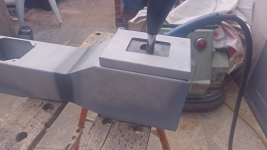
Couldn't think of any other way of fitted shiter in place other than bolted to the box and then make a cover to go over the top, was saying to my dad this is when a 3D printer would be handy you could copy original sega shifter cover and make to fit over this but i mate it in metal, he was telling his mate who has 3D printer and said he was thinking of upgrading a bit so i've bought his now so future jobs hopefully done in plastic where needed

1791796390684.png
1791796413519.png

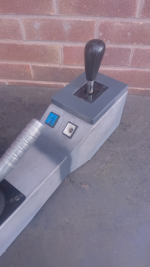
Further thinking about the different driving games you would want to play like Chase HQ, Turbo Outrun, SCI, RoadBlasters I was looking at what could you do to assist playing those, so Turbo Button is a huge requirement and then SCI Turbo button on shifter as well a Gun buttons of wheel so with some space here I thought some extra below the shifter. Anyone got any space Sega Button Tops or full rectangle buttons? just need 2 for these as i have no spare left, thought i'd keep them matching with Dash
Could have fitted 3 but I thought separated its easy to know which your pressing and right near the shifter was best placement for these
1791796779136.png

Sandblasted it all and painted with hydrate 80 as i wasn't sure when It was going to get sprayed, was still adding some bits to my spraying frame which was a success and made painting all my projects much easier
1791796912560.png
1791796928721.png
1791796952069.png
 

Bods

Senior Member
vacBacker
Feedback
5 (100%)
Credits
5,348CR
So with it painted finally as its been waiting about a month as I had more and more items ive been making that need paint also i finally got this part done last Thursday
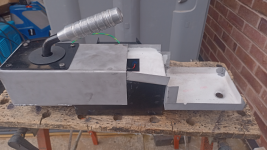
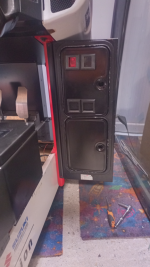
So this now just pushes strait onto the handbrake box, 4 bolts and wires feed through, what I really like is, it's fixed to the seat base and moves with it so it's always in the perfect place where as Sega Rally 2 the handbrake is fixed to the no moving seat base part so it's in different places when seat adjusted which wouldn't be great for a shifter
So now it can play Sega stuff like Sega Rally 1, 2 and 3 in full with the correct shifters & handbrake for relevant games, also Daytona, Scud Race
Next was to sort out how we connect the shifter up, matrix setup or just good ol switches for each gear
1791797120587.png
1791797146233.png
1791797214549.png
 

Phils Arcade

Senior Member
vacBacker
Feedback
10 (100%)
Credits
1,495CR
As someone who loves to make things, especially out of wood and metal, I'm loving this.
I've a twin racer here as well in serious need of an upgrade, and this really does tickle me.
Keep it up, following along :)
 

Phils Arcade

Senior Member
vacBacker
Feedback
10 (100%)
Credits
1,495CR
So with it painted finally as its been waiting about a month as I had more and more items ive been making that need paint also i finally got this part done last Thursday
So this now just pushes strait onto the handbrake box, 4 bolts and wires feed through, what I really like is, it's fixed to the seat base and moves with it so it's always in the perfect place where as Sega Rally 2 the handbrake is fixed to the no moving seat base part so it's in different places when seat adjusted which wouldn't be great for a shifter
So now it can play Sega stuff like Sega Rally 1, 2 and 3 in full with the correct shifters & handbrake for relevant games, also Daytona, Scud Race
Next was to sort out how we connect the shifter up, matrix setup or just good ol switches for each gear

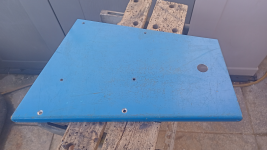
Are those parts powder coated, or sprayed?
 

Bods

Senior Member
vacBacker
Feedback
5 (100%)
Credits
5,348CR
Are those parts powder coated, or sprayed?
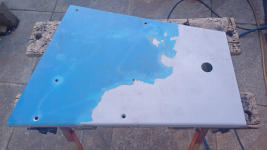
Sprayed them with that 2k Epoxy paint. some items I could have done with using the bigger spray gun, I find i need to thin it down quite a bit too else it doesn't come out good, maybe need bigger nozzle but i'm no expert with spraying or setting the things up so I used the small devilbiss gun my dad had for the bits again, it's more a touch up one I guess with small fan
 

Bods

Senior Member
vacBacker
Feedback
5 (100%)
Credits
5,348CR
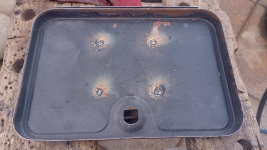
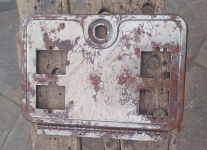
This plate took some work to remove the powder coat, gotta be thickest on anything i've seen, I used heatgun and scraper on most powder coated things to get rid of most as you really need pressure pot blaster to do this stuff which I have but no where setup to use it yet

1791799850227.png
1791800028518.png
Being honest I didn't strip the other side as paint was okay really, gave it a light blast over and painted with 2k like rest just so it matches cab

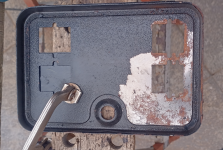
Got some coin doors for the tower, this was out a Turtles Helicopter with a plate riveted on saying 20p so welded the holes up and stripped the paint
This is when it's really handy being able to sandblast items, coin doors are real pain if your having to sand them

1791800268733.png

1791800292594.png
1791800313077.png
1791800332275.png

Better when powder coated or done with textured paint but still look a lot better than rusted doors with paint falling off

1791800432262.png
 

Bods

Senior Member
vacBacker
Feedback
5 (100%)
Credits
5,348CR
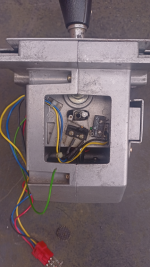
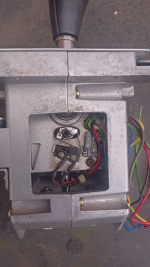
So another job was sorting out wiring up the Ketz 4 Speed Shifter, there is this way people have suggested
1791800625089.png

This I didn't like because as they point out it's always selecting 3rd gear if not in any other so no neutral which doesn't work, okay you can then add a 4th switch to the front so it cuts the ground to 3rd but also 1st is selected by just moving the gearstick left, not good enough
other option is IC connected up using 74LS138

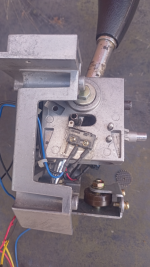
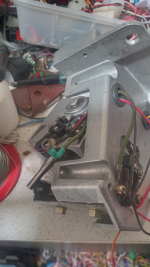
I'll take different option of adding 2 switches, I've kept a few of these small microswitches of scrapped items at work incase and years later I need them, ones with roller on the end same as fitted already, only issue was bolts the right size which I did have enough but no tap to thread the alloy, me dad had some 8ba which were same size as originals in there pretty much and taps, drills to do the job so over there one night to sort it

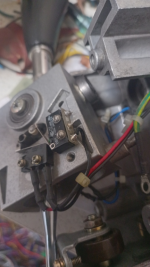
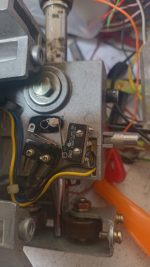
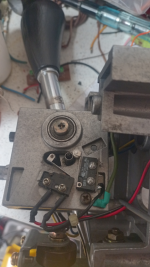
original its 3 switches one each side for forward or back and front from so its on when moved left off to right
so I add 2 more 1 each side so it has dedicated switch for 1/2 and same for 3/4 and the front one just diverts ground to either 1/2 switches on left or 3/4 when right with NO/NC pins, common linked to all switches which meant just adding common from original switch to the new one

1791801864610.png
1791801892073.png
1791802038893.png
1791802079058.png
 

Bods

Senior Member
vacBacker
Feedback
5 (100%)
Credits
5,348CR
had to alter earth wire, does it even need it i don't know but keep it all there so need to go around the new switch

1791802160027.png
1791802180925.png
1791802197478.png
1791802227444.png
1791802251412.png

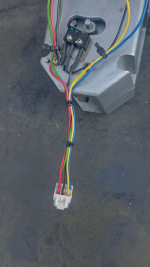
With same colour wires then sorted and connectors it's all wired up through the seat with the handbrake cable to I-Pac board with the extra 2 buttons
@griffo83x what you reckon matey

Short of it having a 6 speed shifter to play Ridge Racer in full manual mode this now gives you 3 options for gears along with Auto
So you still have 2 way return to center shifter for the later games like SR3, Outrun2, Inital D etc

Original 4 speed shifter for Sega Rally, SR2, Scud Race, Daytona etc and then to help playing the older games OutRun, Turbo Outrun, Chase HQ, SCI, Continental Circus and more you can use 3rd and 4th gear as a physical Low/High instead of having to look at screen with a toggle in corner showing you and probably shifting wrong sometimes, so much easier when you know which one your in by position of gearstick then the added buttons for turbo and guns hopefully that final part needed to play all the classic drivers as well as everything newer

I think there is enough movement in this Ketz shifter you could probably add in another set of rollers at the bottom moving originals over to turn it into 6 speed one
 

Bods

Senior Member
vacBacker
Feedback
5 (100%)
Credits
5,348CR
Got some more free metal Sunday just left outside by the road
All what I've done so far has been made with everthing I have lying around from past jobs
Yesteday I decided the VTS Credit board might as well come out as only thing on it used is Vol A pot nothing else connected now, the Credit button and bulb was linked to that but it's now connected to Player 2 Start input on I-PAC for shift key function Esc key to exit out game
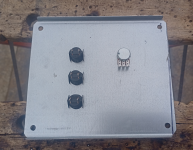
So thought I'd make a panel like in my Twin with Test, Service and Volume pot that will be easier to adjust than the trimmer type on VTS as it's more likely to get used than they would in a one game cab in arcade enviroment
Not sure if the Test/Service buttons function but in Technoparrot it has them in some games to assign to

Amazingly the metal cover that was with this box is exactly the height needed for the job, cut to right width and its perfect shiny metal plate like in some Sega coin tower, just waiting for some sanwa switches and 5k pot to arrive from Pi hut so I'm sorting the wiring out for that today then it's all done hardware wise

Had a play about with OutRun in older mame yesterday with the shifter, you can assign both 3rd and 4th and it then functions as an original Low/High Shifter
Need to crack on sorting the software side of it then
 

Phils Arcade

Senior Member
vacBacker
Feedback
10 (100%)
Credits
1,495CR
Got some more free metal Sunday just left outside by the road
All what I've done so far has been made with everthing I have lying around from past jobs

Nice wee haul then. Been asking the metal fab shops if they have any scrap/offcuts they're looking to get rid of. One guy has come back, so we will see.
 
Last edited:

Bods

Senior Member
vacBacker
Feedback
5 (100%)
Credits
5,348CR
Looking great !
Must have missed some updates so all caught up now.
very nice job on the handbrake , shifter box.:)

It's easy to miss things as it doesn't always show you everthing in New Posts
Was better before when you just went through each one looking at whats latest you missed less, trouble these days everything being done for you for you so people don't have to think, will have effect on peoples brains in long term i reckons

Not got much done last 2 days, left eye feels like it's got something stuck in it but I hadn't done anything apart from post updates here when it started i'm sure
just got the buttons and pot from Pi Hut, knob doesn't seem to fit though which they recommend to go with it, should have bought same one i used on mine but i'll sort it out
The Step Drills are great for these jobs, just a shame when they don't got to the size you need like the buttons need 17.5mm hole so it's 16mm, i then do the 18 a little to bevel the edge both sides then you have a marker to go to and less metal to file. what you need is an Odd and Even set of step drills so 1st is 2, 4, 6, 8, 10mm etc and another 1, 3, 5, 7, 9, 11, 13mm that would be awesome, need to have another look if they exist if not Dragons Den is calling for someone lol

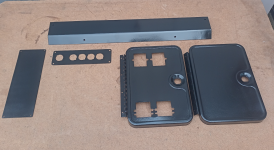
so the nice free metal makes a decent service panel

1791985628138.png
1791985927295.png
 

Flyback2021

Active member
vacBacker
Feedback
43 (100%)
Credits
2,337CR
It's easy to miss things as it doesn't always show you everthing in New Posts
Was better before when you just went through each one looking at whats latest you missed less, trouble these days everything being done for you for you so people don't have to think, will have effect on peoples brains in long term i reckons

Not got much done last 2 days, left eye feels like it's got something stuck in it but I hadn't done anything apart from post updates here when it started i'm sure
just got the buttons and pot from Pi Hut, knob doesn't seem to fit though which they recommend to go with it, should have bought same one i used on mine but i'll sort it out
The Step Drills are great for these jobs, just a shame when they don't got to the size you need like the buttons need 17.5mm hole so it's 16mm, i then do the 18 a little to bevel the edge both sides then you have a marker to go to and less metal to file. what you need is an Odd and Even set of step drills so 1st is 2, 4, 6, 8, 10mm etc and another 1, 3, 5, 7, 9, 11, 13mm that would be awesome, need to have another look if they exist if not Dragons Den is calling for someone lol

so the nice free metal makes a decent service panel

View attachment 66794
View attachment 66796
Looks great, still have a big box of spares , Is there anything else you might need ?
The joy of using a step bit .. think the Dragons have bigger fish to fry :LOL: That said it could be the next 'magic pizza' invention if you get it right !
 

Bods

Senior Member
vacBacker
Feedback
5 (100%)
Credits
5,348CR
Looks great, still have a big box of spares , Is there anything else you might need ?
The joy of using a step bit .. think the Dragons have bigger fish to fry :LOL: That said it could be the next 'magic pizza' invention if you get it right !

Think were pretty much done after this wired up today, cheers anyway Ant :)
Time consuming when you have to go through boxes of cables to find right colours so it matches all through as much as possible

Apparently in some games the Test/Service buttons do function so worth adding these, coin mech/credit button connected to the Coin Input on I-pac so it has all options available

I did think how nice it would be to have a powered File also with changeable files but I did find a place think it was Japan that had made them already
See the Magic Pizza didn't last :LOL:
 
Top