Star Wars Cockpit Renovation

Bods

Senior Member
vacBacker
Feedback
4 (100%)
Credits
4,859CR
tb2000 said:
Nice work indeed! I like those sets of jaws for your vice to turn it into a mini bending machine!
smiley1.gif
Asked my dad about those (him having been a draughtsman/toolmaker and then car mechanic) and said he's never seen any! I assume you've had them a while, they don't look new?

No, they are new, got them off ebay for £20 ish, I thought they were useless when I bought them as all you can do is bend some metal in L shape and all things I wanted to do I couldn't use it but like for this it came in handy after all, used it a few times now so happy I bought it as the other metal bender also off ebay, some polish seller makes them and they do the job nicely couldn't bend this small bit because of the bend in it already

Thanks again all
smiley1.gif
smiley9.gif


I've seen what others have done on here and been inspired by it and it gives you drive to do more things yourself, maybe this will for others.

There is easier ways this could of been done, I could of just bought a decent yoke and fitted it job done, but wanted to keep down costs, my time making things isn't costing me but also genuinely enjoy it, It's took me weeks doing the controller, putting off welding it as I might mess it up but need the practice.

I'm restoring the original SW yoke as well which has cost now as much as I could of bought a nice one for, as long as I don't loose anything on it not a problem so will be selling that at some point, damn wish I'd bought that job lot of handles years back though, knew I should of but forgot to bid
smiley13.gif


There is another reason I carried on making this one as well as the challenge, it's good it's lighter than the original and I needed to alter one part of it for the other part to come

Its the passion for these old machines that gives you the drive to do these things, you have to be a jack of all trades to restore these machines, The Double Dragon I think was the first one I had to do some woodwork on, can't say I was that keen on woodwork at school but the projects were rubbish, apart from the Wood Bending with Steaming it which came in handy here, also the Vacuum forming we did which I've used on other machines, what did we make in the lesson, A Clock. If they had said built anything you want, Could of made an Arcade cab, that would of got my interest
smiley4.gif


I'm not that good playing games so didn't do that well Steve
smiley36.gif
Though I am having issues with the controls. when you test the controller in Windows it works fine, on other games it works fine, I've also tested same games with Analogue Joystick and it works fine on Outrun, AB Cop, Afterburner etc but with both controllers Star Wars has issue when going diagonal, it seems ok when you just go left/right or Up/Down but when you do both it just wobbles about all over place so you can't shoot very good as no accuracy in aiming

Thought its probably the old Pots but Analogue stick is same and that's a lot newer, it's hard enough just starting the game, trying to get it over to select Easy was a game in it's self, It's not centred when you first play it but has auto setup, even if the windows test and it's not centred after a while in game it auto centres it self which is amazing for such an old game and running on mame,

I've been in the test for controller in SW game and it works ok but in game it's not smooth like watching others playing real cab, so wondering if it's the mame version or needs more setting up?

Sitting down playing it in proper cab is pretty cool even with this setup. when watching this Video I can see why so many wanted original machine with 25" Amp

https://www.youtube.com/watch?v=jHUToeQykp0

I'll have to do a video and upload it, cant hope to ever be that good at the game even if the control moves smooth like that. It's a very good and fast paced game, the speech adds to it hugely to give you that experience you want from a movie tie in, if your a big Star Wars fan they you can't not of liked this back in 1983

The only thing they missed out on which would of added to the Cockpit, should of had 4 channel audio and speakers at the front as well so you get the sound of the Tie Fighters passing you but at least they put in 4 big speakers so not all bad
 

Bods

Senior Member
vacBacker
Feedback
4 (100%)
Credits
4,859CR
Done some work on the front of the cab too

Not sure what the heck they were doing all these strange things for but the top panel over the monitor has been bolted on with metal brackets
smiley5.gif
which is a shame as they just made more holes in the sides and top of the cab with this and the dodgy wood that held the 26" monitor in

403-SWC.jpg


405-SWC.jpg


Bizarre really when the square strips of wood are stapled to the sides of the cab and then the top panel should just be held on with 4 screws each side

So they pull out the staples, and then nail on the strips to the panel, trying to get them out it did start pulling the wood apart, so had to clamp it down and then bash em out

406-SWC.jpg


407-SWC.jpg


408-SWC.jpg


409-SWC.jpg


Still got the original Staples in but they glued them on also to make it even harder

410-SWC.jpg


411-SWC.jpg


412-SWC.jpg


413-SWC.jpg


Glued in the split and clamped it up, would like to find some quick clamps that work properly, ive bought a few and they are hopeless, the older screw type like these work great

415-SWC.jpg


Found some strips of wood to replace the hacked up ones. any thing I've took apart over the years I keep the wood, metal, screws, brackets, bolts etc pretty much everything gets saved and reused, another reason I have no space. I've saved this type bits of wood from old machines but think these came from the wardrobes my grandad put up

Screwed the top panel to them as still got the original 4 holes each side and then clamped it in place

419-SWC.jpg


Only issue is, I don't know what's original on this cab and what's me changed, moved.. Things don't sit right, I would assume the height should be same distance from the sides of the cab along the top, which is same as the other part going into the roof section but it was sloping down a bit toward the front, so with it even all the way along, then the door has a gap at the top on an inch so not sure what's going on.

Top panel looks original, the extra strip of wood at front where lock lever goes looks original, maybe they weren't set level with sides but I set it same all way along and address the door issue after, screwed it in place

421-SWC.jpg


422-SWC.jpg


423-SWC.jpg


424-SWC.jpg


425-SWC.jpg


428-SWC.jpg

Bods2019-07-17 12:18:13
 

Bods

Senior Member
vacBacker
Feedback
4 (100%)
Credits
4,859CR
I did wonder if the door wasn't original

It has the correct slot, matches in with the top panel for finish. it's white inside though, when I took it apart to take all the After Burner stuff out, it was quite a while back and didn't really pay much attention to the door and whats on it

So it came from USA just before I bought it, turns out if this is the original door, it's originally from Canada and sold by one of the largest Supplier over there Laniel Automatics, which closed in 2001

It also has little stickers inside the machine on the Main Switch Cover, and other places so think door is original, they used to stencil all the machines, pinballs underneath video games the back doors unless a customer asked them not to. I googled Vendu Par and that's just Sold By also, the owners were French Canadians

So it's certainly travelled

418-SWC.jpg


416-SWC.jpg


417-SWC.jpg


452-SWC.jpg
 

Bods

Senior Member
vacBacker
Feedback
4 (100%)
Credits
4,859CR
The next part that also isn't original, the bottom panel below door

Thought the 4 domes on the side were Coach Bolts but turns out they were plastic cabs glued in to cover more screws just holding the wood for the front panel to fix on

420-SWC.jpg


429-SWC.jpg


430-SWC.jpg


The panel is full of screws fixing it on, should have 3 or 4 down each end and that's it. Now the door doesn't fit with an inch or so gap, thought I'd replace this wood. wondered if this was made too small, I've studied other cab pics and couldn't work out either way if it's smaller, so decided I'll just make the new one a little taller to made door fit so I took out about 20 screws and took panel off

427-SWC.jpg


Nice and dirty behind it again so cleaned it up

432-SWC.jpg


431-SWC.jpg


433-SWC.jpg


Before I would of been cutting it down with Circular saw or Jig saw, then you have to try and plane it down to get it straight, so much easier with the Evolution Table Saw, reason I bought that one, it's quite small and light and they have a blade that cuts Wood, Steel, Plastic and Alloy which is great, was £150 off ebay delivered, then a few months back Aldi had some in, they were exactly the same but £99.99, you got 2 blades with it, would of still had to buy an Evolution blade for it to be same but they were good price

Makes this job so much easier, better finish and far quicker

434-SWC.jpg


435-SWC.jpg


435-SWC.jpg


1 hole for Mains switch, 2nd hole to start the Mains lead slot then used the cheap aldi Router I paid about £12 for years back to route the Air Vent slot and the top edge for the door. The Router isn't too bad for price, the thumb screws are crap, the plastic tops start turning so wont tighten up so the quide moved doing the slot so not a little bigger, since that I've replaced the cheap ones with better metal ones so it stays where its set

437-SWC.jpg


438-SWC.jpg


Took the wood blocks off for the Cord plate holder

439-SWC.jpg


440-SWC.jpg


442-SWC.jpg


449-SWC.jpg


Had some Varnish but didn't come out the right colour, other side is black so it blends in with the black panel

Before fitting it, I cut the bottom edge down to the right size and at angle so it's level with the base of the cab

447-SWC.jpg


448-SWC.jpg
 

Bods

Senior Member
vacBacker
Feedback
4 (100%)
Credits
4,859CR
With the front section lifting as well I've glued and clamped it down, then used some of the screws to secure it down in place in the middle uprights and through the side blocks

443-SWC.jpg


444-SWC.jpg


445-SWC.jpg


446-SWC.jpg


looks like these upper supports had been moved a little as should be stapled on and these had screws, so had to move them back so door aligns with top panel

450-SWC.jpg


451-SWC.jpg


Have some Vinyl I used to cover the wood for now, it's to thin really for this but looks ok in normal light

453-SWC.jpg


454-SWC.jpg


Added a little bit more wood to support the bottom of the door as bottom one side has small bit missing

455-SWC.jpg


457-SWC.jpg
 

Bods

Senior Member
vacBacker
Feedback
4 (100%)
Credits
4,859CR
That's how far I've got with the cab to date, wanted it complete and looking like a Star Wars again, I am missing the rear metal bracket for holding the Marquee in place and also the back of the roof panel, Don't know where it's gone, pretty sure in the ebay pics it was there and sure I took it off so need to locate that

Still have more work to do on the PC side of it, add some things, change the Hard Drive to SSD, Change Mame or add more game roms

The rest of the Cab woodwork I will continue with when I've created more space, got a roof to design and make for over the Patio, then I can put the Chicken and Elephant vending machines out there, got floor tiling to finish all over the rest of this extension those piled up take the space of a machine along with the carpet tiles, 3 cabs need to go so then I'll have some space to work on it
 

Bods

Senior Member
vacBacker
Feedback
4 (100%)
Credits
4,859CR
Star Wars Cockpit - Episode 2

The Joystick Strikes Back


smiley36.gif
I'd be thinking what a clown if someone else did that
smiley11.gif
smiley9.gif
so I'll say it
smiley8.gif


[font="Arial, Helvetica, sans-serif"]A few months after getting the machine these came up on ebay, Full happs setup's of Analogue Joystick, Throttle and USB Interface, which solved the problem of what USB device to use in this cab[/font]

[font="Arial, Helvetica, sans-serif"][/font]

[font="Arial, Helvetica, sans-serif"]With the space any Arcade cab takes up, specially the Sitdown ones I want it to play as many games as possible, the Yoke controls will work with many games but I also want to play more, basically any Flight or Space game and maybe even some old PC games like Lucas Arts Tie Fighter and X Wing, be a shame not to when it has PC installed[/font]


458-SWC.jpg


So had to do a bit of thinking, could I some how use this in the machine as well
smiley24.gif


Bods2019-07-18 08:36:22
 

Bods

Senior Member
vacBacker
Feedback
4 (100%)
Credits
4,859CR
I started with the Throttle, had to really think how could I fit this on the machine, could of cut the seat out at the side and mount it there, but it's too far back to use, even though the machines been converted a few times now and in poor condition I don't want to hack up more

Decided at a lot of debating I need to make a box to fit it in and fit in front of the seat somehow

So got to work with some metal. If your going to do this, I've learnt now make cardboard templates first to work out the bending and where things will come when bent as the angles don't end up how you think, it didn't turn out too bad though

More free metal, came from the control panel off a big Grabber I bought, machine had been stripped down and guy sold the insides on ebay

Thought I'd make use of the hole in it, as I may need to access the inside and uses the metal up that can't be used for other things. I did a bit of a card template, just didn't plan the folds as much as I should

459-SWC.jpg


460-SWC.jpg


What made this harder was it needed to sit at an angle to match the seat, just happened to find something that had the exact same angle to use to mark it out, as well as the angles, I wanted it to be as small as possible, size of the top plate basically

461-SWC.jpg


Marked out it's then the bending which only takes one bit in wrong place and it's probably ruined but went ok

462-SWC.jpg


463a-SWC.jpg


463-SWC.jpg


464-SWC.jpg


Both sides bent and match up ok which was good start. Then it's bending the ends in, the smaller vice bending tool was handy again for the shorter sides. The bending machine I bought this model because it can make boxes up to 45mm deep, you need something inside to clamp it and bend upto though, so have to find things to use and cut out wood for it also. Could do with another for longer things as well really

465-SWC.jpg


466-SWC.jpg


467-SWC.jpg


468-SWC.jpg


469-SWC.jpg


470-SWC.jpg


471-SWC.jpg


472-SWC.jpg


Had to cut out the block of wood to the shape of inside just bend 2 of the sides

473-SWC.jpg


Just screwed it together for testing, holes left to bolt in place and slot out bottom for cables

474-SWC.jpg


Decided to weld it together after getting it back to metal, fill the gaps in where it didn't quite go to plan at top and bottom, also be stronger. welded up the holes not needed.

477-SWC.jpg


478-SWC.jpg


shocking welding and photo
smiley11.gif
but all ok when ground off, some of the later parts I've welded I was getting the hang of it a bit more. Was going to show it in place before finishing it but I'll make you wait
smiley1.gif


Back from the Powder Coaters, looking better. I added some Rivet nuts before going for paint, then I can bolt the cover on the side, only issue is I couldn't find the cover to take along with the rear marquee retainer

479-SWC.jpg


480-SWC.jpg


Bods2019-07-18 09:50:07
 

Bods

Senior Member
vacBacker
Feedback
4 (100%)
Credits
4,859CR
The Joystick next, was quite lucky with this

I bought the control panel from jukebox engineer which was off Buck Rogers Cockpit, never seen anyone that owns those cabs, would like to know why the upright just has Joystick and the Sitdown has Joystick and a Pedal? Joystick is only switches and pretty sure pedal is too.

Then there is the Zaccaria Buck Rogers Cockpit, that has a plane style control but again switches and pedal. Anyway doesn't really matter and I don't really know why I bought this, never know when you might need things

Joystick has Space Harrier type handle which has been used on other cabs like Rail Chase for one, it's quite worn and doesn't really work well but the box it sits on is the interesting part, only trouble was the machine it's off, control panel slopes opposite way, also the box is too big and quite heavy but if I turn it the other way up its about perfect so I did this

481-SWC.jpg


482-SWC.jpg


483-SWC.jpg


Doesn't need to be so wide just for joystick. Had to think about this for ages, sometimes when working on things with angles, it doesn't work out how you thought, wasn't convinced if I cut it at same angle it would be right but worked it out it should be so cut the end off it to get the size needed

484-SWC.jpg


485-SWC.jpg


Angle grinders and the 1mm metal cutting discs are brilliant for this stuff. Also helps with the Make of Grinder, I first bought the typical cheap ones, the casing fell off after a month, so decided the next one will get a proper make so bought Makita, when we built the Games Room we had to get a 9" Grinder to cut the bricks and tiles, was good price and came with diamond blade so bought a 5" Makita as well, nice design and easy to hold compared to some like the cheap aldi which is about twice as big and it makes a difference when cutting things like this, can use it with one hand to start which is handy for some things like when I sharpen drill bits

486-SWC.jpg


Next thing I needed to do was separate the end cap from the part cut off, it's welded in a few places inside but the front corner is all welded so wasn't sure how I could get that off. Also I had to really plan how I'm going to re join it up again, worth thinking about it for a while and working out best plan to save more work later

487-SWC.jpg


Cut the back plate off

488-SWC.jpg


So if I cut the end cap out completely, I would then have to weld metal back up at edge, it wouldn't have the same shape, you wouldn't see it when joystick in place but want it too look original

so decided to remove this top section and leave the top on the end plate

489-SWC.jpg


490-SWC.jpg


491-SWC.jpg


492-SWC.jpg


Oh and while we talk about 1mm grinder discs, the first ones I bought were Blue Spot, lasted good while, I picked up a box from Aldi when they were reduced, I cut up an old car last year and used angle grinder for most, those discs were going down in seconds, thought it may be the thickness of the metal but wasn't, was the cheap rubbish aldi disc that don't last long so not worth buying cheap ones if you get through the disc 5 times faster than good make, Blue Spot were really good

493-SWC.jpg


Used Spot Weld drill to remove one section, didn't even know you could get them till watching Wheeler Dealers, good old Ed. Allows you to drill the top metal without going through to the bottom

494-SWC.jpg


495-SWC.jpg


496-SWC.jpg


The front part that's all welded I drilled along and then cut through with grinder to remove the outer metal, can't find pictures of that part

497-SWC.jpg


498-SWC.jpg


499-SWC.jpg
 

Bods

Senior Member
vacBacker
Feedback
4 (100%)
Credits
4,859CR
Time to remove the paint and weld it, the part I don't like because I'm not very good at it, but all practice I need

500-SWC.jpg


Something else from Wheeler Dealers, Magnets to hold the metal while welding, magnets from Microwave Magnatron

501-SWC.jpg


502-SWC.jpg


503-SWC.jpg


504-SWC.jpg


It's so crap ain't it
smiley36.gif
smiley9.gif
can imagine what a pro welder thinks
smiley11.gif
good job you can grind it off and make it look half reasonable. it was some of my earlier work so I'm getting a little better as I go. lots say it's easier to weld with gas, though that's probably more so on thinner metal, I bought some but not tried it yet

505-SWC.jpg


506-SWC.jpg


Had to cut the hole a bit bigger for the joystick, another problem when testing, if you put the box on the SW Panel and move joystick all way forwards your hand hits on the Plastic monitor surround, so I had to move the Joystick as far back as possible in the box, then I had to reverse the joystick handle so the Pot is at the front instead to get it further back

507-SWC.jpg


508-SWC.jpg


Cut a bigger hole out the front too, thought I did mean to cut it out further to reduce weight

509-SWC.jpg


510-SWC.jpg


Need to make a new top for Joystick to bolt on. These were some speaker stands the girlfriend was dumping, same thickness as original so make use of the metal

511-SWC.jpg


512-SWC.jpg


513-SWC.jpg


514-SWC.jpg
 

Bods

Senior Member
vacBacker
Feedback
4 (100%)
Credits
4,859CR
The Box and Top Powder coated

515-SWC.jpg


516-SWC.jpg


The thing that took the most working out was the how I could you swap over controllers, spent weeks looking at different quick fixings, trying to come up with an idea that keeps it looking almost original when the SW Yoke is on and couldn't think of anything. What you could use on one wouldn't work on the other

Then the Square holes in the RB Controller gave me an idea. The SW has studs welded in where as RB is fixed with Coach Bolts, so I was looking at some of the coach bolts I have from machines taken apart, no idea what these came from now, might of been off the Gamebox quiz machine I took apart

The square fits in the hole on the RB base, also the curved back of it I thought would help with being fitted as there isn't as much area to drag on the metal and it will stay tight fit hopefully

So I cut the tops down to a smaller square bigger than the square at end of threads.

517-SWC.jpg


518-SWC.jpg
 

Bods

Senior Member
vacBacker
Feedback
4 (100%)
Credits
4,859CR
This is what the RB back looked like square holes which was bonus

519-SWC.jpg


Not sure if anyone noticed but I then cut the holes out bigger squares under them for the bolts

520-SWC.jpg


The bottom ones just cut out so it hooks in as not enough metal but makes it easier to fit

521-SWC.jpg


So the idea is it hooks in at bottom and then pushes over the top and slots down

The control panel looks like this, also I gave the panel a clean as it looked quite dull compared to repro artwork, looks much brighter after and not sure if anyone noticed this either but I added a Start Button, debated for a few days if I should do it as I don't like making holes in original stuff, but then it's been butchered enough already and the Switch I've had kicking around for years, it's Omron so quality and is exact size of the mock buttons on the artwork, so decided to go for it, can always weld up hole again along with others if change it anytime

Shame the button isn't Red but blends in quite good

522-SWC.jpg


523-SWC.jpg


524-SWC.jpg


525-SWC.jpg


So that was how it was when I got it before cleaning

060-SWC.jpg


526-SWC.jpg
 

Bods

Senior Member
vacBacker
Feedback
4 (100%)
Credits
4,859CR
It's a bit fiddly getting the SW Yoke through the CP but my plan worked, it did push all the way down, need to adjust bolts since it was painted

Added the washers to CP for 2 reasons, one the coach bolts would of got pulled into the panel holes and not enough gap, also I thought the artwork will be ruined from it being pushed up and down and also helps with it slotting on

527-SWC.jpg


528-SWC.jpg


529-SWC.jpg


530-SWC.jpg


So with the SW Yoke fitting nice and works how I hoped, did think I'd have to have to come up with some sort of lock to hold it in place when slotted on but its find, it pushes on tight and doesn't move, if I made the washers smaller you can't even tell it's not just bolted on as normal
 

Bods

Senior Member
vacBacker
Feedback
4 (100%)
Credits
4,859CR
The Tig Welding looks ace don't it, that's the difference with Raleigh BMX and Mongoose and Diamond back, Raleigh ones must of been mig welded and they didn't even clean it up after, welding on the others is superb

Certainly one of those things you need lots of practice at, Need to get better for the work on cars, huge amount to do on the CRX

To fix the Joystick on the same way I had to come up with another idea, the metal on the back of it's far thinner than the SW Yoke and it needs to be the same, also it's got thick bars top and bottom where it was threaded and bolted to the panel, so only way was to add another plate of metal and have a gap between it for the bolt heads, also this brings the joystick forward a bit more so your hand clears the plastic surround of the monitor more which is perfect.

Hunted around and only bit I could find was the big bar that goes across the front of the Dino cabs with the cut out for the Card Slot which worked out perfect, it was very slightly thicker but after a bit of sanding it was fine, not sure why it was black when the cabs are white or Orange

531-SWC.jpg


532-SWC.jpg


533-SWC.jpg


534-SWC.jpg


535-SWC.jpg


536-SWC.jpg


537-SWC.jpg


538-SWC.jpg


The Joysticks had connectors on them but I need a single one, also this one had some of it missing so used Amp connector from the USB interface and for the joystick as it needs more pins than the SW Yoke

539-SWC.jpg


540-SWC.jpg


The SW Yoke I wanted it wired so it could be used on original machine, then made a convertor with the same Amp connector so just one to swap over

541-SWC.jpg
 

Bods

Senior Member
vacBacker
Feedback
4 (100%)
Credits
4,859CR
So in seconds I can take off the SW Yoke and put the Joystick on
smiley1.gif


Not sure it's a good idea to unplug while its on, or while the USB in connected at least, so I'm thinking of adding USB ports inside Coin door so I can unplug the Interface, swap controller and plug USB back in, probably safest

542-SWC.jpg


Just needs some artwork from the control panel for the Joystick box to make it blend in better

543-SWC.jpg


The shifter is to be left on all the time, one hole I drilled in side of cab on black border for coach bolt, that's the only hole made, the speaker board at bottom of seat had screws each end to fix in place, the wood the screws went in were quick chewed up so I drilled it out a bit and put T-Nuts at the back then used bolts to go through throttle box and speaker board so holds both in place, cable goes under through the gap under the wood so nothing else altered

544-SWC.jpg


545-SWC.jpg


546-SWC.jpg


When I got this machine and it was running After Burner, didn't have sound to try it with but it was pretty good playing it in a Sitdown Machine

So now it can play After Burner, plus any other Flight or Space games that used this setup, Galaxy Force, Thunder Blade, FireFox, Starblade, AB Cop, Air Rescue which I quite like
smiley1.gif
as well as games like Rail Chase and Jurassic Park, Need to sort out the list of games to get running in it, get it all setup properly, get Star Wars working better, with 4 big speakers I prefer playing After Burner in this than on the original Up Right so I'm thinking that may have to go as I need to create space for this, didn't have any space before buying, think I under estimated how good After Burner actually is, was never that high on my list though I would of bought a Deluxe cab if I had endless space, its pretty good and the music is ace now I'm getting to know it

547-SWC.jpg


548-SWC.jpg
 

Bods

Senior Member
vacBacker
Feedback
4 (100%)
Credits
4,859CR
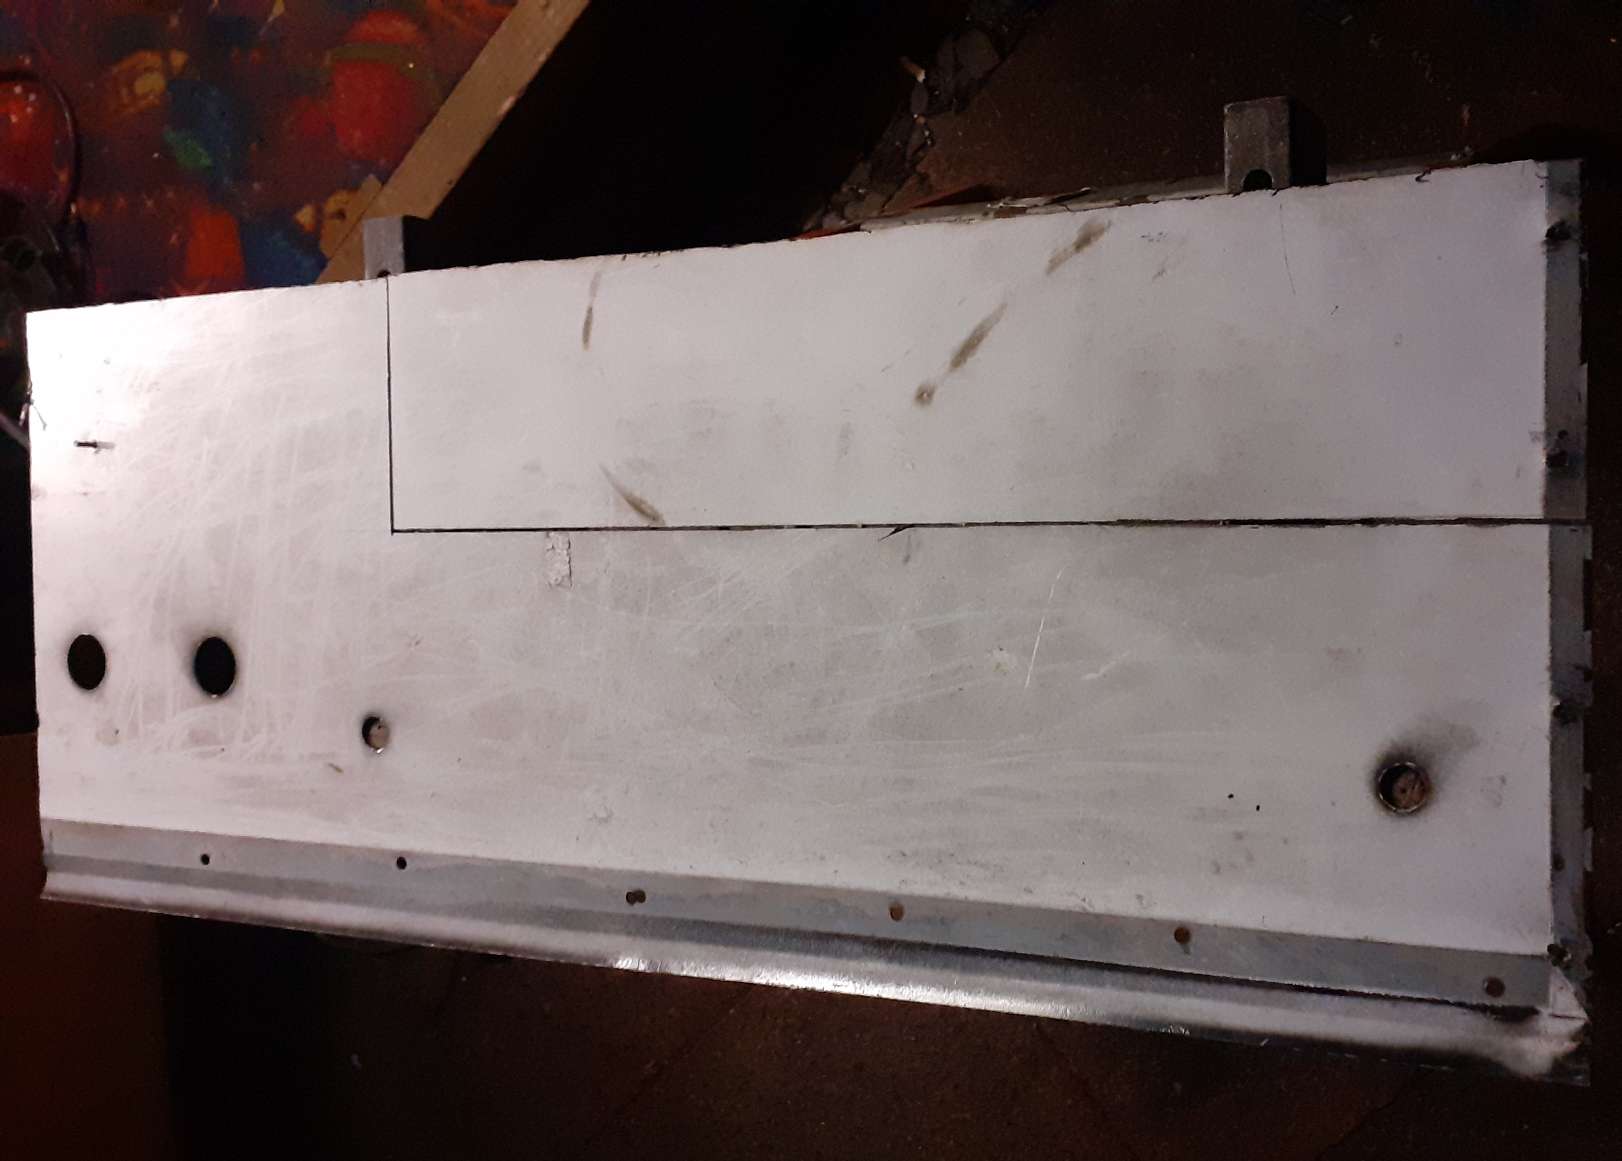
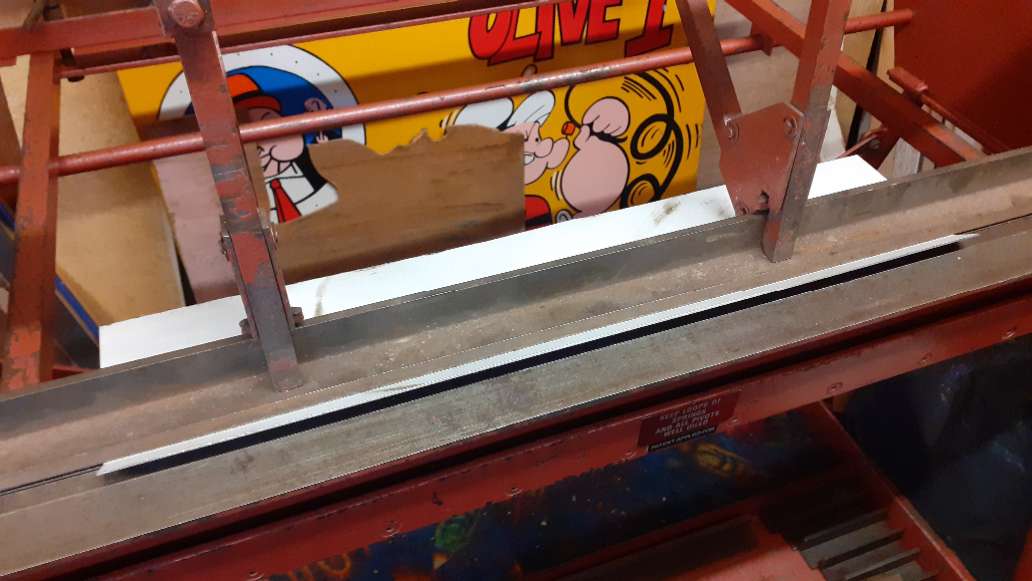
While back I decided to invest in a decent metal folding machine, plenty second hand ones on ebay but not so many when you want Box & Pan one to make boxes which is what I need for quite a few jobs. Found one and just waiting for one to come up, had 3 jobs for it as soon as I got it, make backs for 2 old Honda Signs

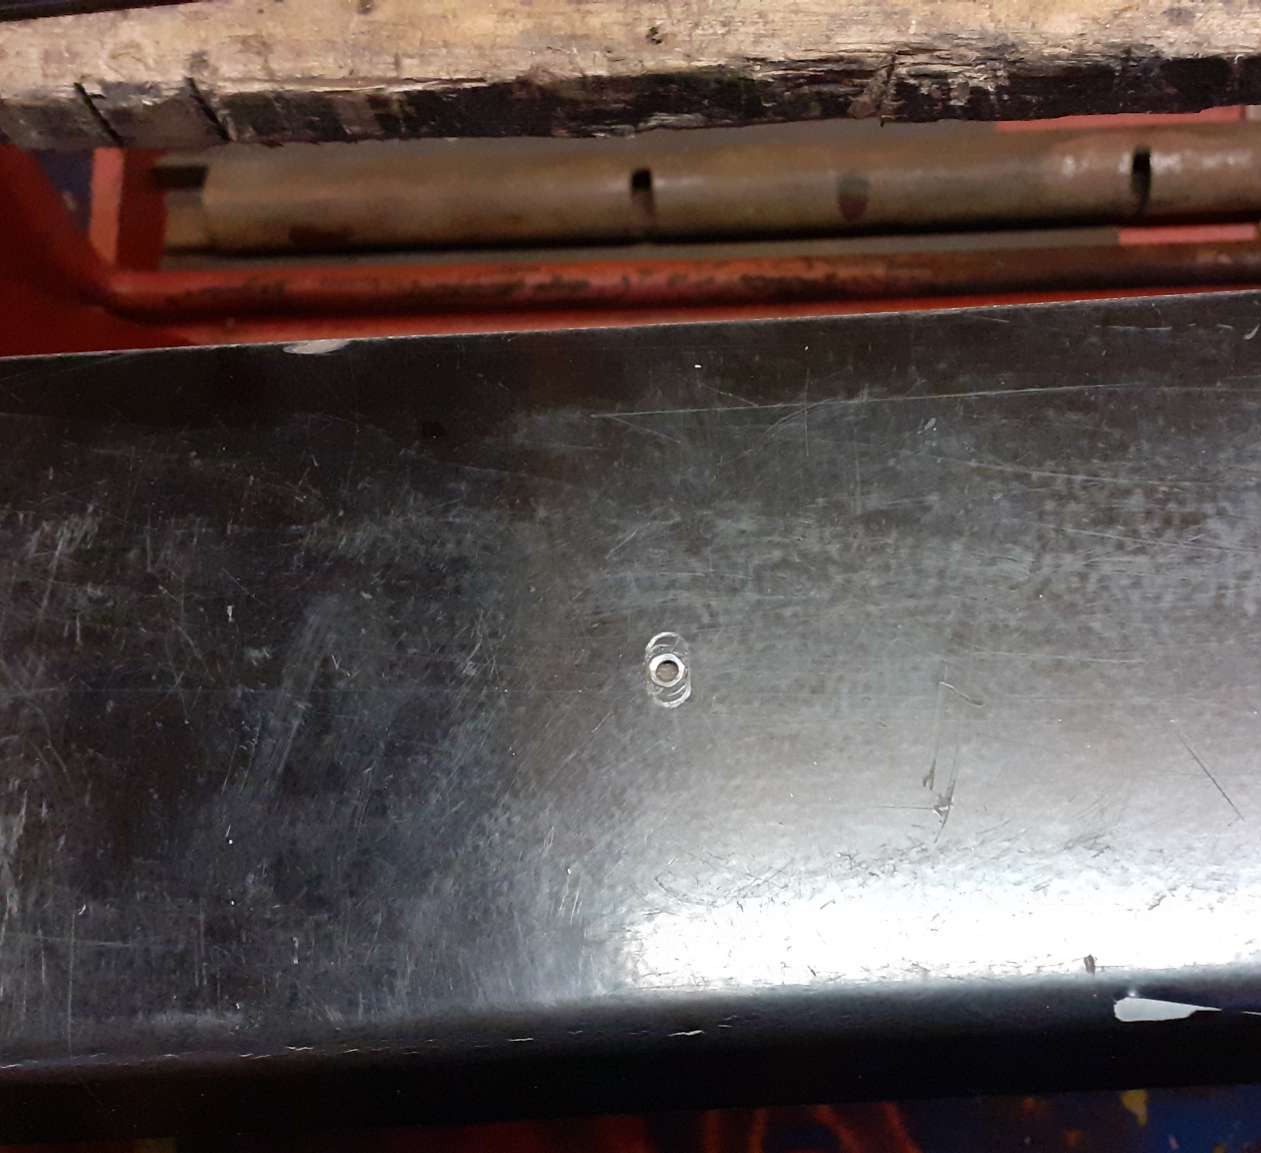
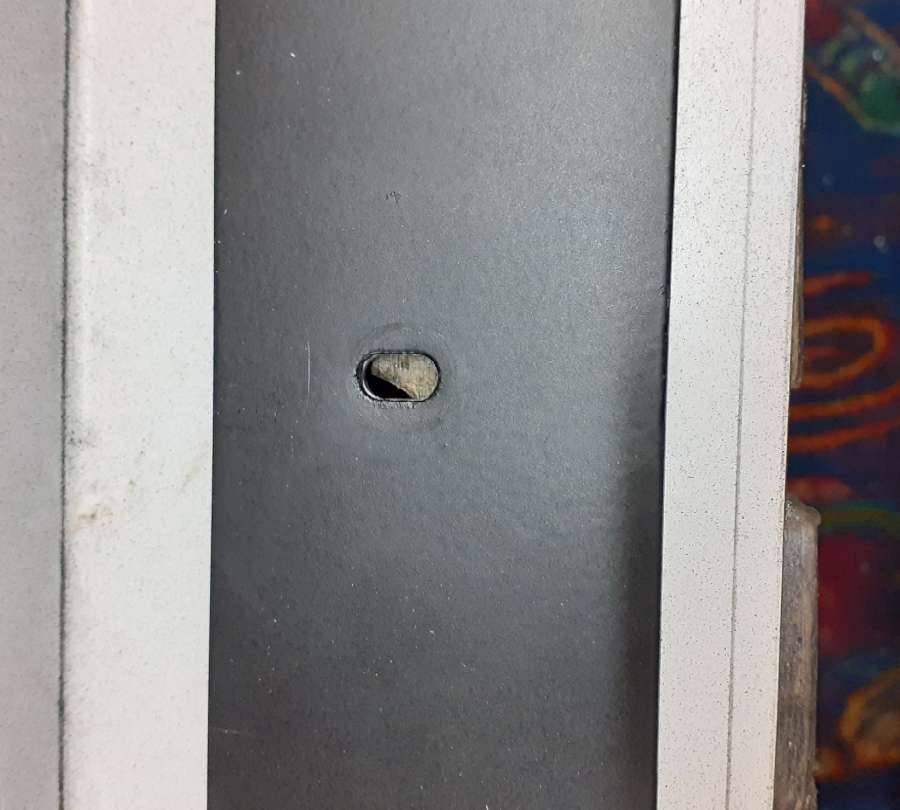
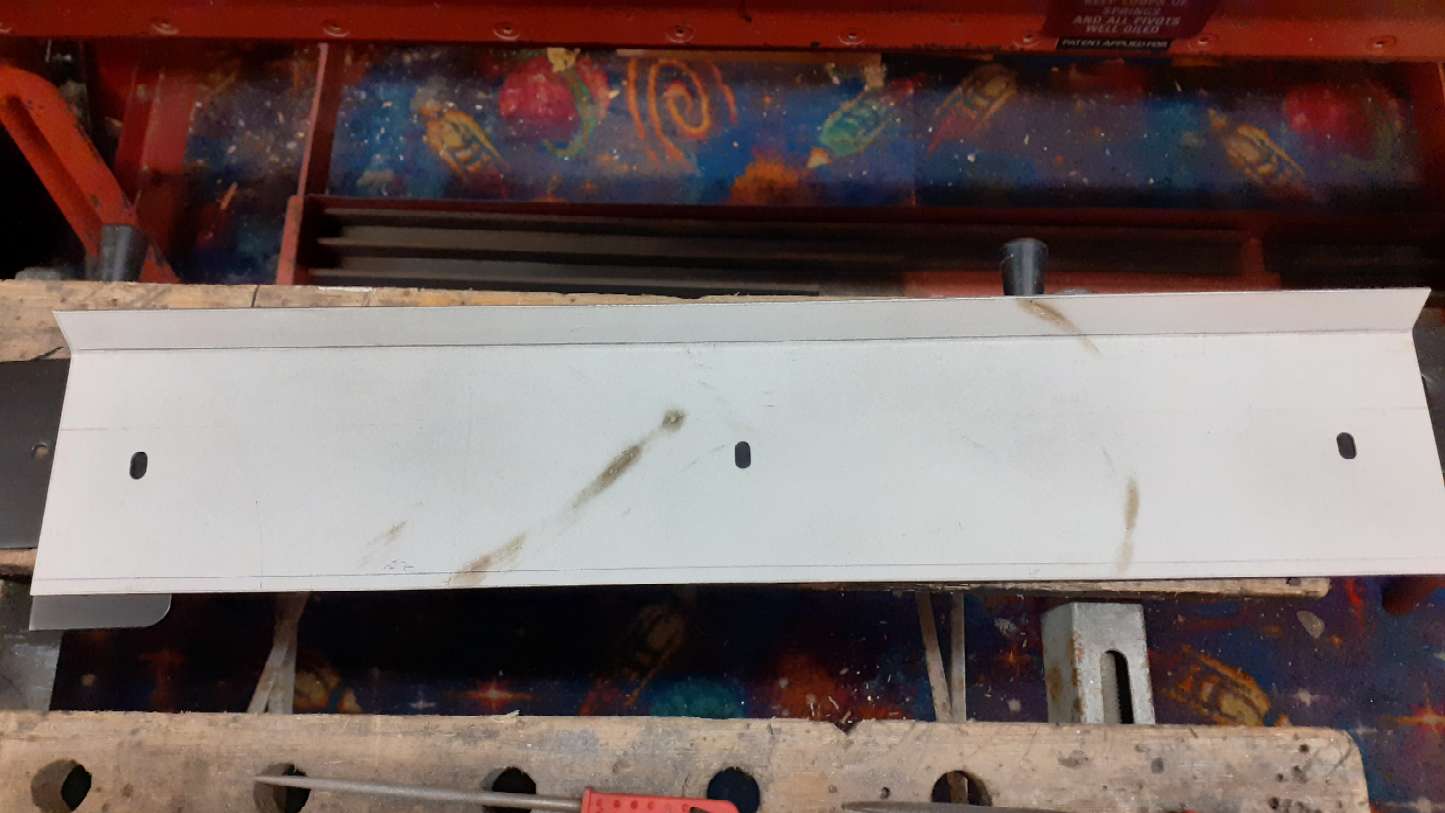
Other was for this Star Wars. couldn't remember when I bought it if there was a Rear Marquee bracket, pics were too poor to see but worked out in end it was missing. only flat bit with one bend, Machine can do 1m wide upto 1.2mm thick steel so cut out some and made one finally.

Used the Roof one to mark out slotted holes, drilled and filed them to align with the holes in wood in goes on. Just needs a quick Sandblast and Paint next

Bracket01.jpg


Bracket02.jpg


Bracket03.jpg


Bracket04.jpg


Bracket06.jpg


Bracket07.jpg


Really like being able to make these things myself, Sure I'll have a load more things to use it on at some point. Like Wheels for Conti Circus Rear section, it has wheels missing and they are nothing like standard ones as they recess into the wood so hopefully can make some copies
 

Vamino

Insert coin(s)
vacBacker
Feedback
22 (100%)
Credits
2,637CR
Nice job mate.

I used to work in a fabrication factory and had access to all those types of machines. If I had the space for a little workshop I'd also be buying stuff like that, I'd probably get myself a little foot operated guillotine as well.
 

Bods

Senior Member
vacBacker
Feedback
4 (100%)
Credits
4,859CR
Cheers mate

Couldn't find one to buy anywhere, probably wouldn't cost to much to have someone make it but issue is not having one to copy, so case of making it to fit and trimming down, which is much easier yourself

Would love a full workshop of equipment, guillotine would be ace, have to make do with Angle Grinder, Files, Drills but does the job. When I've shifter more stuff in my way might look at some other machinery

Will be able to make New Speaker grill and Coin box door for Crossbow now. Can make Boxes, Box Section, Radius bends and Tubes
 
Top