Universal Cosmic Guerilla Cocktail Restore

Flinnster

The Dino King
vacBacker
Feedback
29 (100%)
Credits
2,566CR
Picked this one up at the weekend. Hope to save it and make it into a nice little single button space invaders multi-table (and for any other vertical 2-way stick, 1 button games).

unicgtable.jpg


First thoughts:

- Legs won't be just a chrome job sadly. Looks like they have collapsed at the base, so will need welding
- Missing coin box (ain't they always?), and missing a lock from the side access door.
- All the lower box grilles seem to be missing?
scp-ajax-loader.gif
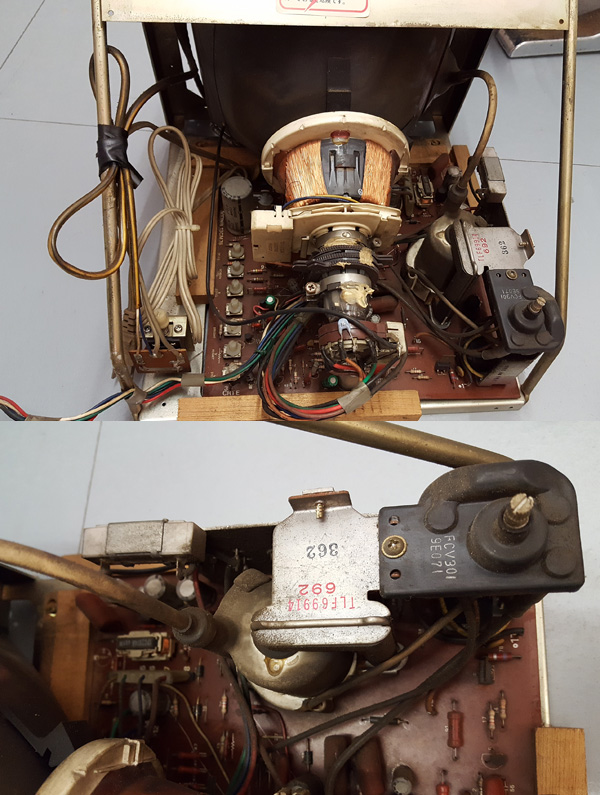
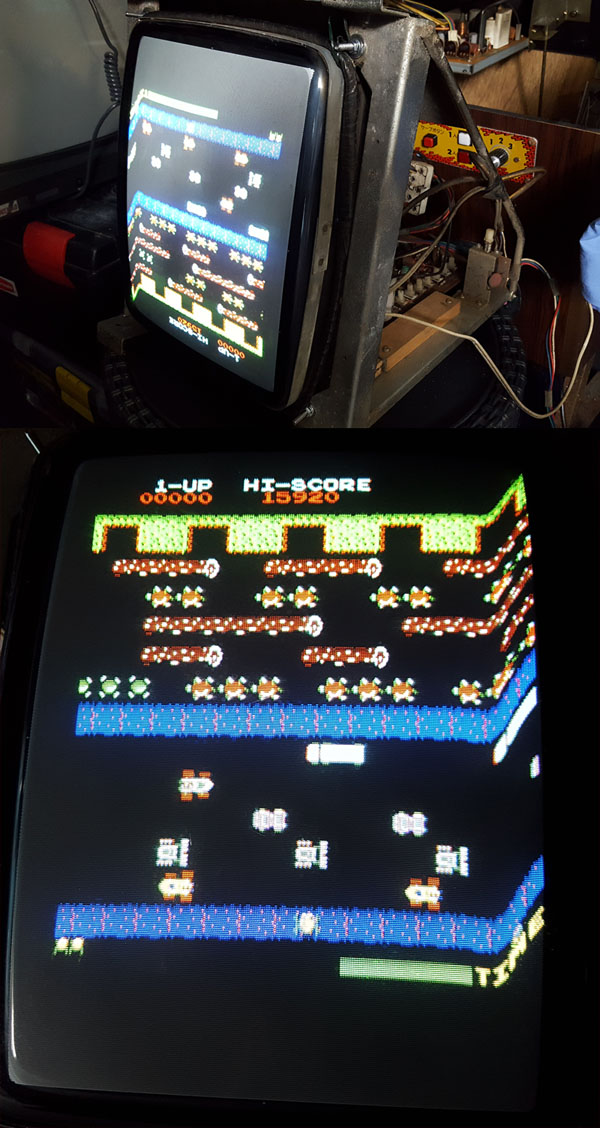
Need to see if I can get the monitor working
as it was removed to make way for a flat panel. It's a Sanwa 13CM76 chassis, and appears to be colour - it has RGB, ground and sync wires going to the neck anyway
scp-ajax-loader.gif
No ISO or switcher (Need a 240-100V iso transformer for the monitor)
yes.gif
Tube looks almost burn-free

- Monitor bezel is missing.. looks like a teeny 13" monitor in these things?
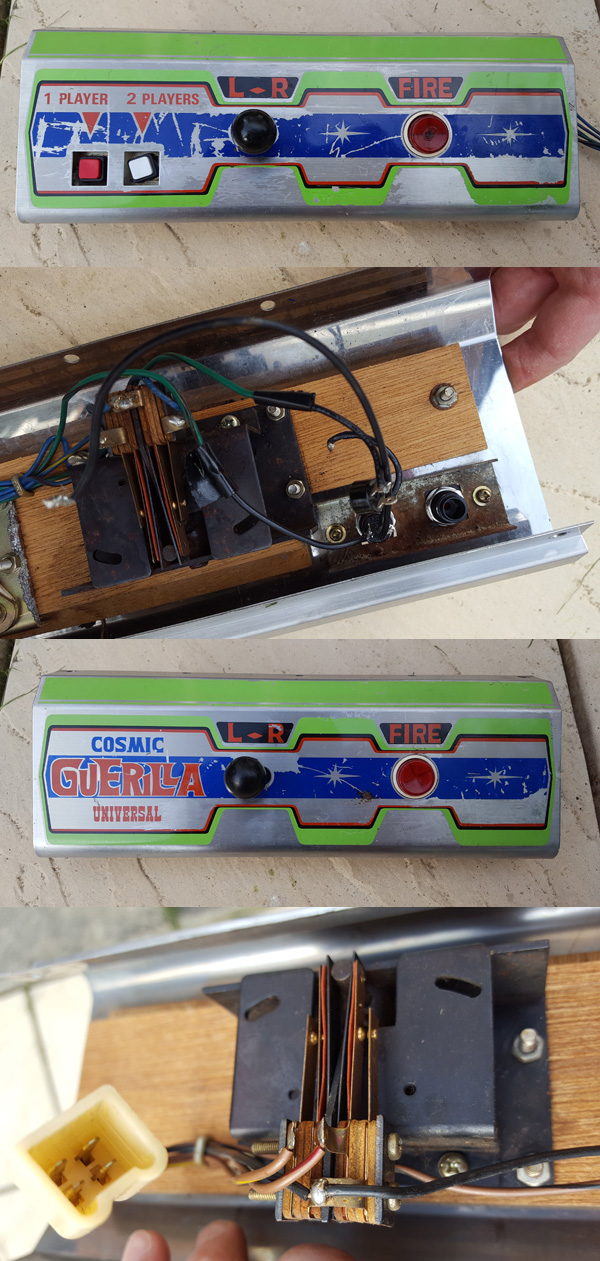
- Control panels seem OK but some of the paintwork is scratched (might leave, or maybe paint in the scratches?)
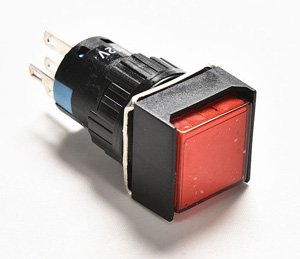
- Player 1's fire button has a fag butt burn in the middle of it, and one of the square player start buttons is missing the innards (switch mech and bulb).
- Need to try and source wood-effect t-molding..
- Glass and clips for the top totally missing (I guess the red border on these tables was printed / painted on the glass itself?

Has anyone got a manual scan for any Universal cocktail? Might help me figure out the sizes of certain parts (plenty of bolts missing around the monitor frame and cab in general).

Stuff to do:
yes.gif
Get the monitor tested, see if it fires up or just burns

scp-ajax-loader.gif
Get an internal 100v Jap spec ISO transformer for the monitor

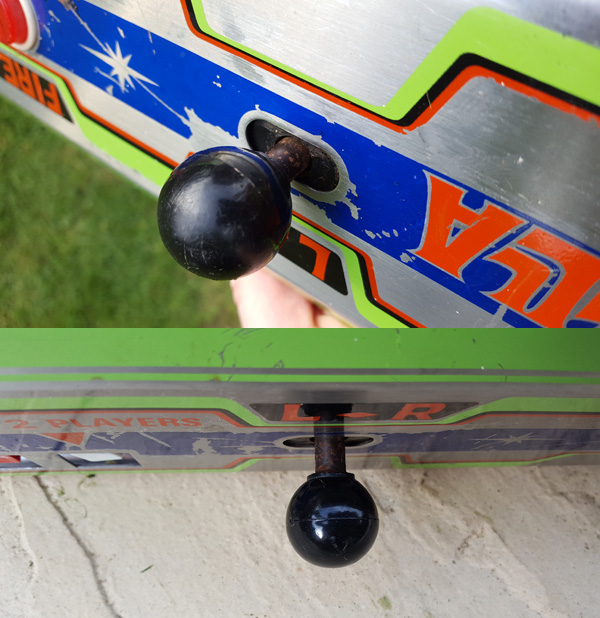
- Strip the joysticks, treat the rust + respray shafts black
- Novus the balltops
- Treat the CP rust on mounting parts
- Fit new start buttons
- Figure out replacement P1 fire button
- Wire up the coin mech / reject button switch for coin1
- Get legs welded + rechromed / pow coated
- Get repro glass cut for the top
- Find unobtainium corner glass clips, or repros
- Find monitor bezel / surround (13"?)
- Try to find flat wood effect 3/4" T-molding... or failing that.. just use brown?
- Figure out what to do with grille holes in the base? Spray mesh black + mount on inside?

Flinnster2019-07-31 01:31:57
 

philmurr

Active member
vacBacker
Feedback
46 (100%)
Credits
2,310CR
Flinnster said:
- No ISO or switcher (no idea if the monitor needs an ISO.. most likely?)

Has anyone got a manual scan for any Universal cocktail? Might help me figure out the sizes of certain parts (plenty of bolts missing around the monitor frame and cab in general).

Pretty sure it will need an isolation transformer. The original transformer in the game was a custom multi-tap and had lots of different voltages including 100/110V output

A pretty detailed service manual is here https://www.arcade-museum.com/manuals-videogames/C/CosmicGuerilla.pdf
 

Flinnster

The Dino King
vacBacker
Feedback
29 (100%)
Credits
2,566CR
Cheers fellas! Yep thought as much for the ISO!

Thanks for the manual link Phil.. love the way the monitor is referred to throughout as 'the TV'
smiley36.gif


(On the penultimate page of the manual schematic I can see 100v in to 'the TV' so that's cool!)

Flinnster2019-05-20 10:04:48
 

Flinnster

The Dino King
vacBacker
Feedback
29 (100%)
Credits
2,566CR
Another sunny weekend so started looking at a few bits on this one.

So first of all the loom. Sadly butchered by the previous owner -
they'd hardwired the controls to a bit of breadboard that had a pi GPIO
breakout soldered on it. Thankfully they'd not completely ditched the
interconnecting plugs so I could at least work out what was supposed to
be what.

01-loom.jpg


Given there's no original Universal power area stuff in the cab, and that I intend to make this a multi space invaders cocktail (even more now it seems the monitor is colour), I bit the bullet and rewired the loom to be Jamma.

Even though I don't have the monitor up and running yet, this means I can easily wire up switcher, controls, speaker, and then test everything using a link loom I use for connecting the cabinets at events - which allows me to run the RGB out to one of the dino kings.

Job done - the barebones wiring all works well and I was using a jammypi homebrew board to play Galaxians and Invaders without too much fuss, and the speaker doesn't sound too fluffy.
So the connectors and controls are almost intact. Cool.

02-cps.jpg


The CPs almost work fine, although naturally player 1 side is battered compared to the player 2 side and is lot more clunky. I need to dismantle the leaf joysticks and see what I can improve - at worst case I could simply swap stick and button over to the player 1 side if I can't get the p1 side working better.
The fire buttons oddly look to be semi-transparent red plastic but it doesn't seem like there was any light mounted behind them (there's a large lump of leaf metal in the way I suppose).
I haven't yet managed to find obvious replacements (the player1 side has the fag burn on it) - certainly not in the same colour of transparent red plastic.

Now the player 1 & 2 start buttons.. what a mess. The innards of one is missing and the wires have again been butchered. Original buttons are long gone anyway (they would have looked a bit like 1970's keyboard keys), these are arcadeworld 14mm buttons that have been fitted in the 19mm square holes. Sigh
smiley13.gif


Had a bit of a search, and the best 'modern' replacement I could find were 19mm square 'lit' buttons that fit 16mm mount holes (I dont necessarily have to connect the lamps).

04-starts.jpg


The holes in the mount block here are 14mm, so I may have to do some creative button filing/dremmel-ing to get them to fit, we shall see when they arrive. The mount block is pretty rusty too, so that'll likely see some diet coke or white vinegar at that point.

03-sticks.jpg


The paintwork on the panels is original but seems someone went to town with a key on the p1 side. There are a fair few battlescars on both sides though. The remaining original paint is quite 'textured' and perhaps not that hard to remove - if I did repaint the cracks, it would need a transparent cover of some sort to protect all of it.

Both joystick shafts are rusty, so it should be easier to remove those and give them a treatment and respray black. The joystick balltops just need a bit of a polish with Novus and should come out OK I think.

05-crt.jpg


The monitor currently has no mounting bolts at all for some reason, so I'm waiting on some washers to arrive and then I can at least move it about safely without screwing the tube up!
Then I'll try to see if I can get it powered up using a Japanese spec stepdown - the chassis actually has a standard white Japanese mains plug on it.
Or maybe I'll wait until there's someone more experienced than me who can help with this part.
I have zerrrooo experience with 1970's CRT stuff!
smiley36.gif


Finally I tested the coin counter .. which is rated at 6v. It clacks away nicely and counts up with a 5v pulse just fine. But.. it's probably going to be a bit pointless for this multi-game project, because the JPAC used on the jammypi doesn't fire out counter pulses.
So if anyone needs a 6v coin counter? It could be available!
smiley1.gif


Flinnster2019-06-02 00:48:57
 

Flinnster

The Dino King
vacBacker
Feedback
29 (100%)
Credits
2,566CR
Bit of an update! With the loom rewired to jamma I'm able to power up and output RGBS & audio, and connect up the control panels.
I've sourced reasonable bolts and washers to fix the tube to the frame again, and with Smarty's help we got the old monitor fired up and it's looking very promising.

A little unbalanced on the colours and the horizontal coil appears to be waay off to one side (helpfully located right under the neck so hard to adjust) - but it only ruddy works.. and first time, and has no burn!

monitor-first-test.jpg


We got this going by plugging it into Smarty's cocktail that has a 100v step-down inside it, so now I know that the CRT lives, I need to source my own internal-cab 100v step-down so I can start getting the base of the cab in shape.
Ideally I'm looking for one with a Japanese socket connection for the output, given the monitor just has a standard Jap mains plug on it's power cable.

Sadly progress has gone nowhere on the control panels.
Beware the ebay seller of square switches that look like these:
04-starts.jpg


Now, if you search for "16mm square switch button" on ebay, you'll see tons of these identical stock image sales items appear. All from different sellers - but if you look closer you'll see they are all in China with random character names, and they all take 46 days or more to deliver.
Or rather.. they are all the same seller.

I waited 2 months and got nothing in the post.. the tracking was fake and just said 'Malaysia Post Despatched'. Of course, once you raise a complaint and wait the time for ebay to actually do anything about it, 60 days have elapsed and you have no time left to get your refund!
I've contacted my credit card company to try and reclaim the cash, even if it's just a few quid.
And I'm left still needing to source some square red start buttons that are 19mm at the front, but narrower (16mm or less) on the mounting plate behind.

I also need to rig up some kind of service panel as even doing a basic monitor tests were a pain with no test or service buttons to get any grids or colourbars up!
 
Top