Discs of Tron environmental restoration

Phils Arcade

Senior Member
vacBacker
Feedback
9 (100%)
Credits
1,384CR
Where you get your swatches?
Those swatches are real expensive, even older ones on eBay. I've been looking for a set for ages.

Did spot a few pure white light colour eyes/analysers, that can scan a colour using white light and give you its closest Pantone colour, or any number of other colour types. Not sure what the cheaper AliExpress ones would be like though.
 

Phils Arcade

Senior Member
vacBacker
Feedback
9 (100%)
Credits
1,384CR
Gave the chassis a rinse. I'll give it another clean with water and washing up liquid before sun drying it then sending it off for servicing.

The horizontal width coil plastic gave up and snapped so it will need at least a new one of those.

Nice to see this.

When washing boards, or in an ultrasonic tank, I'd dry off and then fire the air line at it, air, not the actual line, lol. This helps to remove any trapped water in coils, under ICs etc...
 

Alpha1

Do the Shake and 'VAC
Staff member
vacBacker
Feedback
91 (99%)
Credits
5,279CR
Those swatches are real expensive, even older ones on eBay. I've been looking for a set for ages.

Did spot a few pure white light colour eyes/analysers, that can scan a colour using white light and give you its closest Pantone colour, or any number of other colour types. Not sure what the cheaper AliExpress ones would be like though.

I have been looking at those as well, i did during this restoration but decided against getting one as I was advised by @Dex-Jay only the expensive ones are any good.
 
Last edited:

Alpha1

Do the Shake and 'VAC
Staff member
vacBacker
Feedback
91 (99%)
Credits
5,279CR
Nice to see this.

When washing boards, or in an ultrasonic tank, I'd dry off and then fire the air line at it, air, not the actual line, lol. This helps to remove any trapped water in coils, under ICs etc...

The monitor removal was over the warmth of the summer of 2022 so I left it in the garden in the sun to dry. It then went off to @gunblade to be made beautiful.
 

Alpha1

Do the Shake and 'VAC
Staff member
vacBacker
Feedback
91 (99%)
Credits
5,279CR
Pulled my NOS floor decal from storage and unfortunately it's slightly delaminated. However they are unobtainium so it will do until they're reproduced.

It applied well.
 

Attachments

  • IMG_20220512_211116.jpg
    IMG_20220512_211116.jpg
    143.2 KB · Views: 13
  • IMG_20220512_165205.jpg
    IMG_20220512_165205.jpg
    135.9 KB · Views: 14

Alpha1

Do the Shake and 'VAC
Staff member
vacBacker
Feedback
91 (99%)
Credits
5,279CR
The metal step protectors were pretty rusty so I removed them to work on later. Today after work I decided to tackle them.

I used a drill with a brass metal rust remover wheel to clean them up. They look pretty good now but I'll finish them off Monday when my metal polishing buffer arrives.

I also cut the new carpet out ready to install hopefully at the weekend as my heavy duty stapler has arrived.

Many thanks to @lespotts for sending me some carpet 😍😍👍
 

Attachments

  • IMG_20220513_205821.jpg
    IMG_20220513_205821.jpg
    73.3 KB · Views: 13
  • IMG_20220416_120357.jpg
    IMG_20220416_120357.jpg
    92.6 KB · Views: 9
  • IMG_20220513_195623.jpg
    IMG_20220513_195623.jpg
    130.7 KB · Views: 6
  • IMG_20220513_195637.jpg
    IMG_20220513_195637.jpg
    188.1 KB · Views: 8
  • IMG_20220513_203531.jpg
    IMG_20220513_203531.jpg
    89.5 KB · Views: 8

Alpha1

Do the Shake and 'VAC
Staff member
vacBacker
Feedback
91 (99%)
Credits
5,279CR
Goodbye super old smelly fart carpet. 🤢🤢🤢🤢🤢

You're going in the bin pronto. Honestly it absolutely stinks. 💩💩💩

New one installed and looks and smells delicious 😍😍😍
 

Attachments

  • IMG_20220508_113122.jpg
    IMG_20220508_113122.jpg
    218.6 KB · Views: 6
  • IMG_20220514_203433.jpg
    IMG_20220514_203433.jpg
    51 KB · Views: 6
  • IMG_20220514_203422.jpg
    IMG_20220514_203422.jpg
    83.7 KB · Views: 8
  • IMG_20220514_204809.jpg
    IMG_20220514_204809.jpg
    70 KB · Views: 9

Alpha1

Do the Shake and 'VAC
Staff member
vacBacker
Feedback
91 (99%)
Credits
5,279CR
As I start to try and finish off the rear section I'm working on the rear metal marquee sectional pieces. They're all a bit crap so started to strip them ready for painting.

Normally I would powder coat but they were literally just painted black so I'm honouring the original finish. Some other parts like the coin door will need to be powder coated.
 

Attachments

  • IMG_20220515_182345.jpg
    IMG_20220515_182345.jpg
    188.7 KB · Views: 7
  • IMG_20220515_175719.jpg
    IMG_20220515_175719.jpg
    189.2 KB · Views: 3
  • IMG_20220515_182552.jpg
    IMG_20220515_182552.jpg
    183 KB · Views: 2
  • IMG_20220515_182819.jpg
    IMG_20220515_182819.jpg
    162.8 KB · Views: 3

Alpha1

Do the Shake and 'VAC
Staff member
vacBacker
Feedback
91 (99%)
Credits
5,279CR
Finished the metal work on the step over bit.

I decided against a mirror polished finish and more of a factory feel.

I'm amazed at how they turned out, in comparison to how rusted they were.

Before
Screenshot_20220517-141940_2.png


After
IMG_20220516_214744.jpg
 

Attachments

  • IMG_20220516_174255.jpg
    IMG_20220516_174255.jpg
    115.7 KB · Views: 3
  • IMG_20220516_214906.jpg
    IMG_20220516_214906.jpg
    82.1 KB · Views: 5

Alpha1

Do the Shake and 'VAC
Staff member
vacBacker
Feedback
91 (99%)
Credits
5,279CR
Did some paint tests yesterday. It appears to be a good match for the original paint so I'll clearcoat it once I've primed and
painted the others.
 

Attachments

  • IMG_20220518_181108.jpg
    IMG_20220518_181108.jpg
    130.6 KB · Views: 1
  • IMG_20220518_201433.jpg
    IMG_20220518_201433.jpg
    72.9 KB · Views: 2
  • IMG_20220518_181658.jpg
    IMG_20220518_181658.jpg
    86.1 KB · Views: 4

Alpha1

Do the Shake and 'VAC
Staff member
vacBacker
Feedback
91 (99%)
Credits
5,279CR
All external metal work now painted.

It was all stripped to bare metal, then primed, painted and clear coated using Rustoleum products.

Just waiting for some replacement NOS screws to turn up.
 

Attachments

  • IMG_20220523_200445.jpg
    IMG_20220523_200445.jpg
    118.6 KB · Views: 5
  • IMG_20220523_200819.jpg
    IMG_20220523_200819.jpg
    142.6 KB · Views: 5

Alpha1

Do the Shake and 'VAC
Staff member
vacBacker
Feedback
91 (99%)
Credits
5,279CR
Cleaned up the rear fluro units in preparation for installing the glass artwork.

BeforeIMG_20220523_201145.jpg

After
IMG_20220523_204358.jpg
 

Attachments

  • IMG_20220523_201154.jpg
    IMG_20220523_201154.jpg
    73.8 KB · Views: 3
  • IMG_20220523_202909.jpg
    IMG_20220523_202909.jpg
    80.6 KB · Views: 2
  • IMG_20220523_204123.jpg
    IMG_20220523_204123.jpg
    101.5 KB · Views: 2
  • IMG_20220523_202533.jpg
    IMG_20220523_202533.jpg
    66.5 KB · Views: 5

Alpha1

Do the Shake and 'VAC
Staff member
vacBacker
Feedback
91 (99%)
Credits
5,279CR
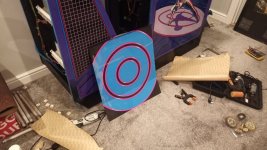
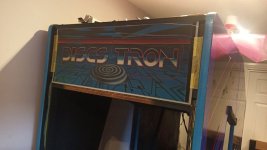
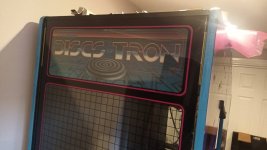
EDOT glass is notorious for flaking. In fact quite a lot of early videogame backglass will flake and lift if stored in humid or poor conditions.

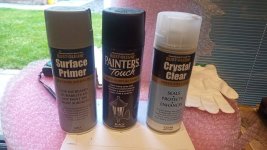
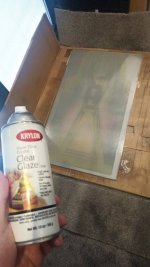
Triple thick is used to fix where possible this issue or to prevent it from happening on good condition backglasses. I had never done this before so here goes..

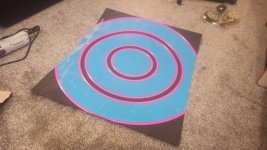
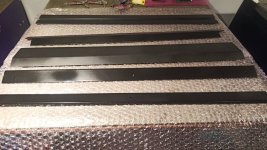
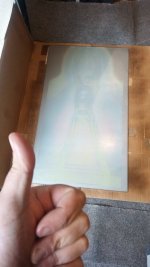
So after a successful test on the flaked backglass (it didn't turn to ash..), I've just used my lunch hour to spray the good one.

I did three coats in total. Each coat consisting of one horizontal spray, one vertical, and then horizontal again.

First two coats 5 minutes apart and third coat 45 minutes later.

As luck would have it, it started raining as I put on the first coat so I had to pull the doors closed, however I recommend masking up even if there's sufficient air flow.

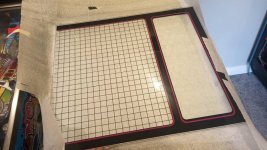
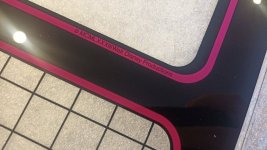
Wait till tomorrow now before touching it.
 

Attachments

  • IMG_20220525_104513.jpg
    IMG_20220525_104513.jpg
    57.7 KB · Views: 8
  • IMG_20220525_105150.jpg
    IMG_20220525_105150.jpg
    50.7 KB · Views: 8

Alpha1

Do the Shake and 'VAC
Staff member
vacBacker
Feedback
91 (99%)
Credits
5,279CR
I bought a set of rear topglass and a new bezel glass from Phoenix Arcade.

IMG_20220525_205014.jpg

And I started putting the back end back together.

IMG_20220525_210643.jpg
 

Attachments

  • IMG_20220525_205250.jpg
    IMG_20220525_205250.jpg
    145.7 KB · Views: 6
  • IMG_20220525_205300.jpg
    IMG_20220525_205300.jpg
    100.5 KB · Views: 2
  • IMG_20220525_205822.jpg
    IMG_20220525_205822.jpg
    71.8 KB · Views: 3
  • IMG_20220525_210243.jpg
    IMG_20220525_210243.jpg
    75.8 KB · Views: 6

Phils Arcade

Senior Member
vacBacker
Feedback
9 (100%)
Credits
1,384CR
I bought a set of rear topglass and a new bezel glass from Phoenix Arcade.

View attachment 1068

And I started putting the back end back together.

View attachment 1069
Are those fluorescent tubes, or led ones? I tend to find the LEDs too bright in a lot of cases. Don't get me wrong, in some machines they really make the machine shine, and I think, this meant to be futuristic, an LED version might be grand.
 

Alpha1

Do the Shake and 'VAC
Staff member
vacBacker
Feedback
91 (99%)
Credits
5,279CR
Are those fluorescent tubes, or led ones? I tend to find the LEDs too bright in a lot of cases. Don't get me wrong, in some machines they really make the machine shine, and I think, this meant to be futuristic, an LED version might be grand.

Original T8 replacement tubes
 
Top