Today I did this to my cab...

smarty

Ready Player One
vacBacker
Feedback
12 (100%)
Credits
1,292CR
Not today, but yesterday afternoon I sorted an issue that's been bugging me for awhile now... One of the speakers on my Pole Position cab has always played up, with either very low or no audio, having sorted a bit of space, I set about getting to the bottom of the issue. The PP cab has two ARII psu/amplifiers. The top speaker runs off of one and the lower of the other.

Because my Pole board isn't working (Nothing new there then!) I made up an adapter to plug into the existing harness which had a 3.5mm jack for each of the audio outputs which the board would usually provide. I used my phone to play audio into the amplifiers and after various cable swapping of speaker connectors and audio inputs confirmed that one of the ARII's wasn't outputting any sound.

I then got the ARII schematics out from the PP set (sheet 3B) and proved all the resistors were in spec. The electrolytic caps have been replaced so I didn't even look at those. I proved the TDA2002 amplifiers had supply voltage and ground connection and then went for the shotgun approach and swapped both. I could have gone about checking the signals going in and then back out, but I had the spares already so got on with it. New TDA's fitted and the audio is working like a treat. Fixed! This is another little fault that's been hanging around for a while, which I can now cross off my list.

PP_Audio_Test.jpg
 

cosine

Active member
vacBacker
Feedback
14 (100%)
Credits
595CR
Also yesterday, I decided to rewire the mains in my 240v converted New
Astro City. Dear god what I mess. This is the cabling I pulled from it,
looks like someone was running a PC in it at some point, or at least, I
hope that's what they were doing.
smiley5.gif


iX1dDYB.jpg


Next on the list is the JAMMA loom, as it has spade connectors attached to some of the pins
smiley36.gif
 

smarty

Ready Player One
vacBacker
Feedback
12 (100%)
Credits
1,292CR
Cosine: You can't beat a bit of insulation tape to join mains cable together. Lovely!

Today I fitted two new edge connectors. The pins in the Fire truck Connector were not making good contact with the board, they were going rusty and didn't provide good resistance to the PCB. I was getting intermittent faults and squeezing the connector would fix them for a short period. Those issues have now gone.

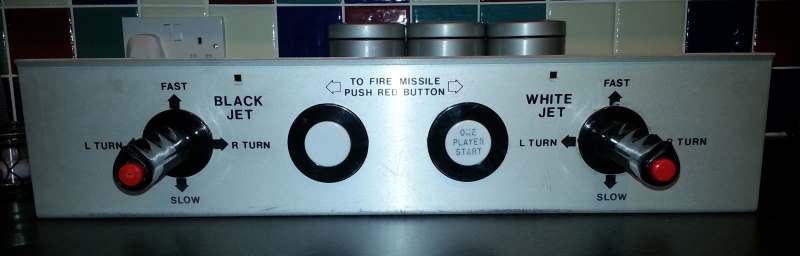
The Edge connector for the Jet Fighter was broken in a few placed as you can see, It did work OK, but this is a good long term fix to minimize future issues.


I was also going to fit a speaker into my Pole Position cab, but decided to put my finger through the cone before It got anywhere near being fitted. Doh!


grobda

"Look at the size of that thing!"
vacBacker
Feedback
7 (100%)
Credits
1,061CR
so... my jamma cab had been gradually losing power on the 5v line, i thought it was the psu so bought a hantarex us250 to replace the us150 thinking it would be a straight swap.

no such luck - they both use a 9 pin molex to output to the pcb; but they dont share the same pinout. cue some prising recalcitrant pins out of a molex connector.

so i do all then then fire up a pcb and get 400mv on the 5v line. checked the wiring and I have no continuity between ground at jamma and ground at the psu. this is a cab that had been previously working.. and i was using the same wiring just with a different psu.

scratched chin and investigated the wiring. found numerous splices and mystery wires so decided to strip out the power wiring just leaving the monitor speaker and cp wiring. harvested all the excess wiring and made up a shorter power loom.

bingo cab works but monitor is now shimmering. suspect interference from the PSU. put the old US150 psu back in and hey presto it works, and can supply the hungry pcbs it was failing at supplying before now that the loom is sorted.

so the 5 minute job took an hour and a half. a learning experience :)
 

Milky

Moderator
Staff member
vacBacker
Feedback
16 (100%)
Credits
994CR
Nice, easy win this morning. To stop the floor nibbling away at the bottom edges of Burgertime while in it's temporary (dining room) home, I gave it some nice new feet and set the height so it's just floating. Being Teflon, it now glides a bit better and will stop the flaking getting worse


Two second job.
 

smarty

Ready Player One
vacBacker
Feedback
12 (100%)
Credits
1,292CR
I've been working on my Jet Fighter CP today, I completely stripped it down, cleaned it all up and replaced the missing fire button with a temporary bit of plastic from another stick I had. It's not a perfect fit or shape, but it make the 2 player controls fully usable. I also replaced five crimp connectors from various switch position that had broken and been soldered or looked like they were just break.

I don't think you can really see the difference in the photo's but its certainly improved the shine on the aluminium, and the edges of the buttons have lost their grime.

BEFORE:

jf_cp1.jpg


DURING:

jf_cp2.jpg


AFTER:

jf_cp3.jpg
 

smarty

Ready Player One
vacBacker
Feedback
12 (100%)
Credits
1,292CR
EC_CP.jpg


I fitted a new repro CPO (from muddymusic) to replace the tape that had been used to cover the control panel. I rewired all the joystick & button connections. It looks great!

I need to get some new blue & red buttons and a red EC stick but what I have will do until I get the cab fully working.
smarty2014-06-07 21:31:38
 

smarty

Ready Player One
vacBacker
Feedback
12 (100%)
Credits
1,292CR
I did some monitor investigation work tonight, I've got a couple of W&G K7000 chassis that I planned to put some new Electrolytic caps in and discovered the LOPT's were in a bad away. The chassis does work but it looks like its been saved from imminent failure. Both chassis have similar LOPT issue.

K7000_LOPT.jpg
 

smarty

Ready Player One
vacBacker
Feedback
12 (100%)
Credits
1,292CR
Another day, another bit of tinkering...

Today I made a cardboard monitor surround for my Pole Position. I didn't have a template so made it up as I went along. Its not perfect but looks better with, than without! Shame the gameboard is freaking out. AGAIN
smiley19.gif


2014-07-13+13.40.49.jpg


2014-07-13+16.08.15.jpg


2014-07-13+16.15.32.jpg


smarty2014-07-13 19:53:43
 

smarty

Ready Player One
vacBacker
Feedback
12 (100%)
Credits
1,292CR
Angles...Luck, guesswork, making up as I went really, slowly marking up the card with it in position then cutting, I did cock up the top piece and only realised once I'd glued it all together! So I had to remake that part.
 

smarty

Ready Player One
vacBacker
Feedback
12 (100%)
Credits
1,292CR
These last few evenings I've been trying to finish any paintwork that I'm going to be doing this side of winter, I've got two lots of painting on the go but this one is finished. It's the Coin door for my Atari Jet Fighter and it's turned out very nice.

This is the only part of the cab that I've had to spray. All the other metal cab parts were anodised black (I think that's the correct term) and have cleaned up good too with just a wipe over. I didn't want to go painting everything, the cabs in a good enough condition and being 39 years old I didn't want to butcher it up when it wasn't necessary.

Before

JF_CoinD_Before1.jpg


JF_CoinD_Before2.jpg


After

JF_CoinD_After1.jpg


JF_CoinD_After2.jpg
 

smarty

Ready Player One
vacBacker
Feedback
12 (100%)
Credits
1,292CR
Hi ya,

Usually my spraying goes something like this...

*Wash original pieces in the sink and annoy the wife :)

*Manual &/or electric sand depending on what the piece is

*I use Rust-Oleum direct to rust primer which is Matt black for the first coat. (found in some B&Q or on the web) I've found this good if you're lazy sanding an don't make the metal totally shiny before putting top coats on.

*Then a coat of hammered effect paint again from B&Q, this is really good at hiding imperfections in your sanding and I like the effect.

*You then really need to wait 24 hours for this stuff to properly dry otherwise I've found the next coat of paint will go funny.

*Finally I go for a few coats of Satin black, which usually gives a great finish to what you've been working on. To me Gloss or Matt effect don't look right.

smarty2014-09-12 09:19:41
 

smarty

Ready Player One
vacBacker
Feedback
12 (100%)
Credits
1,292CR
I finished wiring my EC Midi coin door tonight and fitted some new coin reject labels. The cab's got a dual Jamma adapter... The left reject button triggers the coin input, and the right reject button switches the game over.
smiley4.gif


EC_midi_coinreject.jpg
 

Vamino

Insert coin(s)
vacBacker
Feedback
22 (100%)
Credits
2,632CR
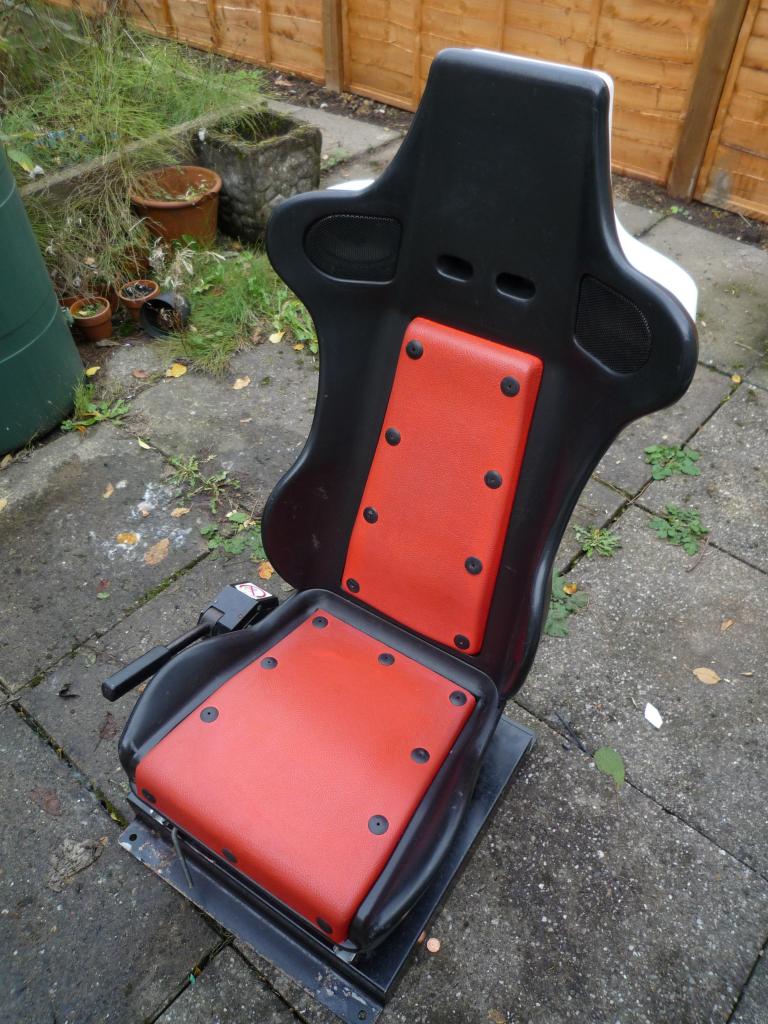
Been doing a bit of work on the SR2 cab I bought from the recent raid.
I've had to 'borrow' a wheel + spacer from another project, but hopefully I can find something cheap before I start the other project......

From this:
SR2_Before.jpg

SR2_Before2.jpg


To this:
SR2_seat.jpg

I really gotta weed the garden!
smiley36.gif


SR2_after.jpg


SR2_after1.jpg


SR2_after2.jpg


Just getting it up and running/presentable before starting the proper restore.....
 

Vamino

Insert coin(s)
vacBacker
Feedback
22 (100%)
Credits
2,632CR
Result!

SR_2.jpg


The DSB2 and FFB control boards were faulty
smiley19.gif
, the PSU + Cage was missing....but the monitor works a treat and has very minimal burn.
smiley1.gif


Anyway, it's now up and running which is the main thing. Luckily I'd hoarded some parts for just a project.....
 
Top