Donkey Kong Bartop Scratch Build - FINISHED

Mr20to5

Active member
vacBacker
Feedback
1 (100%)
Credits
1,360CR
Hi guys, (think this is the best section for this?)

As I’ve said before, someday I would like to own my very own baby blue original DK cab. And maybe one day, I will. But until that day, I thought I would make my own.

I have been toying with buying a Sega Dino/MushiKing/L&B for the kids to play on, but as yet the right one hasn’t come up, so in this project, I intend to combine the two and make a mini, bartop style DK cab for the kids and of course myself to play on.

Intentions, having scoured many, many web pages, are to build a faithful replica of the top half of the original cab. That’s the intention, we’ll see how things progress.

The woodwork side I do not expect to pose any problems, the internals may raise a few questions, but I know I’m in good hands here and it’s good to push your boundaries every now and then.

That said, this will either be an OCD inspired awesome project or an epic fail destined for the bin.
smiley36.gif


So, with some rare time to myself and held captive by the rainy summer weather, I made a start.

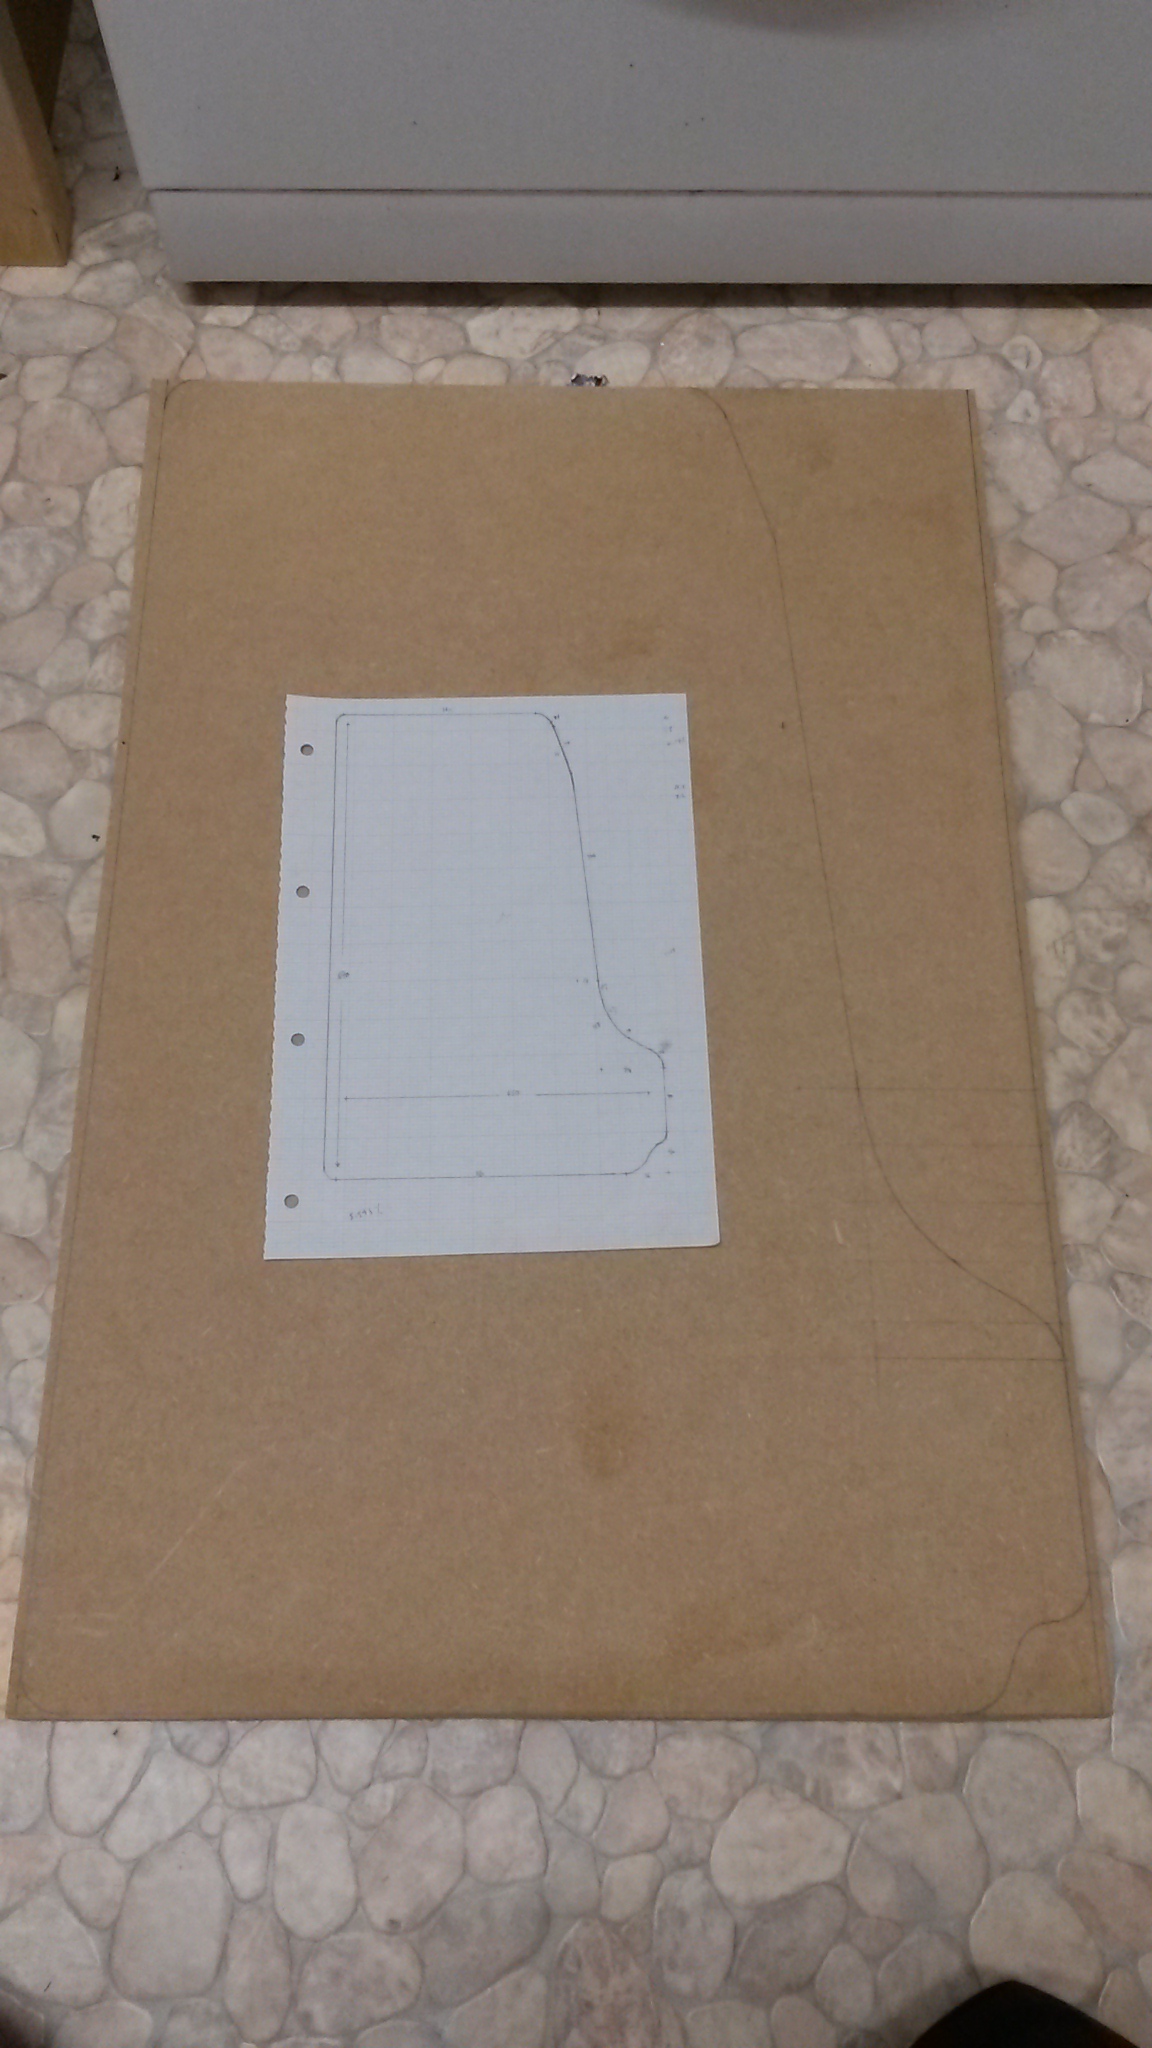
Popped online and downloaded the plans from Jakobud, I read on DLF about these plans being wrong but I think they are fine for what I am after. First thing was to simply trace the sections I was interested in onto some graph paper.

20150727_131413.jpg


Next up, with the design on graph paper, was to simply scale it up a bit to fill the page and allow me to better draw out the curves. All free hand, just using various anchor points from the original plans.

20150727_131456.jpg


Using this, I then decided on what size I wanted my finish cab to be, choosing a total height of 700mm, and transferred the drawing onto some 18mm MDF, which I already had spare. Again, all freehand, using old fashioned pencil and set of French curves.

20150727_131549.jpg


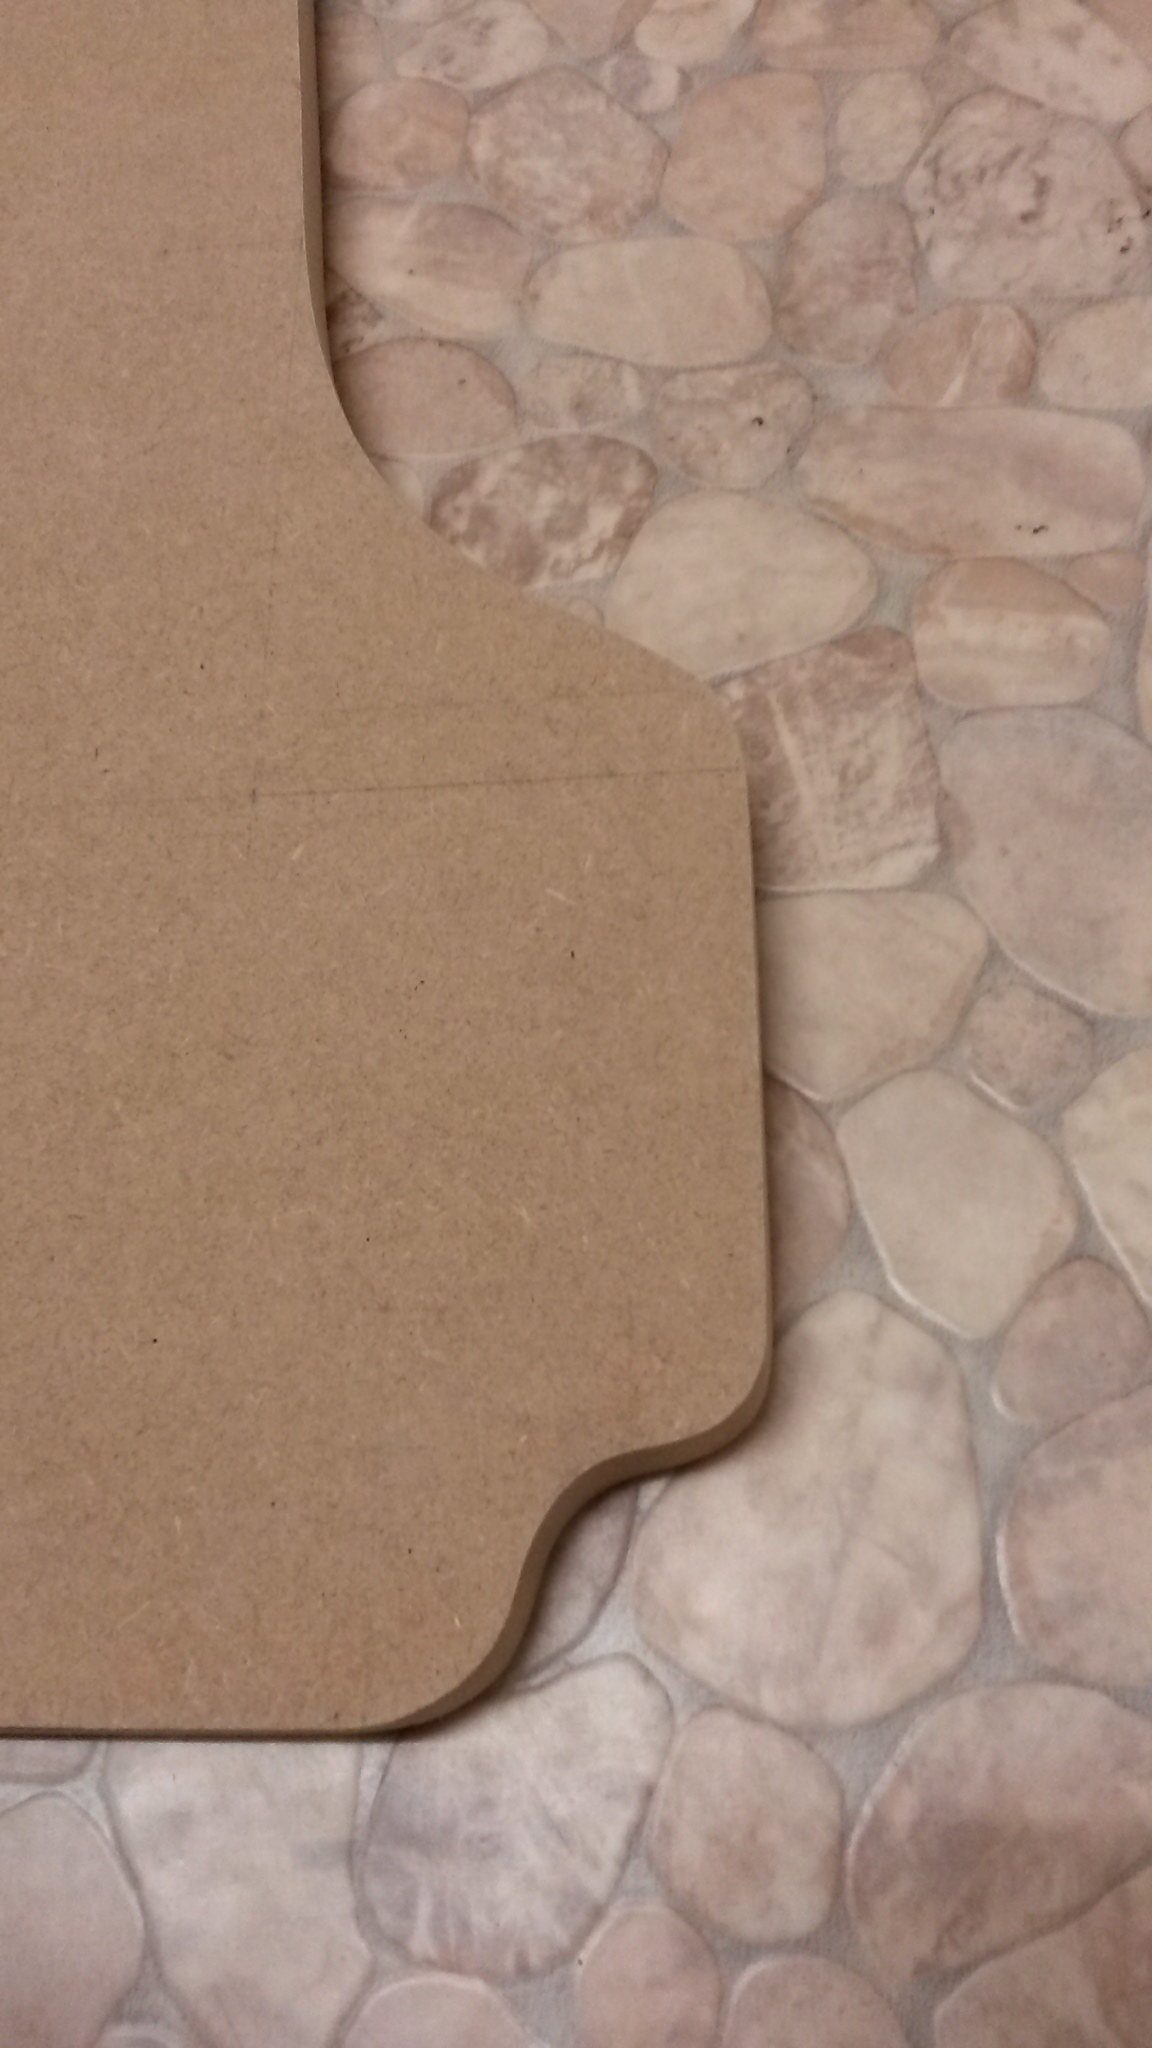
From there, I cut out the shape using a jigsaw, then finished the rough edges with a finishing plane and sandpaper, wrapping the sandpaper round a section of old broom handle for the inner curves.

20150727_175856.jpg


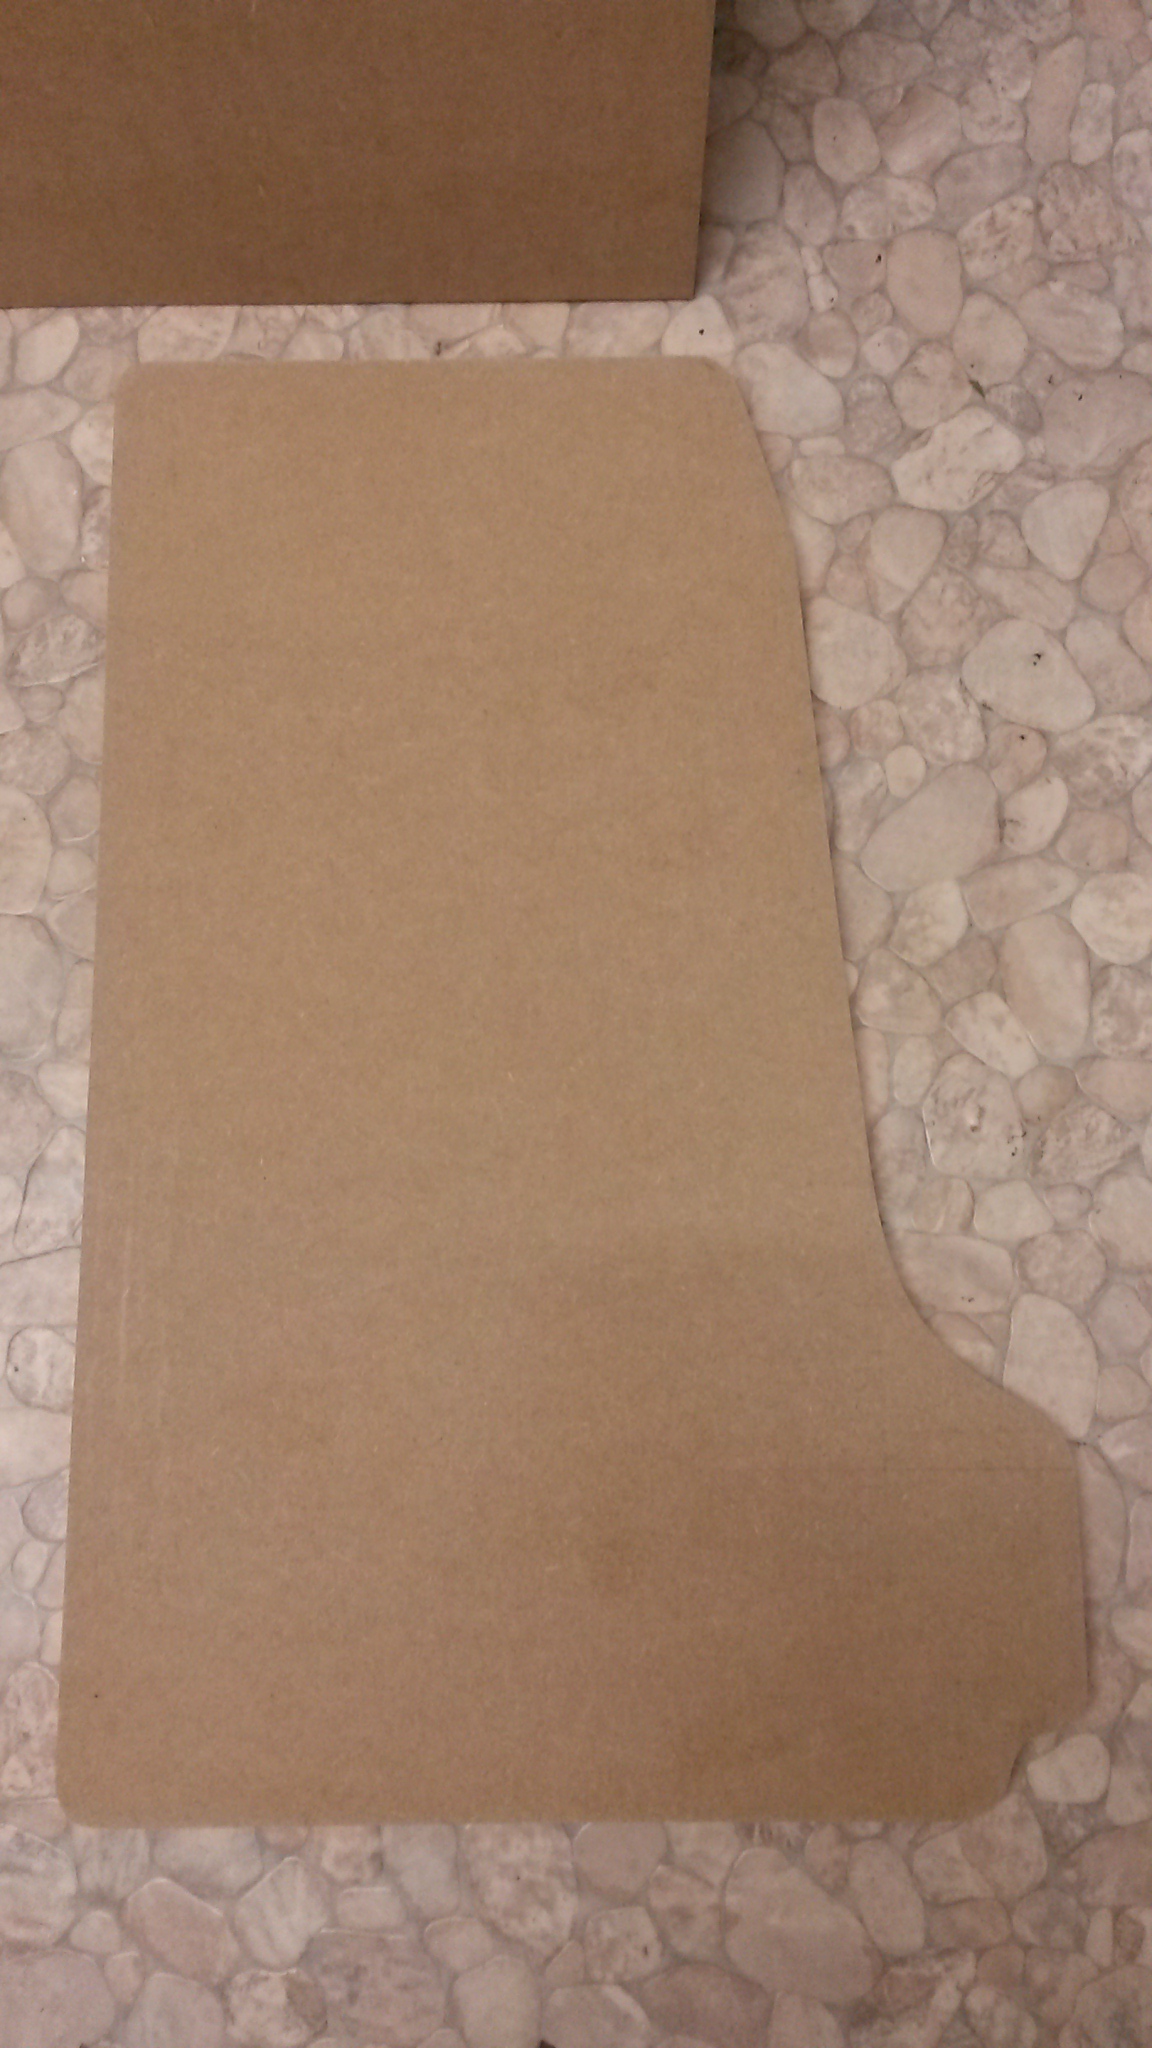
Happy with the outcome, so far, some nice curvy, erm curves.

20150727_175911.jpg


Will rough out a second side panel tomorrow and clamp it to this then use a flush cutting bit on my router table to make an exact copy. That will be the end of using 18mm MDF with all the other pieces being fashioned from 12mm to keep the weight down. Very aware of not over-engineering this, whilst still keeping it solid enough to withstand some proper use.neil16372015-10-27 20:12:36
 

Mr20to5

Active member
vacBacker
Feedback
1 (100%)
Credits
1,360CR
Hi Guys,

So, managed to get the second side copied using a flush cutting bit in my router, an exact copy in seconds. Then marked up with the positions for the back, front, CP and inner MDF pieces, more to keep me right than anything else. It is very much going to be a work in progress and I have already changed the positioning of the bezel batoning.

20150801_101559_zpsibtrupxt.jpg~original


Next up was to cut out the batoning, which I did by hand using a dovetailing saw, which I will dry fit to the sides once I have them all cut out, but here's where I am at for now.

20150802_195523_zpsrdrtinig.jpg~original


And then the birthday chaos descended. Will get the other side's batons cut next then dry fit and partially screwed into place. The I can measure up and cut the remaining sections and hopefully see things start to take shape, which, will probably mean more changes as I see that things may not turn out how I had them in my mind......

Until next time peeps....
neil16372015-08-25 16:31:36
 

Mr20to5

Active member
vacBacker
Feedback
1 (100%)
Credits
1,360CR
PAC-MAN said:
Very cool so far

Great job!

Your epic resto thread is one of my main reference points, just on a smaller version. Yours was epic and beside the entire thread being an awesome inspiration, it was the quality of the paint job that really stood out for me.

I really really want to achieve a flawless finish but need to try and source some paint first !!! At least I shouldn't need as many tins as you !!

Thanks for the comments so far, next mini update incoming.

Neil
 

Mr20to5

Active member
vacBacker
Feedback
1 (100%)
Credits
1,360CR
Hi guys,

A bit more progress this weekend, not much to show for it, but I'm happy with the results so far, and time taken on these steps should ensure an easier build/better fit later..

First up, got the batons all cut for both sides and fitted into place, offering both sides up to each other, shows that they are bang on identical. Happy face !!

20150808_154419_zpsvrpnhlqr.jpg~original


Next up was a lot of boring marking out and cutting all the other pieces I would need. Using 12mm MDF for these. Measure lots, cut once. No mistakes, all nicely square and exactly the same width (364mm), which will give an overall width of 400mm.

20150809_143151_zpssoaxepjt.jpg~original


As eager as I now am, to simply fire all this together and see what it will look like, next job is to cut the slot in the sides for the T-mold (just waiting on Mr Postman bringing me this), and then I think I will prime and paint the insides black as it will be far easier to do this with the cab unassembled.

At work for the next 7 then on a trip up to Scotland for the 7 after that so the next update may be little way away.

Cheers guys,

Neil.
 

Mr20to5

Active member
vacBacker
Feedback
1 (100%)
Credits
1,360CR
Hi guys,

One quick mini update on a small yet pleasing piece of progress.

Whilst waiting for Mr Postman to deliver my shiny new slot cutter for my router table (the one I had, had to wide a kerf), I thought I would have a stab at cutting the speaker grille on the front panel. Here's how I got on in pictures.

First up, I printed the plan from Jakobud, scaled to fit my needs, and traced it onto Mrs M's finest greaseproof paper.

20150809_165035_zpsyqn9ncgc.jpg~original


Then did the old school trick of turning it over and rubbing the pencil onto the wood.

20150809_165559_zps5ylsriok.jpg~original


Drew the lines on a bit heavier and then knocked a hole punch into each end, then drilled through with a 3.5mm bit.

20150809_182238_zpsinvjx4zp.jpg~original


Then using a fret saw, I began to follow the lines, not overly bothered about keeping it perfectly straight, just keeping it within the lines, ready for sanding.

20150810_181748_zpsil4l5qbr.jpg~original


After sawing, before sanding.

20150810_185807_zpsjxuisiyk.jpg~original


Then after about an hour of sanding, using thin strips of sandpaper held against Mrs M's finest kitchen pallet knife, to give a bit of rigidity and a nice flat edge.

20150812_212956_zpssdkmi8z8.jpg~original


Happy with it for now, primer might show up some minute imperfections, but I'll deal with any of those later on.

And just before I go, Mr Postman has been.

20150813_192346_zpspopt3xxu.jpg~original


That's all for now peeps !!

Neil.
 

Mr20to5

Active member
vacBacker
Feedback
1 (100%)
Credits
1,360CR
virtvic said:
It would have been a whole lot easier and quicker with a router...

It would've if;

a) I had a 3mm straight bit - I don't
b) I could've been bothered to try and find the edge jig I made ages ago - I couldn't
c) I kinda like doing things old school. And it keeps me in the garage away from bathing the kids duties, etc.

smiley2.gif
 

Mr20to5

Active member
vacBacker
Feedback
1 (100%)
Credits
1,360CR
Hi guys,

So, with some very rare spare time to myself (thanks to Mrs Mr for entertaining the kids), I made some good progress. Here we go….

First up and the new slot cutter got put to good use routing the T-Mold slot on both side panels. I was in two minds whether to use the router table (pros; built in lift mech to get the height of the cutter absolutely spot on – cons; a relatively small table surface area which makes it difficult with larger pieces), or my handheld. In the end I opted for the table, which went well, except for a random few inches where the slot has veered off by about 1mm!!! I’m guessing the panel tilted slightly or got some dust under it. If it’s noticeable once the T-Mold is applied I may have to try and sort it by hand chisel.

20150822_134957_zpscsujkoed.jpg~original


Next up and I could now start putting all the pieces together. Let construction commence…

20150822_170821_zpspe4gxljd.jpg~original


With lots of careful positioning, lots of clamps, screws and glue, not to forget the odd square, to keep things, erm, square and I have the makings of a cab!! I really like how this has taken shape. Here’s the photos…

20150824_121319_zpsr7heqe75.jpg~original


Rebated edges ready to accept the marque and bezel

20150824_121334_zpsn10jgsqo.jpg~original


20150824_121351_zpsnfosonyw.jpg~original


Grille detail and lower part of cab

20150824_121402_zpsdsj54tqe.jpg~original


And finally, bringing up the rear, erm the rear!! Also with rebated edge to accept the main section which will have a cam lock at the top, to keep it closer to an actual cab.

20150824_121444_zpso7vonc4m.jpg~original


Next up it to decide on the positioning of the monitor and fix it into place, making a bracket, etc.

Also time to make my first real purchases in this project as pretty much everything so far, I have had stored already, and order some gubbins for the inside!!

Think now is also probably a good time to make a to do list, both to keep me on track and ensure I don’t forget stuff, but it’s also good to be able to tick stuff off as you go.

Until next time.
Neil
 
Top