You are using an out of date browser. It may not display this or other websites correctly.
You should upgrade or use an alternative browser.
You should upgrade or use an alternative browser.
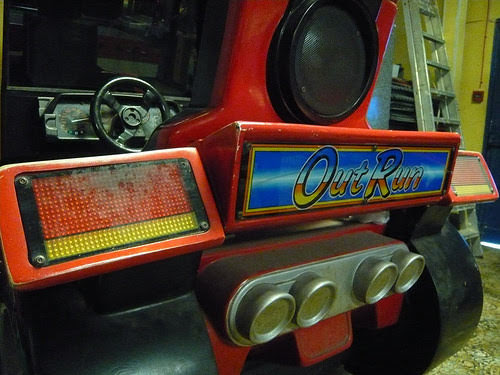
Outrun Deluxe (Turbo De-conversion) Restoration
- Thread starter clarkey
- Start date

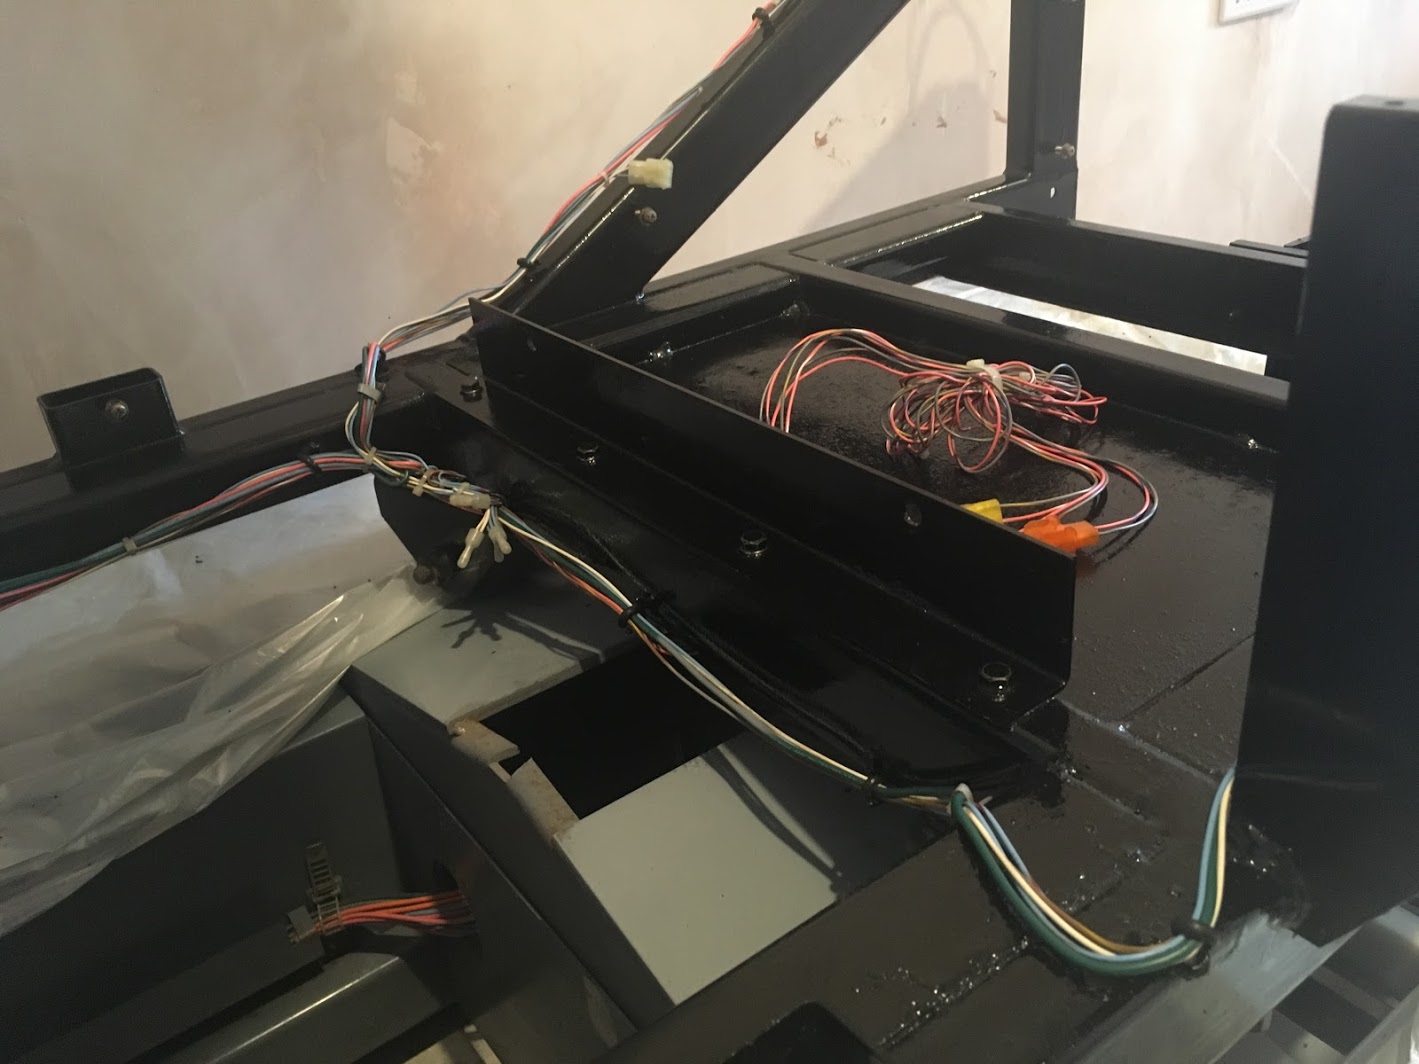
Cleaned sanded and sealed the moving frame.
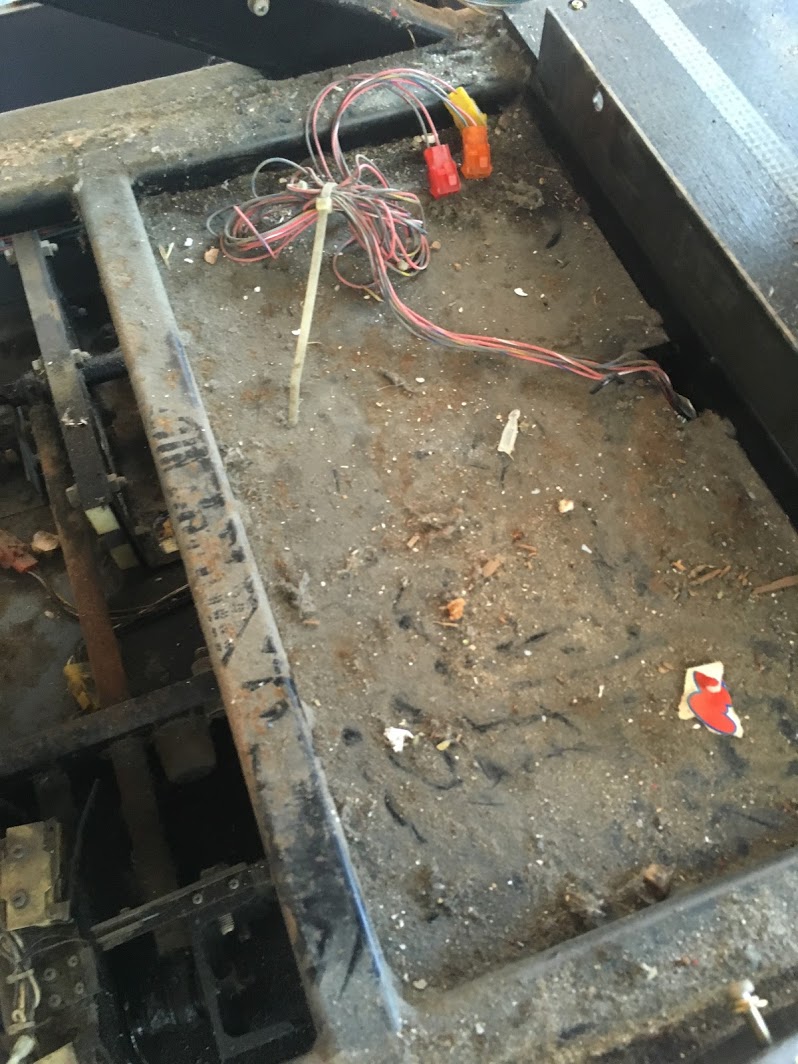
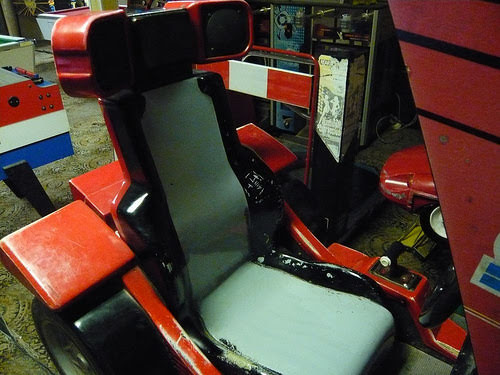
What greeted me when I removed the seat.
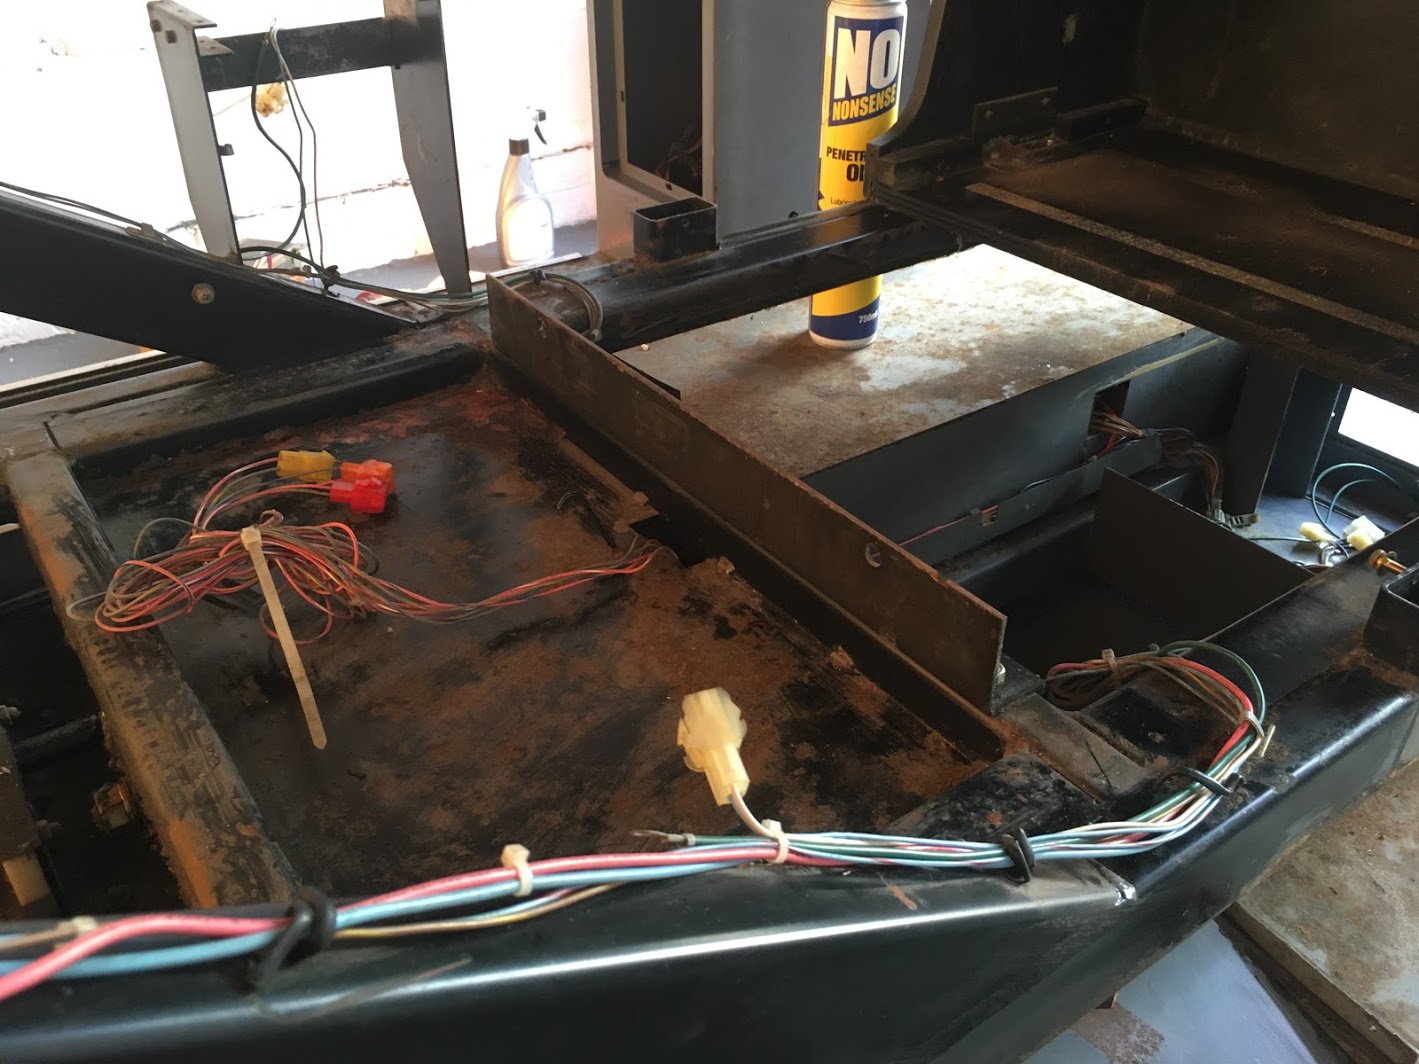
Cleaned up, treated the rust with rust converter.
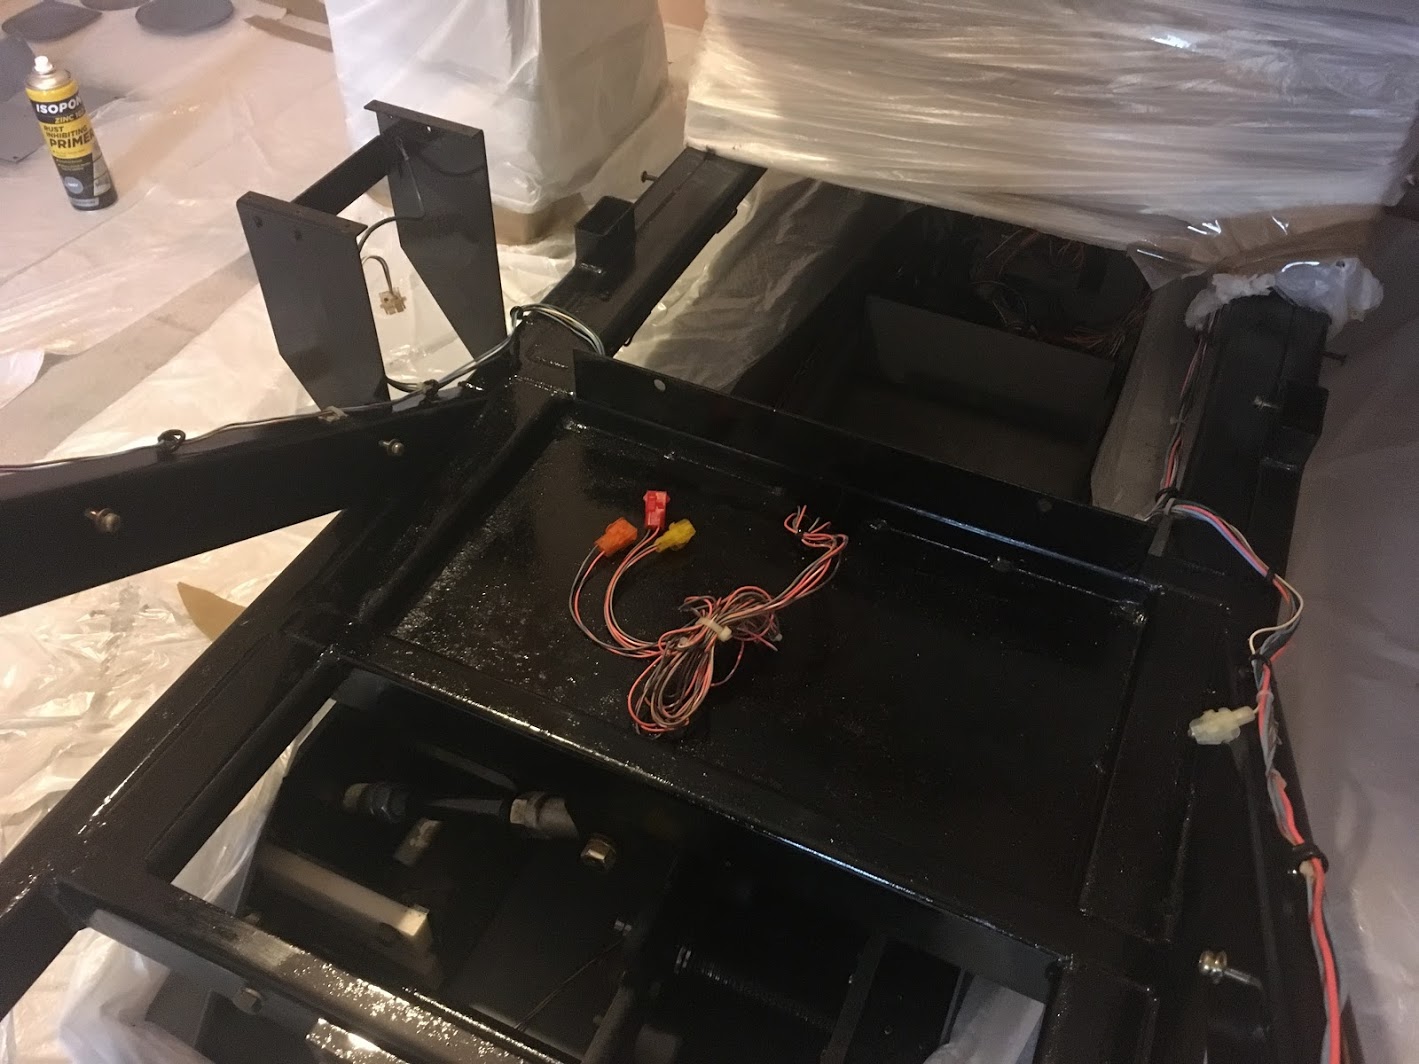
Fresh coat of paint.
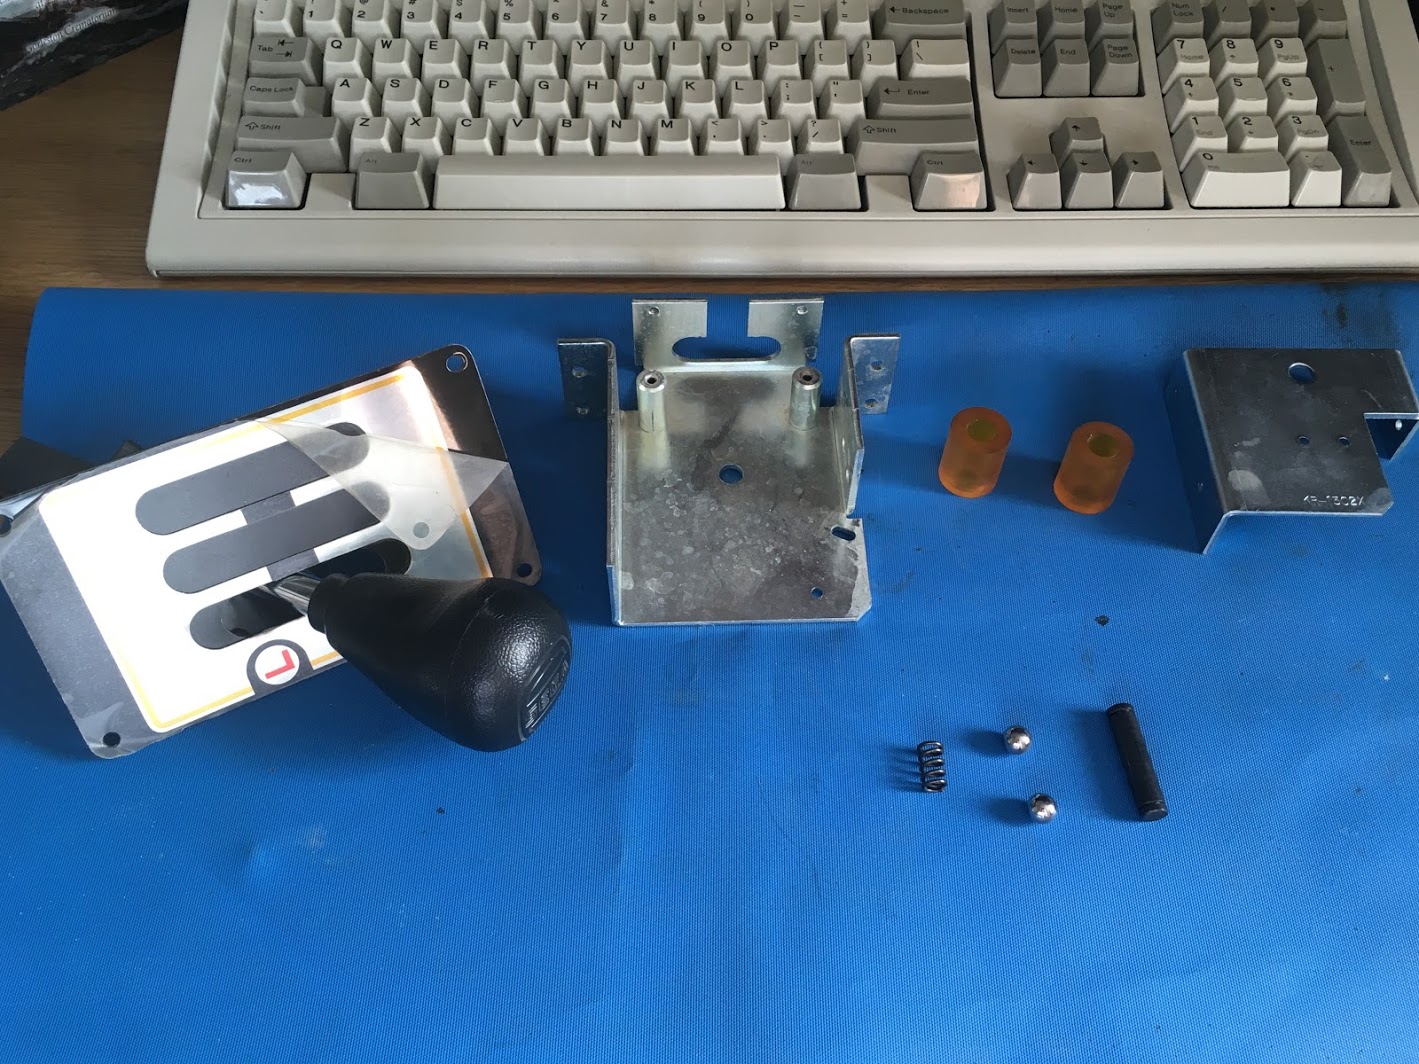
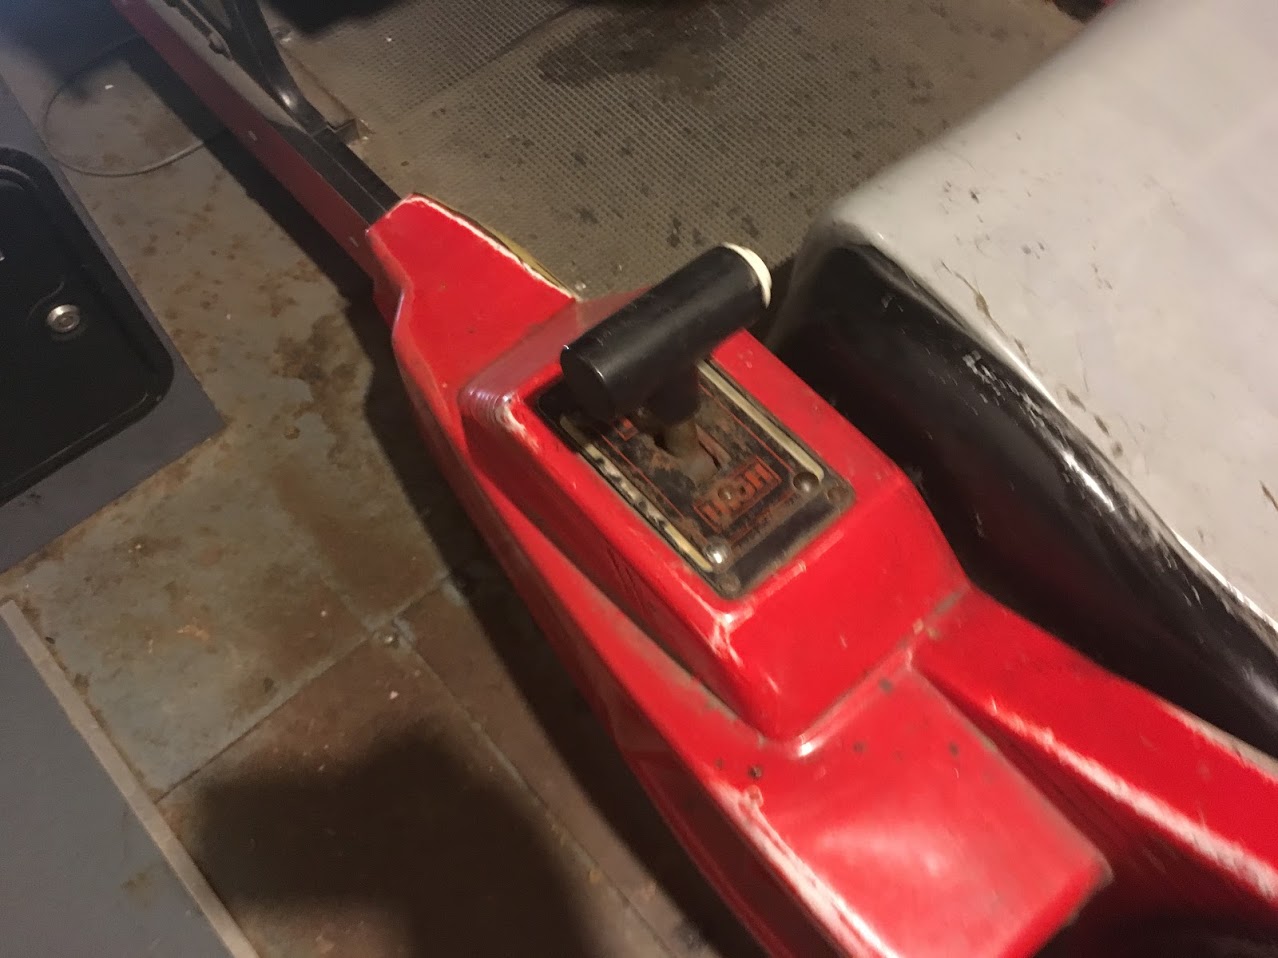
Gear Lever
The gear lever was completely missing (well replaced with a generic turbo one)
Managed to source most of the parts NOS, this was not cheap and I looked at loads of other options but it was this or have no sifter / hope a used one appeared for sale!
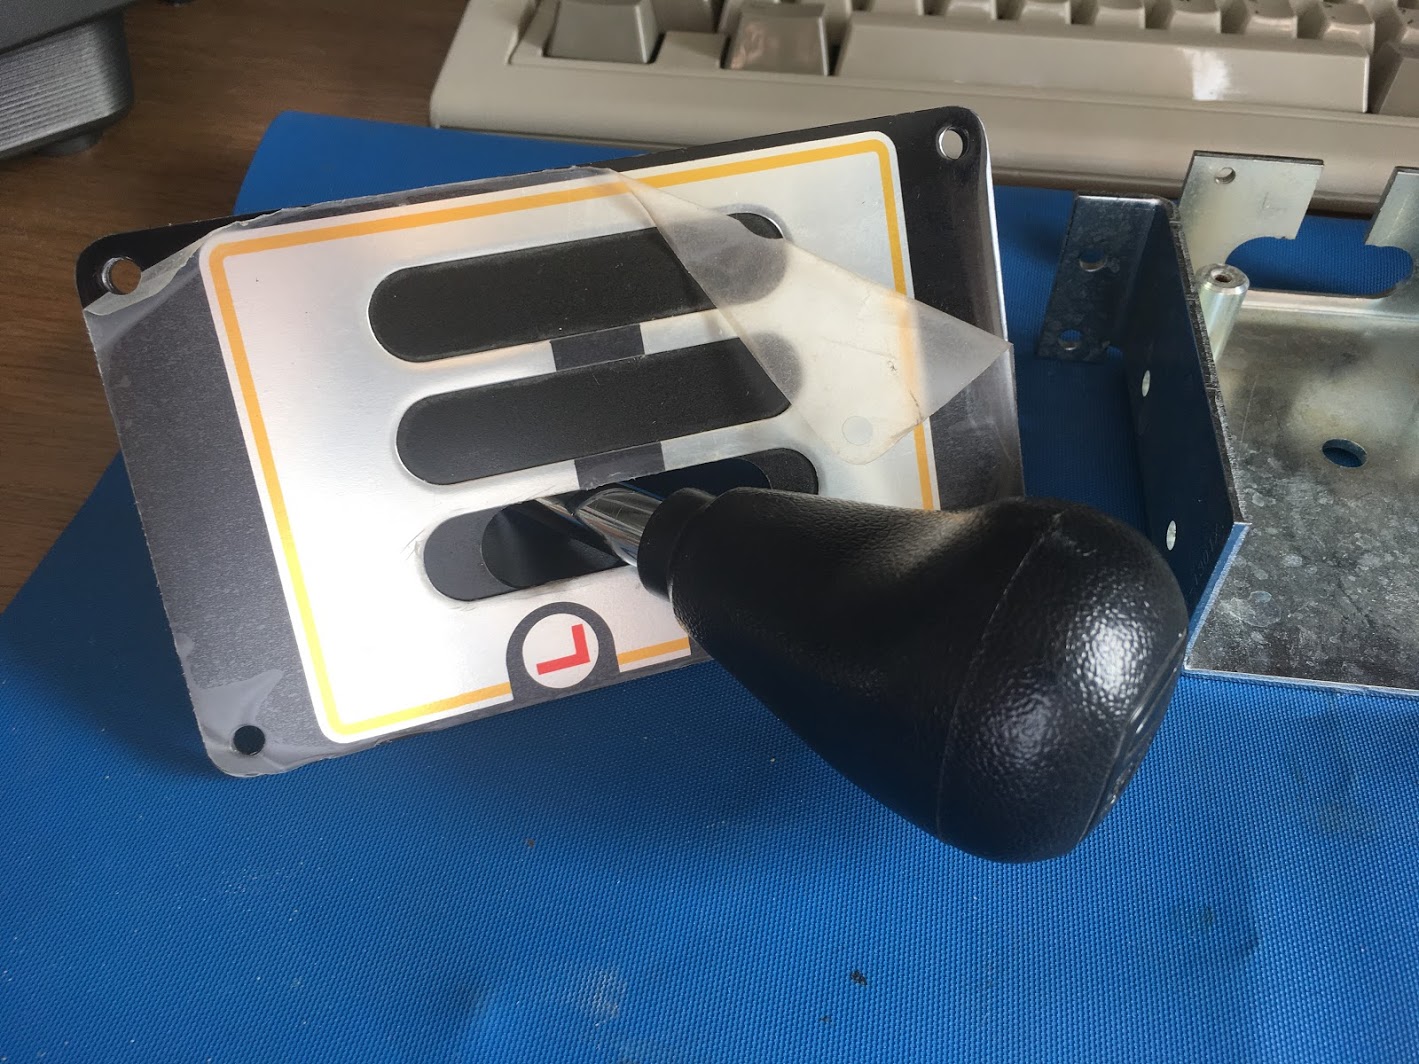
This thing is beautiful

Managed to source most of the fixings, nylon washers etc from Ebay.
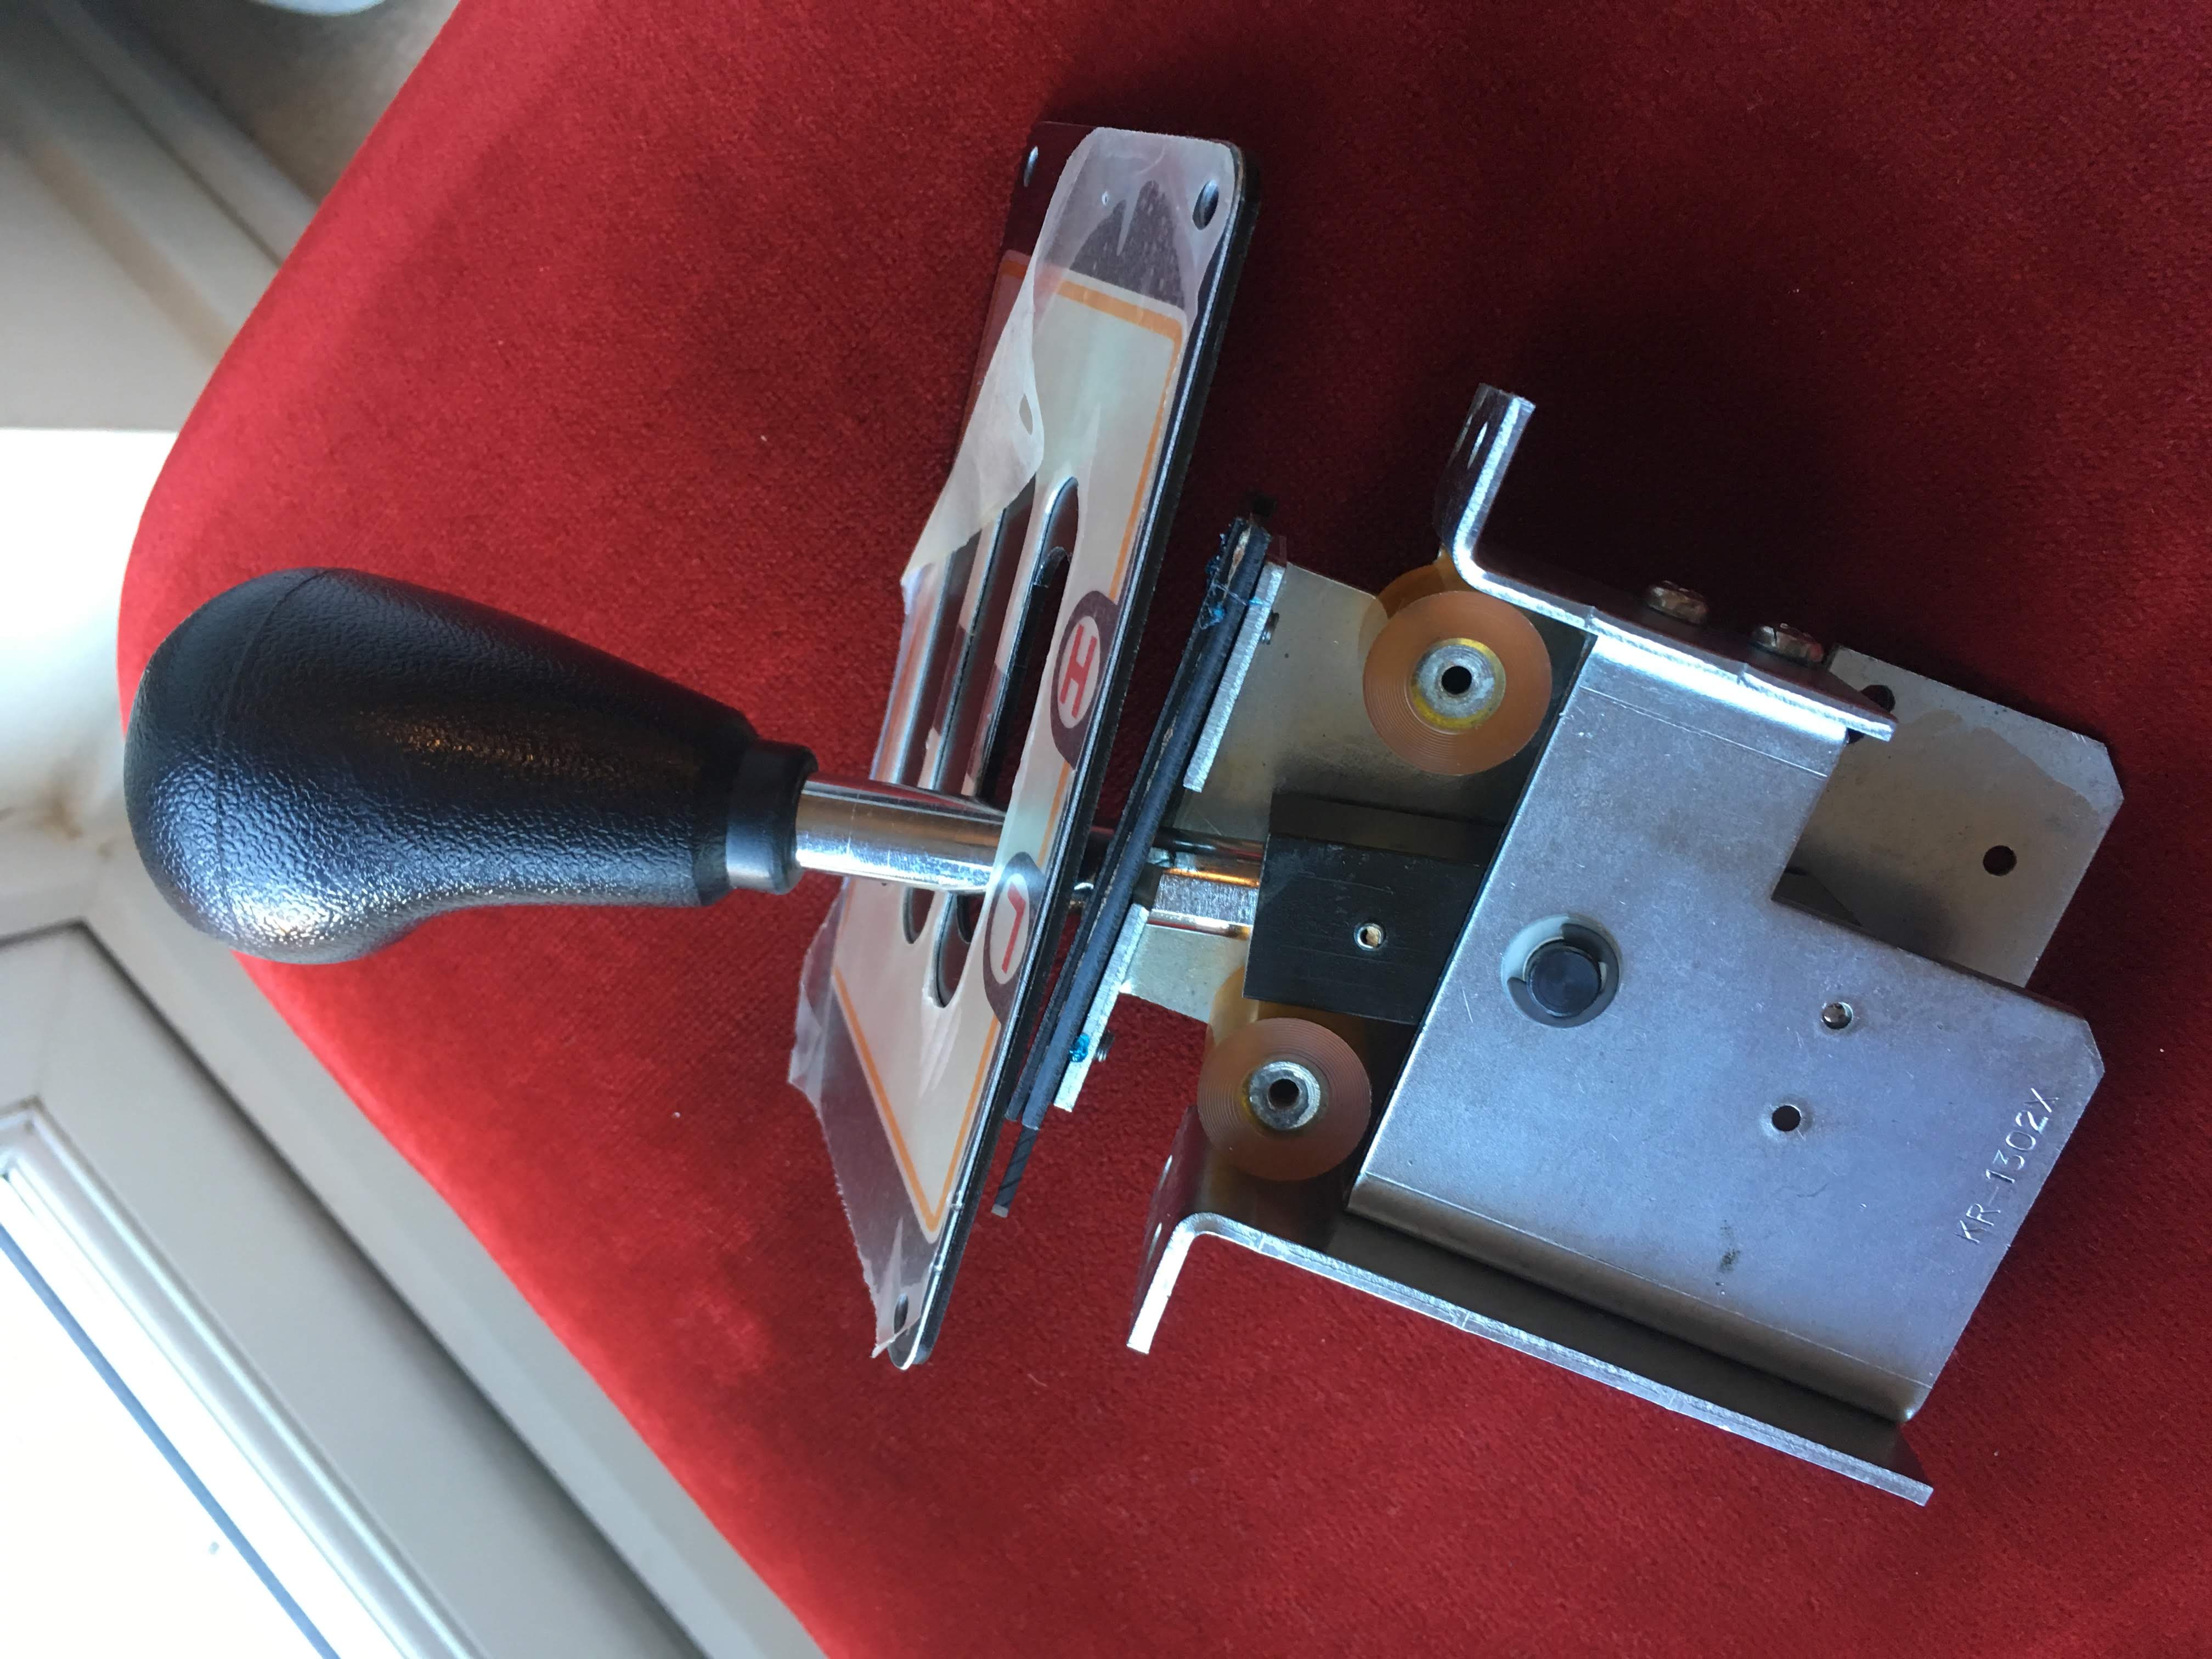
Assembled with threadlock, just need to find a suitable microswitch. I also need to recreate one of the metal brackets where it fixes to the car as it was cut off during the conversion to turbo.
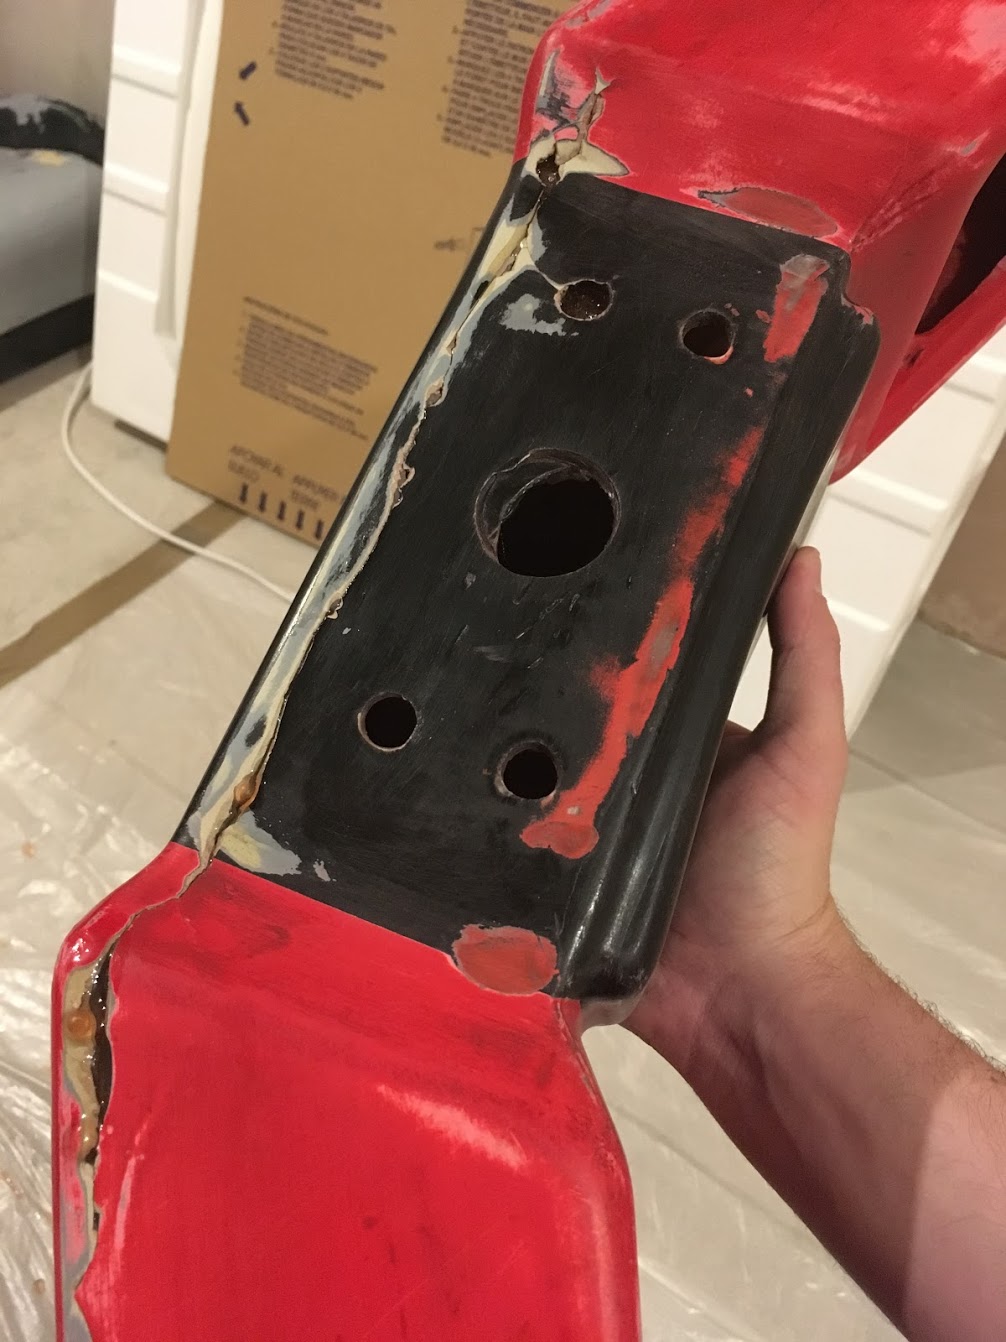
Busy prepping the body work for paint now.
clarkey2018-10-21 10:45:16
What greeted me when I removed the seat.
Cleaned up, treated the rust with rust converter.
Fresh coat of paint.
Gear Lever
The gear lever was completely missing (well replaced with a generic turbo one)
Managed to source most of the parts NOS, this was not cheap and I looked at loads of other options but it was this or have no sifter / hope a used one appeared for sale!
This thing is beautiful
Managed to source most of the fixings, nylon washers etc from Ebay.
Assembled with threadlock, just need to find a suitable microswitch. I also need to recreate one of the metal brackets where it fixes to the car as it was cut off during the conversion to turbo.
Busy prepping the body work for paint now.
clarkey2018-10-21 10:45:16
nurtuo said:Great Work.
Good to see a DLX will live again.
Fingers crossed! Got to cross the PCB threshold soon

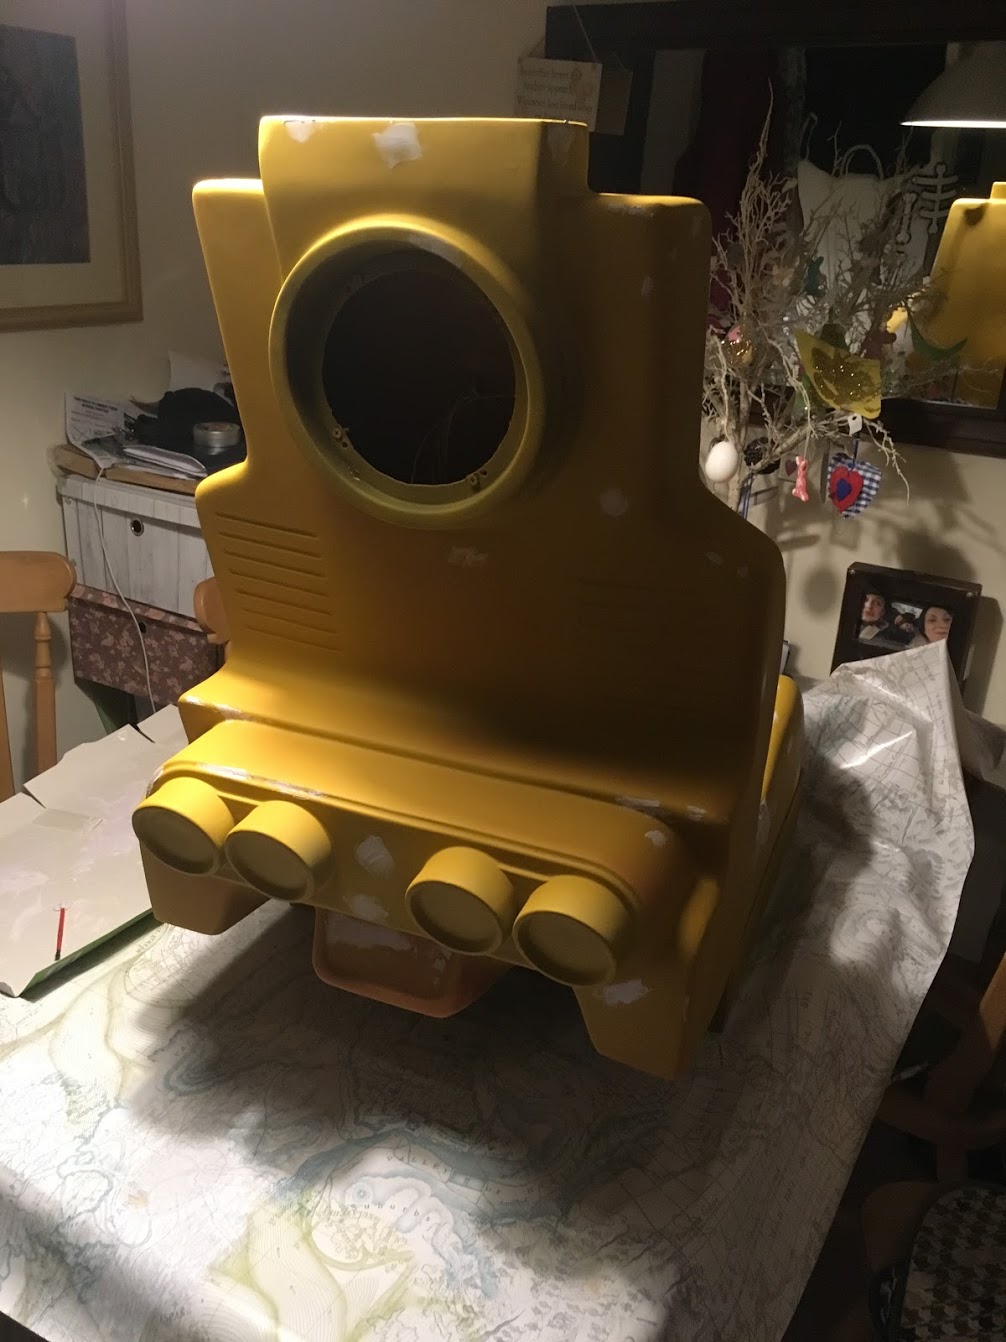
Fiberglass
I knew this would be a lot of work, but boy did I underestimate just how much. Some of these pictures are from earlier in the year but they end bringing the resto up to date, some of these bits have happened in parallel to other parts.
Couple of pictures of when the machine was still on site and shortly after I got it, these pictures hide a world of pain.
Visible here is the graffiti (very deeply scratched in) not visible, headrest about to fall in half and copious fag burns scratches chips etc from 32 years on site. Also note the right bolster has a repair, it was completely ruined and covered in some sort of hard filler that appeared to have been thrown at it from thirty yards away.
Dirt filth chips scratches etc.
The gear lever had as mentioned before been replaced, unfortunately as this one did not fit correctly it had cracked and damaged the surround.
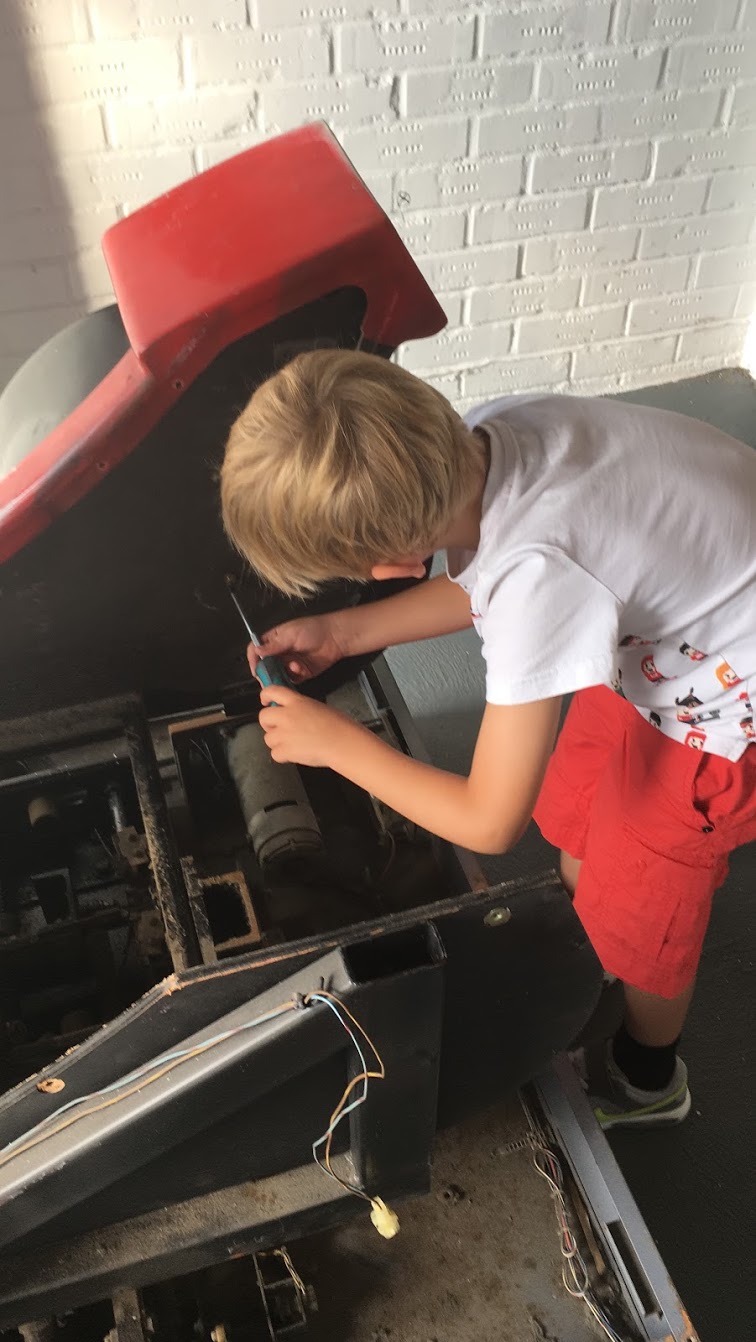
The youngest has been keen to help.
Headrest
The headrest was splitting into two, it was made in two pieces and joined together and this join had started to fail, I fiberglassed the inside then filled and sanded.
Filled
Primed and more filler, ready for final sand and paint, along with the spoiler.
I knew this would be a lot of work, but boy did I underestimate just how much. Some of these pictures are from earlier in the year but they end bringing the resto up to date, some of these bits have happened in parallel to other parts.
Couple of pictures of when the machine was still on site and shortly after I got it, these pictures hide a world of pain.
Visible here is the graffiti (very deeply scratched in) not visible, headrest about to fall in half and copious fag burns scratches chips etc from 32 years on site. Also note the right bolster has a repair, it was completely ruined and covered in some sort of hard filler that appeared to have been thrown at it from thirty yards away.
Dirt filth chips scratches etc.
The gear lever had as mentioned before been replaced, unfortunately as this one did not fit correctly it had cracked and damaged the surround.
The youngest has been keen to help.
Headrest
The headrest was splitting into two, it was made in two pieces and joined together and this join had started to fail, I fiberglassed the inside then filled and sanded.
Filled
Primed and more filler, ready for final sand and paint, along with the spoiler.
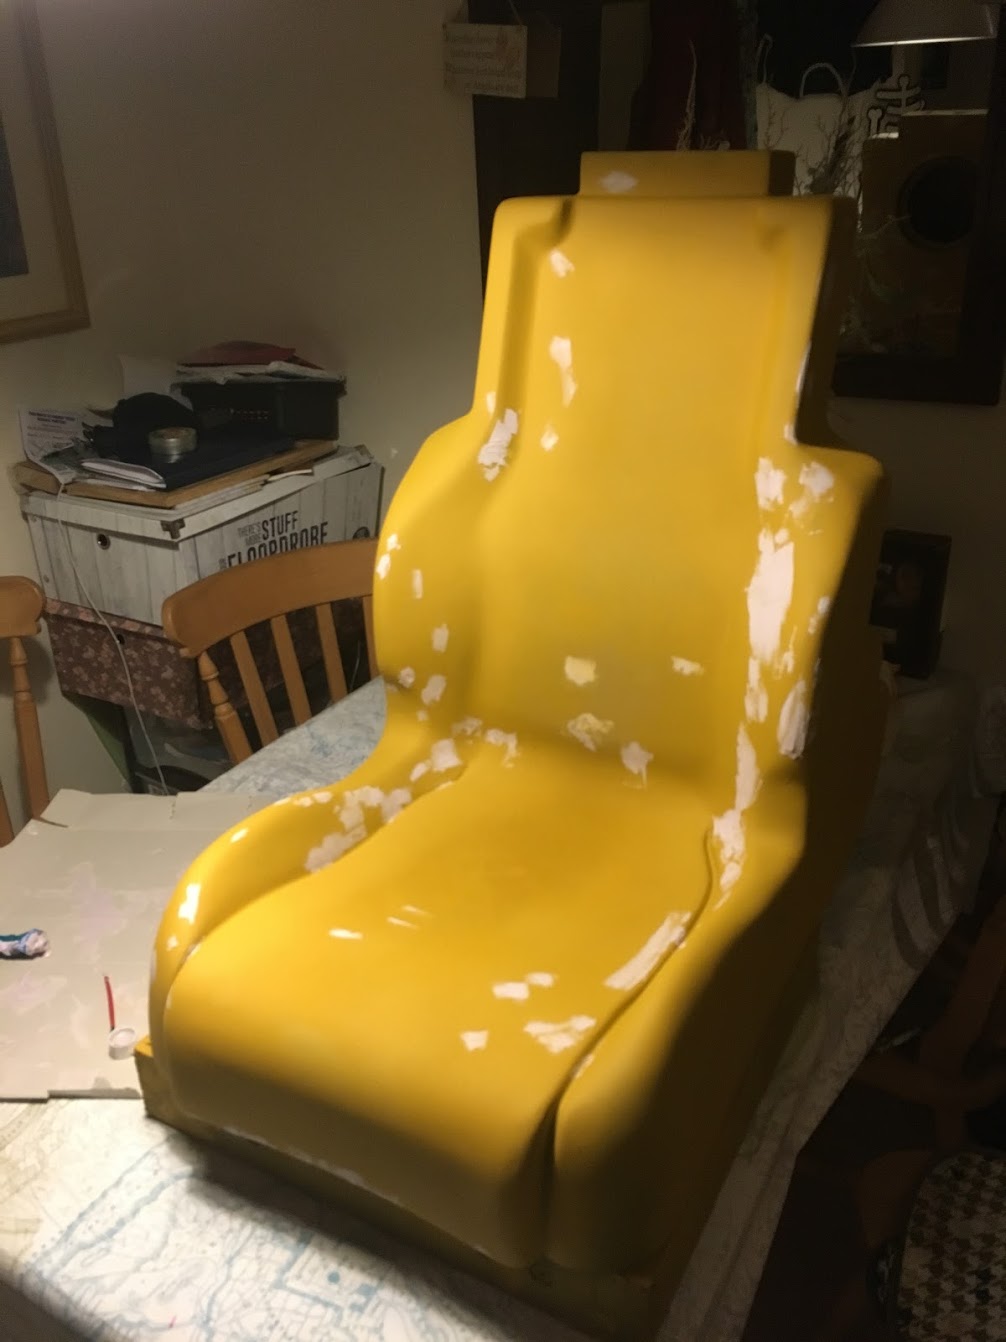
Seat
The seat was the worst part.
Goodbye Jilly T whoever you are.

Sanded (hoursssssss of work)
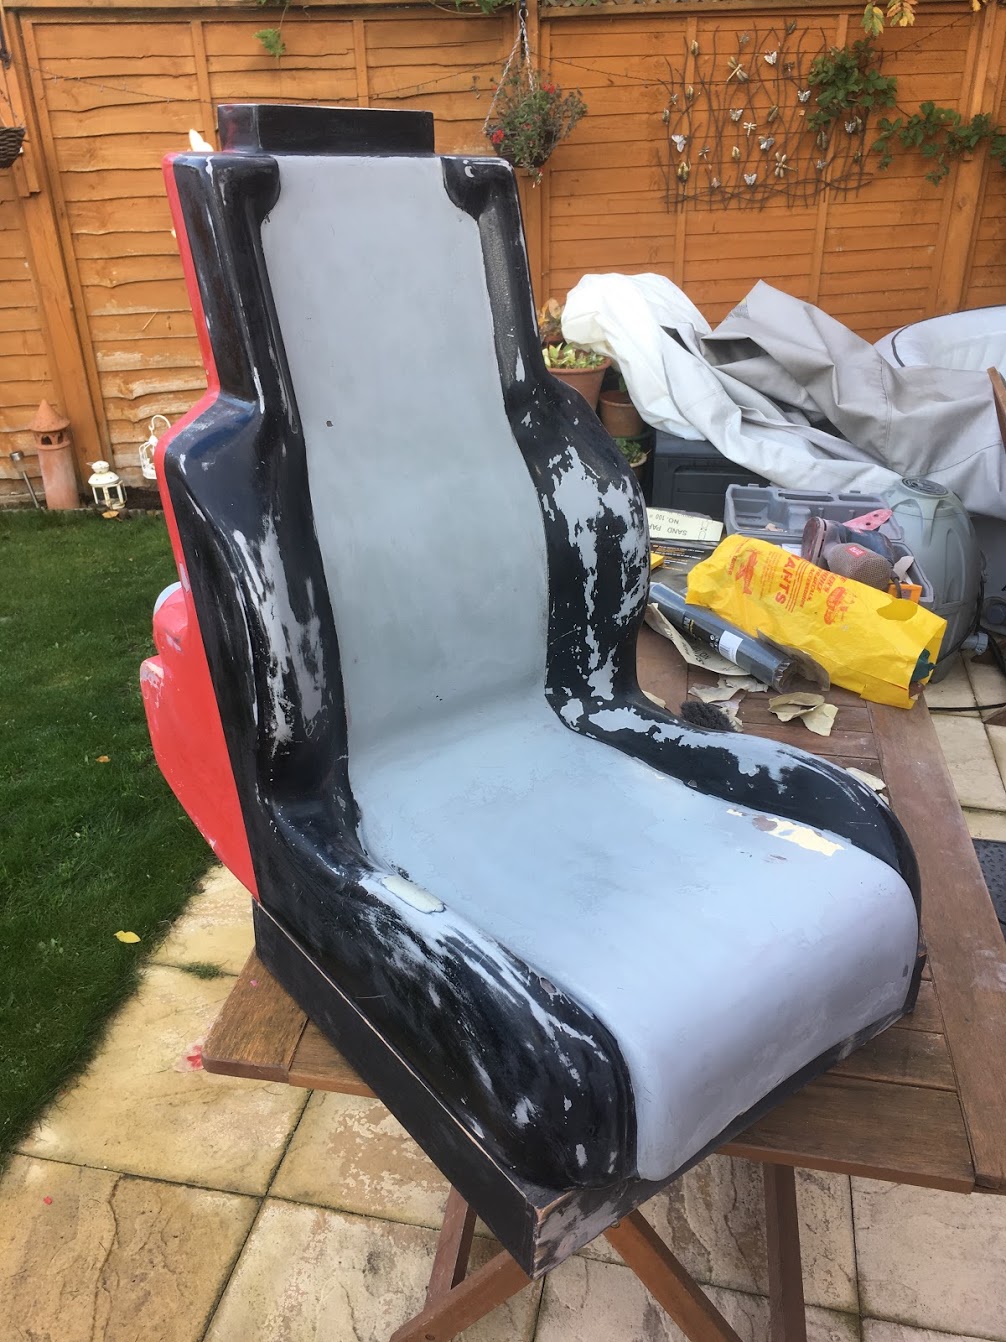
Bolster repaired.

Primed and more filling.
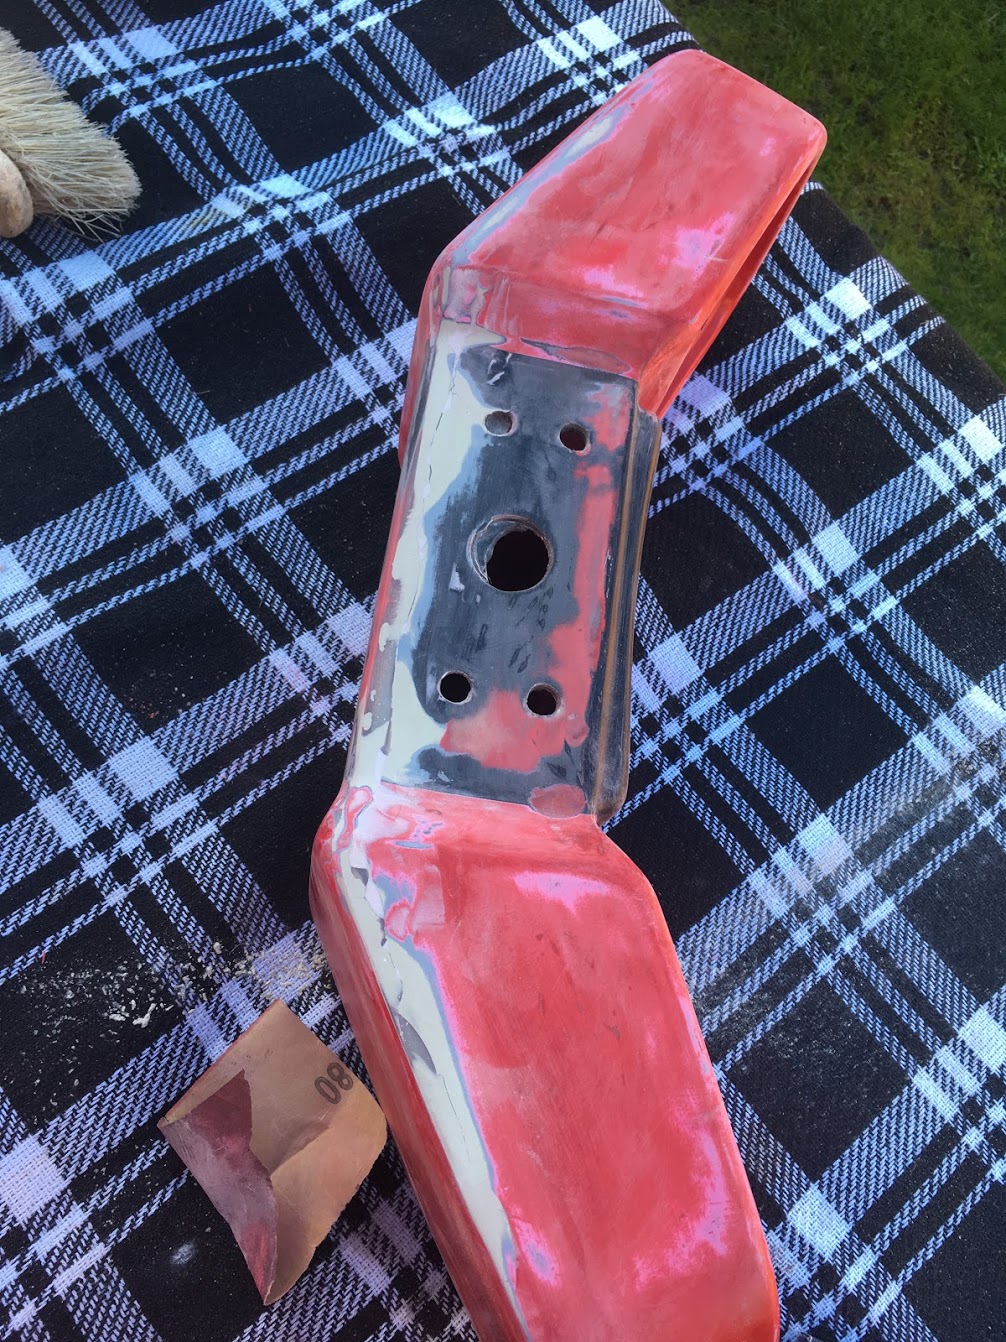
Side Pods
Lots of cracks (that I think must have been there from new.
Some weird filler like substance was caked on this side and blocking lots of the detail.
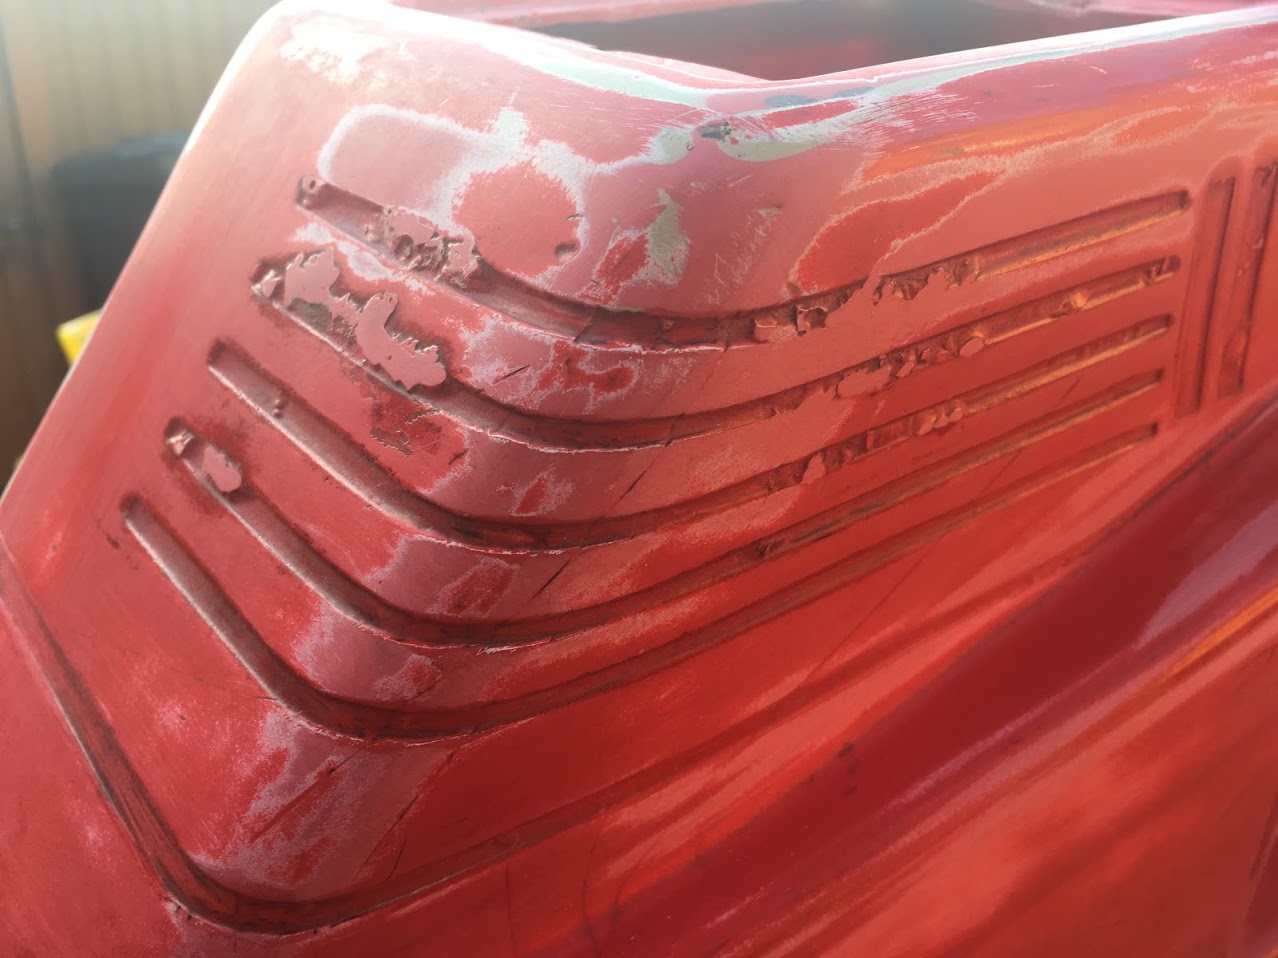
Cut out. (larger than needed but will fill in later)
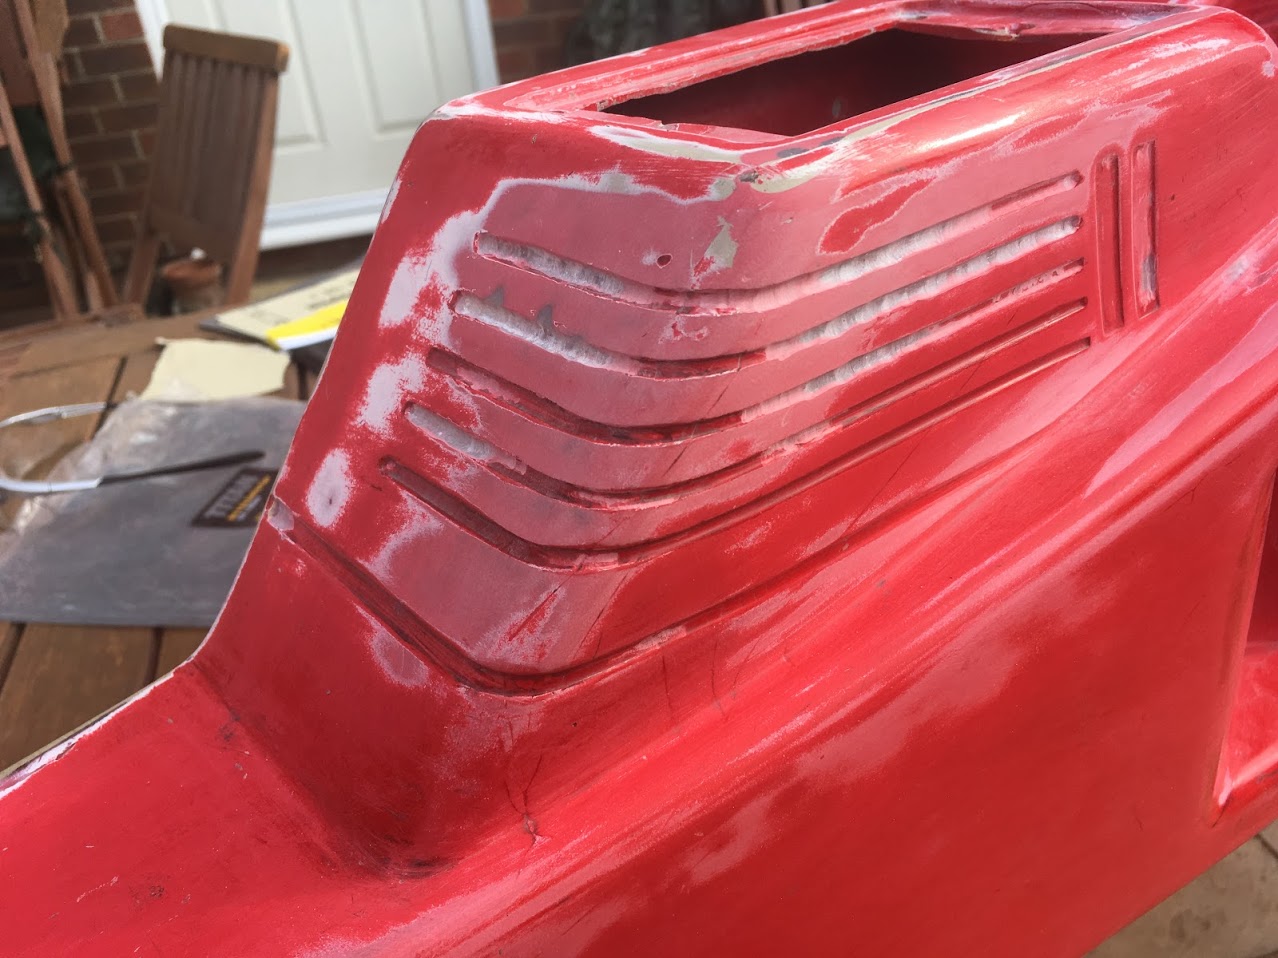
After much sanding both sides were primed then filled again ready for final sand and paint.
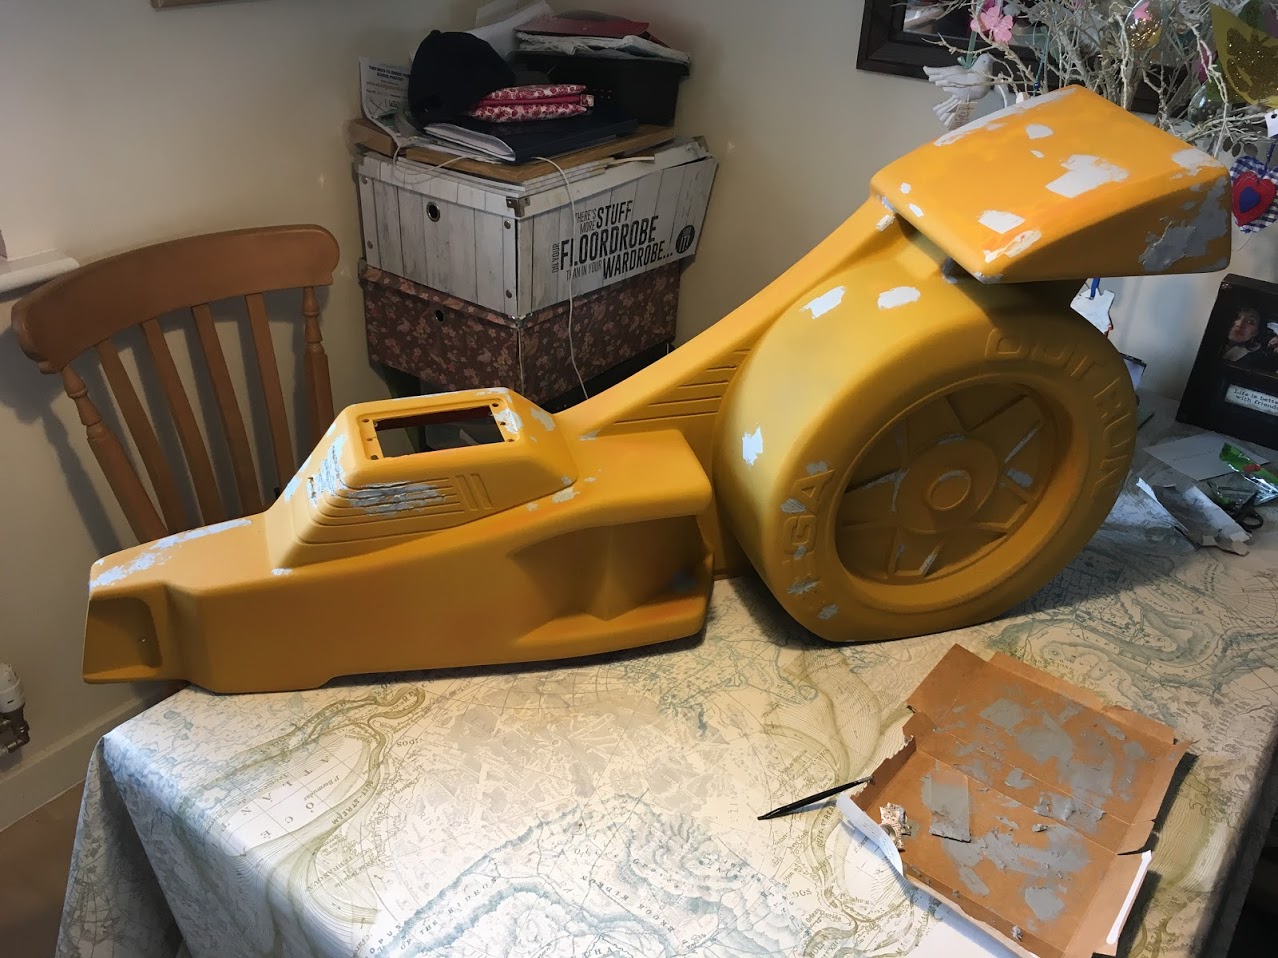
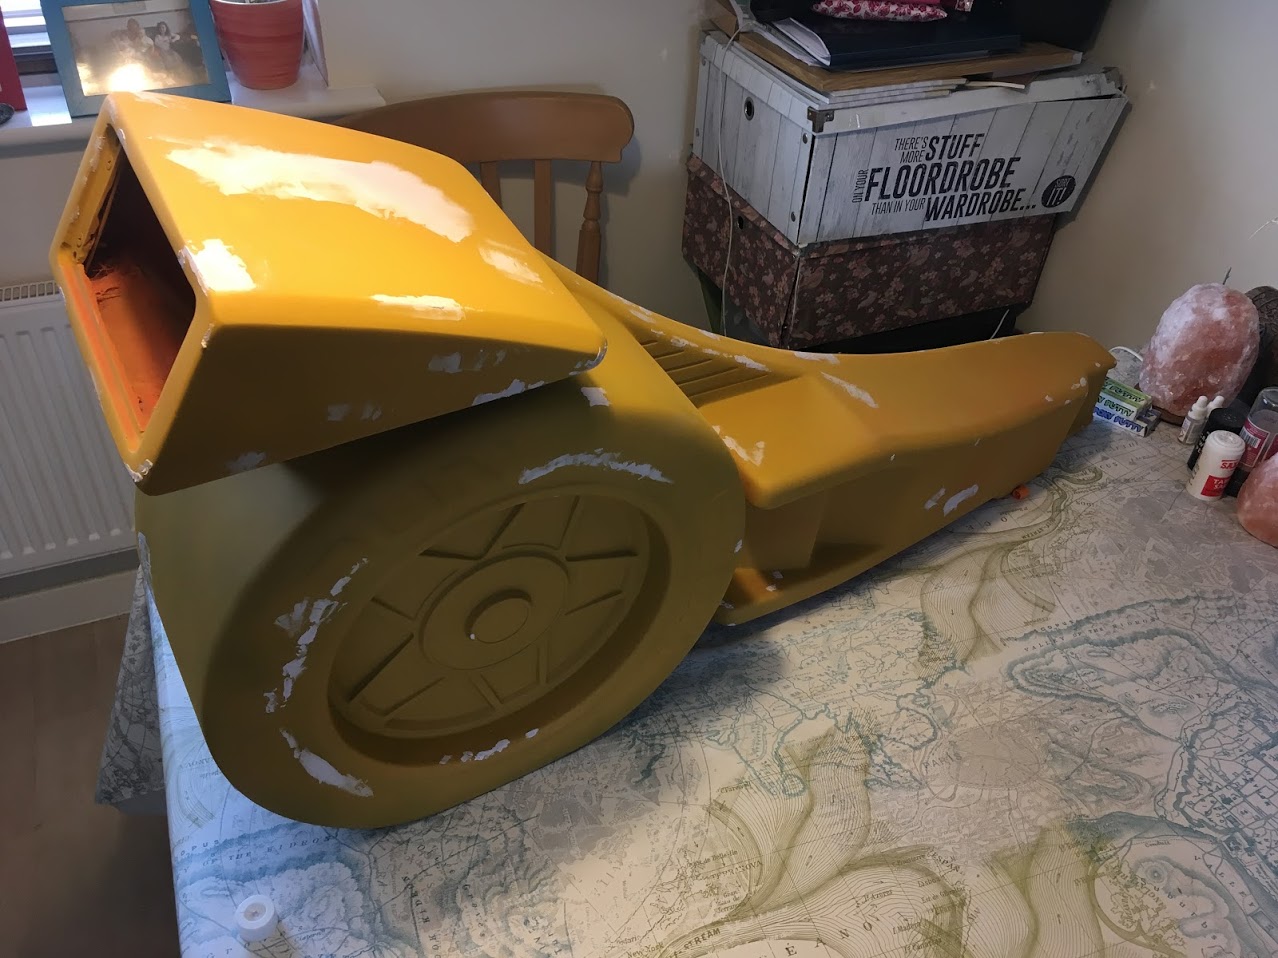
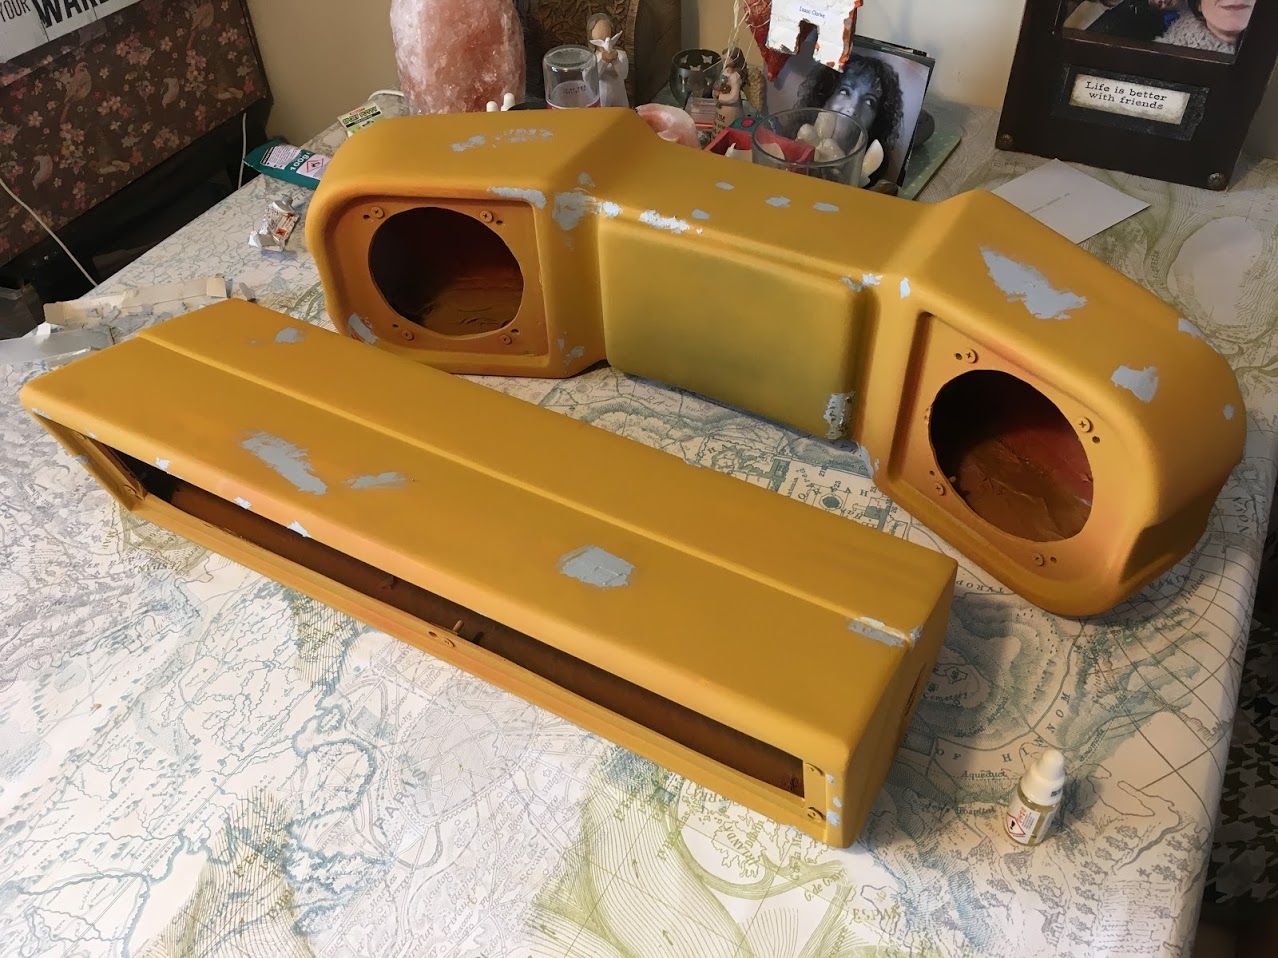
So this week will be sand the filler, then wet sand the whole lot with the aim to get the top coats on over the weekend / early next week.
The seat was the worst part.
Goodbye Jilly T whoever you are.
Sanded (hoursssssss of work)
Bolster repaired.
Primed and more filling.
Side Pods
Lots of cracks (that I think must have been there from new.
Some weird filler like substance was caked on this side and blocking lots of the detail.
Cut out. (larger than needed but will fill in later)
After much sanding both sides were primed then filled again ready for final sand and paint.
So this week will be sand the filler, then wet sand the whole lot with the aim to get the top coats on over the weekend / early next week.

Flinnster said:Seriously epic stuff.
Newbie plastics question. Why yellow primer?
Cheers, it’s filler primer. The whole surface was so bad I used it to cover some of the finer crazing etc. Some parts (the red /silver) will get a grey primer over the top of this first.
wim outrun repro
User
- Credits
- 41CR
Very good work so far.
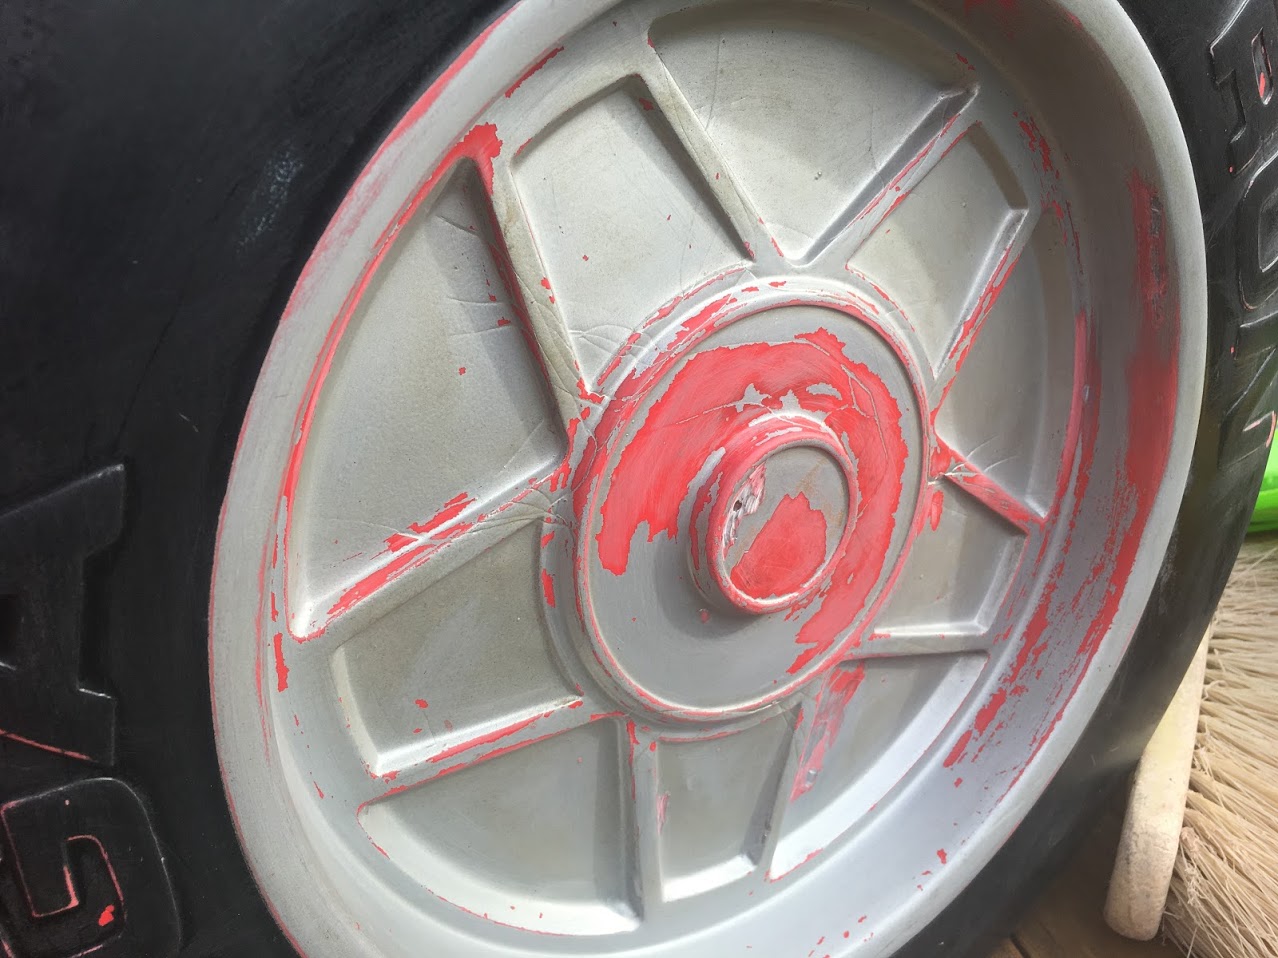
The cracks in your wheels . Are there because they where already in the mold . I think they used a hamer to get the parts out of the mold. And then
the cracks came in the mold. And they continue to use the mold.
Cheers
The cracks in your wheels . Are there because they where already in the mold . I think they used a hamer to get the parts out of the mold. And then
the cracks came in the mold. And they continue to use the mold.
Cheers