POST UPDATE - Instructions for 6 button connection and configuration added
Ok I've knocked together some (hopefully) more complete instructions for setting up the RGB-Pi JAMMA. Feel free to comment if I've missed anything or got anything wrong but I think this is about right, and I think it covers a few more things than the instructions on the wiki.
I’ve written this guide after setting up my RGB-Pi JAMMA as I found the instructions provided weren’t clear, and I spent the best part of a day trying to get the damn thing up and running. Hopefully the instructions below will make things a little easier for people.
1 - The RGB-Pi JAMMA comes with three little plastic blockers - they’re in the foam that holds the RGB-Pi and easy to miss. You should insert one of these in pin 7 of your JAMMA harness. This will stop you accidentally connecting your RGB-Pi the wrong way round. This can be a bit fiddly but it should push in eventually.
2 - Disconnect any boards (if you have any plugged in to your JAMMA harness already) and power up your cab. Use a multimeter to check the voltages coming out of your PSU and adjust using the potentiometer as required. There is a useful video for how to do this here: https://www.youtube.com/watch?v=M9JNeP3tiaY The voltage should be showing as 5.25 (or as close as you can get it) in order to run your RGB-Pi (mine’s running fine at 5.2v).
3 - Make sure no buttons are registering as being pressed on your cab (to be honest if you know your cab doesn’t send signals from the buttons in general use you shouldn’t have to worry here).
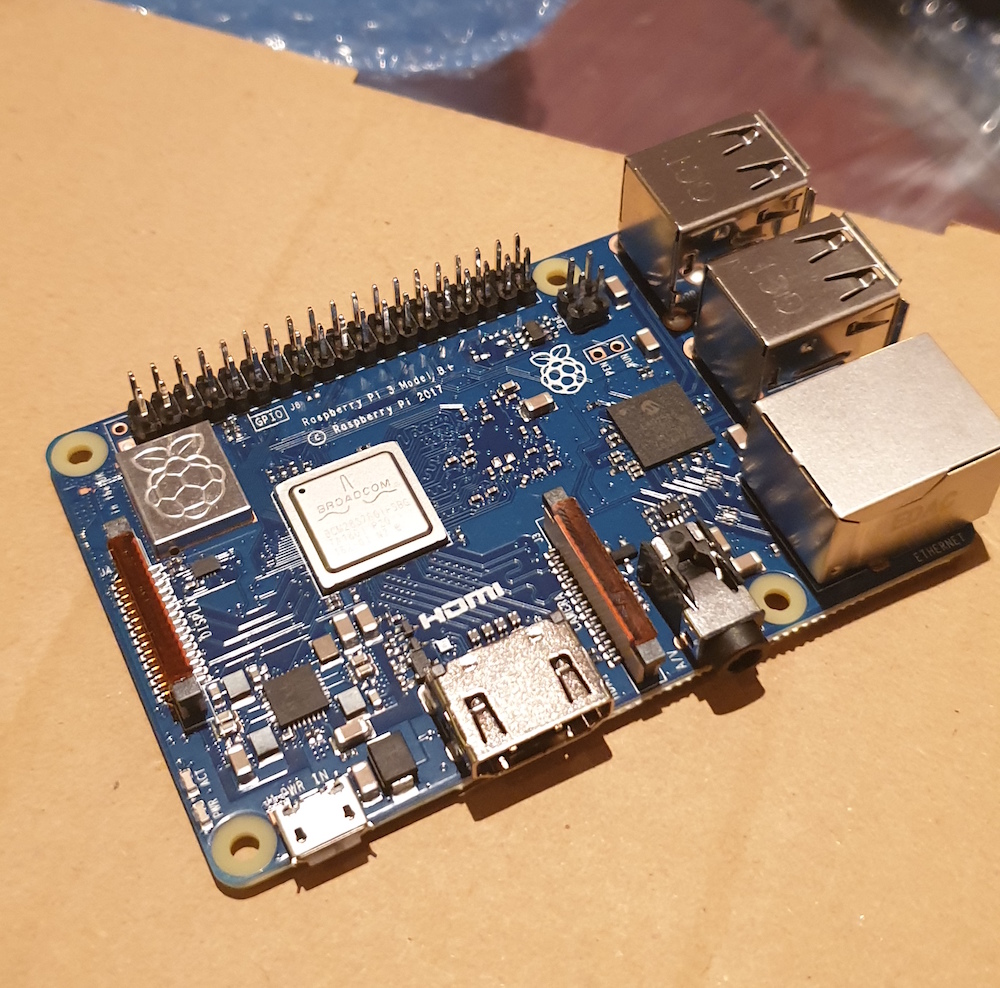
4 - Carefully connect the RGB-Pi to your raspberry Pi. Make sure the JAMMA connector on the RGB-Pi is facing outwards. At this point of course nothing should be connected to anything so there will be no power going through anything this should simply be a case of carefully pushing the RGB-Pi on to the Pi GPIO pins.
5 - Attach a heatsink to the gold square on the RGB-Pi - you can get cheap heatsinks with self adhesive backing on Amazon for a few quid.
6 - Download the RGB-Pi OS file from their website. It’s a zip file but you don’t need to decompress it, Etcher will deal with all of that later.
7 - Format your SD card to FAT32
8 - If you don’t already have it, download Etcher. This is used to write your OS image to the SD card correctly (as opposed to just drag and dropping files using a file manager). Etcher is a vailable for both Windows and OSX so don’t worry if you’re running a Mac, you’ll be fine.
9 - Use Etcher to burn the downloaded file to your SD card. Do not decompress the ZIP file, Etcher will take care of everything for you. When etcher has finished flashing the SD card it should unmount the card. At this point you can remove the SD card and insert it in to your Raspberry Pi.
10 - When you bought your RGB-Pi you should have received an email from the seller. This should have links to both their discord server and to their telegram channel. he discord server is useful for getting tech support etc., and the telegram channel contains loads of ROM packs you can download. You should verify yourself on the relevant channel in Discord by uploading a photo of your RGB-Pi. This gives you access to additional channels. From the Telegram channel, I used the arcade pack which came as 5 separate files. These files were a split zip file, and I had real problems extracting these correctly on my Mac.. Luckily I had a virtual machine running Windows which I was able to use, and WinRar for Windows extracted everything perfectly. Once you’ve extracted all the files you can forget about them for now.
11 - Pop your SD card in to the Pi, and connect the RGB-Pi to your JAMMA harness with the Cab turned off. Power up your cab once connected, hold your breath and pray to the Gaming gods and if everything is working you should see the RGB-Pi OS logo after a few seconds. You may need to adjust the controls for your monitor - my standard settings needed adjusting before I could see anything. Once you can actually see the screen the system will ask you to configure your controls (so when it says Up, push up on the joystick etc.). For the Insert Coin button I dropped a coin through my coin mech and I can use that to add credits. Once this is completed the OS should expand the file system on the card. Once it has finished doing this the Pi will restart after about 10 seconds and take you to a screen saying you haven't installed any games yet.
12 - Now we can talk about adding ROMs. I found the only way to do this was via SSH (I use CyberDuck but you could use Putty if you prefer). In order to connect the Pi to your Wifi you need to go the network settings and enter your Wifi name and password. HOWEVER, RGB-Pi OS only allows 8 characters to be added for each of these. So I had to rename my wifi network and change the password, which meant all my devices dropped off the network. This is a real pain but I couldn’t see any other way of doing this.
*Update: V2 of the RGB-Pi OS allows you to add far more characters so this shouldn't be an issue if you're using the newest version of the OS *
Once I had done this and connected to the Wifi I could go to the IP address shown in RGB-Pi OS and log in (username is pi, password is rgbpi). This then gave me access to the rom folder which I hadn’t been able to access by putting my SD card in my Mac. I was then able to transfer the ROMs. The RGB-Pi OS creates the correct folder structure for you so you can place your ROMs in the correct place.
13 - Download the BIOS pack from the Telegram channel and transfer it to the relevant folder on the RGB-Pi. I found I couldn't run Neo Geo games without doing this.
14 - If you need to set up 6 buttons you need to do a little more work. The first thing you need to do is break the jumper trace on each side of the board labelled JP1 and JP2. A Stanley knife should be fine for scraping away the middle of the jumper. Next, you need to solder 4 wires to the PCB on the four contacts labelled 1P5, 1P6, 2P5 and 2P6. Connect the other end of the wires to your buttons 5 and 6 for each player on the CP (my buttons were already set up previously so were already connected to ground, but if yours aren't you'll need to ground the buttons). For games such as the SF2 series you'll need to remap the various buttons in Retroarch. I set up the controls in SF2HF and saved them (save for the game, don't overwrite the core mapping file). I then loaded the new profile for the other SF2 games I wanted to play.
* Update: It appears that the mappings for SF2 etc. are correct in RGB-Pi OS V2 *
15 - That should be it. Once your ROM’s are in place you should be good to go.
RichMurrills2020-06-04 21:01:11