You are using an out of date browser. It may not display this or other websites correctly.
You should upgrade or use an alternative browser.
You should upgrade or use an alternative browser.
Zacc Invaders - The Project
- Thread starter Mr20to5
- Start date

Hi Guys,
A quick update on progress this morning. (Before I get ready to set of for The Arcade Club/New Frontier !!! Woo Hoo!!)
Let's start with a slight quandary - to restore or replace.
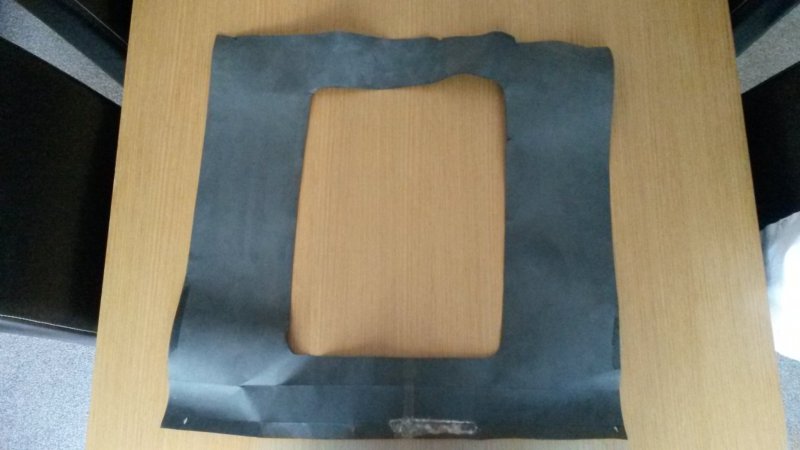
Here is a picture of the cardboard surround that sits around the monitor screen itself. As you can see it is not in the best nick, but on the other hand, I can only assume that this would be the original, so is it worth saving?
So, for now, a quick trip to The Range and a couple of quid later, I had acquired a nice big sheet of A1 card and using the old surround as a template, I cut myself a new one. Coloured in the edges with a Sharpie and Hey Presto..
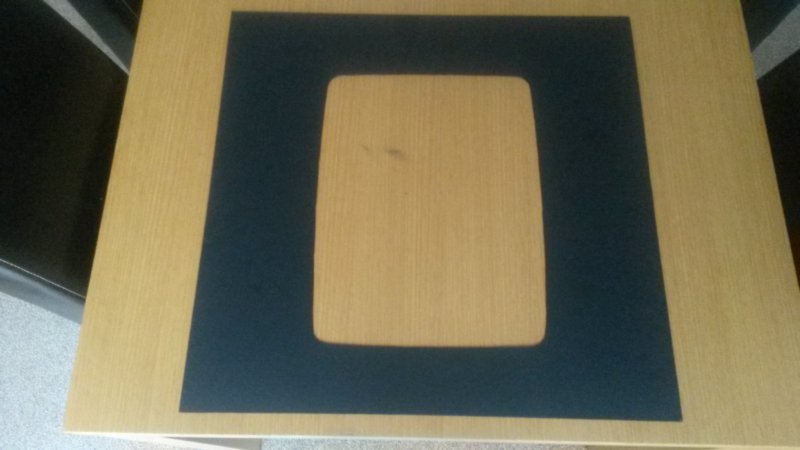
When offered up this is a lovely fit and all but invisible when looking through the bezel. I am impressed but will still keep hold of the original, as you never know. But would be interested in where opinion lies with this?
Ransome I hope this helps you in your quest also.
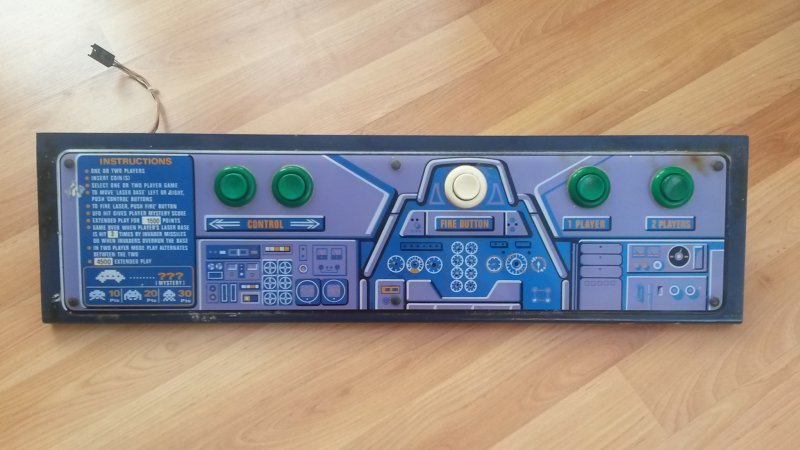
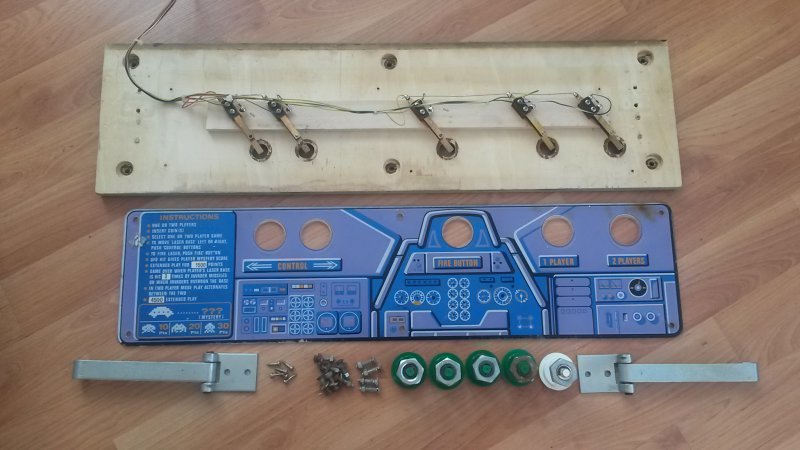
Next up, the control panel. Dismantled it mostly, to find the overlay in reasonable condition, a little scratching round the edges underneath and some cig burns in a couple of places but nothing too severe. The buttons I would want to replace, as they are badly discoloured and chipped in places. The screws, nuts and bolts were all badly rusted all over. Here's the photos;
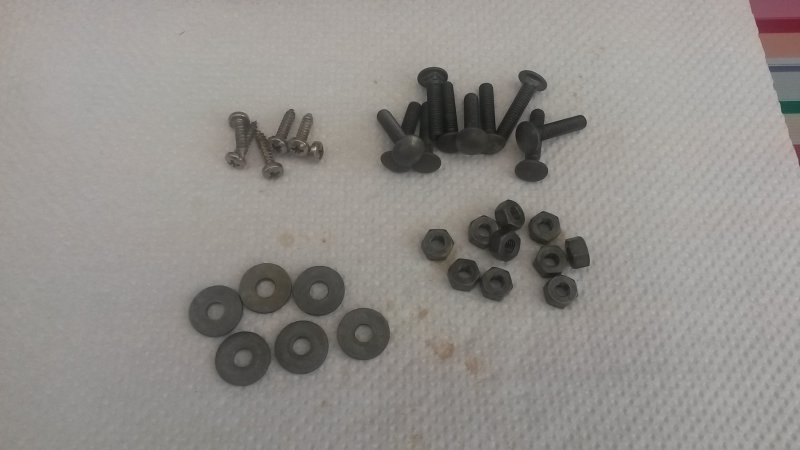
First up - the rusty bits. 24 hours soaking in some manky vinegar I found in the back of a kitchen cupboard and viola; (it really is that simple, no scrubbing, sanding, polishing, anything, just soak in vinegar and shake every no and then when you walk past).
Before

After
That's it for now. Onto the control panel itself next, which I am half way through doing, hopefully get finished soon, but would be good if anyone could point in the direction for getting replacement buttons, the ones I keep finding on tinternet searches all come with the microswitches attached which I obviously don't need.
Thanks for looking.
Neil
A quick update on progress this morning. (Before I get ready to set of for The Arcade Club/New Frontier !!! Woo Hoo!!)
Let's start with a slight quandary - to restore or replace.
Here is a picture of the cardboard surround that sits around the monitor screen itself. As you can see it is not in the best nick, but on the other hand, I can only assume that this would be the original, so is it worth saving?
So, for now, a quick trip to The Range and a couple of quid later, I had acquired a nice big sheet of A1 card and using the old surround as a template, I cut myself a new one. Coloured in the edges with a Sharpie and Hey Presto..
When offered up this is a lovely fit and all but invisible when looking through the bezel. I am impressed but will still keep hold of the original, as you never know. But would be interested in where opinion lies with this?
Ransome I hope this helps you in your quest also.
Next up, the control panel. Dismantled it mostly, to find the overlay in reasonable condition, a little scratching round the edges underneath and some cig burns in a couple of places but nothing too severe. The buttons I would want to replace, as they are badly discoloured and chipped in places. The screws, nuts and bolts were all badly rusted all over. Here's the photos;
First up - the rusty bits. 24 hours soaking in some manky vinegar I found in the back of a kitchen cupboard and viola; (it really is that simple, no scrubbing, sanding, polishing, anything, just soak in vinegar and shake every no and then when you walk past).
Before
After
That's it for now. Onto the control panel itself next, which I am half way through doing, hopefully get finished soon, but would be good if anyone could point in the direction for getting replacement buttons, the ones I keep finding on tinternet searches all come with the microswitches attached which I obviously don't need.
Thanks for looking.
Neil
Gaming Heaven
Active member
I say your replacement card is perfect, mine was ok but a bit curled I should have painted the wood underneath black when it was all open as it has curled a bit to reveal the wood underneath
this is really helpful as I have not restored my control panel yet
looks like you already cleaned your front glass but caution I rubbed mine too hard and the art started to rub off
I need to order some drill bit buffer attachments, look forward to learning how to fix the cig burns
this is really helpful as I have not restored my control panel yet
looks like you already cleaned your front glass but caution I rubbed mine too hard and the art started to rub off
I need to order some drill bit buffer attachments, look forward to learning how to fix the cig burns
Gaming Heaven
Active member
OK I am now copying you and finally sorting my CP [bolts etc in vinegar as we speak!]
My white button broke in the process of cleaning but I had some NOS spares, I can post you a new white button if you want but dont have the green?
what's wrong with your buttons?
also can you point me in the direction of the right polishing compound for perspex I found blue type on ebay but says for final finishing but to remove brown burn marks not sure if it will suffice?
thanks
My white button broke in the process of cleaning but I had some NOS spares, I can post you a new white button if you want but dont have the green?
what's wrong with your buttons?
also can you point me in the direction of the right polishing compound for perspex I found blue type on ebay but says for final finishing but to remove brown burn marks not sure if it will suffice?
thanks
Gaming Heaven said:OK I am now copying you and finally sorting my CP [bolts etc in vinegar as we speak!]
My white button broke in the process of cleaning but I had some NOS spares, I can post you a new white button if you want but dont have the green?
what's wrong with your buttons?
also can you point me in the direction of the right polishing compound for perspex I found blue type on ebay but says for final finishing but to remove brown burn marks not sure if it will suffice?
thanks
Hi pal,
I may have been a tad hasty in my assessment of my buttons. I have since spent some time cleaning and polishing them and they may well suffice although annoyingly one of the greens is a different shade.
Glad to hear that I have inspired you to get stuck into your own resto though.
As for polish, I'm maybe not the best to ask as this will be my first.

It may also depend on whether you are using a polisher or by hand.
For what it's worth, I will be polishing by hand using differently graded pads with a fine cutting polish I have for my car and finishing with a glaze, also car stuff.
The reason for these choices are that I already have them and they are very good.
If I am happy with the results I'll put full details on here, but wouldn't like to recommend just yet.
Failing that the proven trio of Novus products will probably be purchased. Not researched for best prices but these are the ones here;
http://www.ebay.co.uk/itm/Novus-Plastic-Polish-set-includes-59ml-Novus-1-2-3-bottles-plus-one-cloth-/151643467368?pt=LH_DefaultDomain_3&hash=item234ea7ae68#ht_1122wt_1190
Neil
neil16372015-04-27 16:42:50
Gaming Heaven
Active member
thanks Neil great info
Paul
Paul
Hi Guys, quick update before I dash to work.
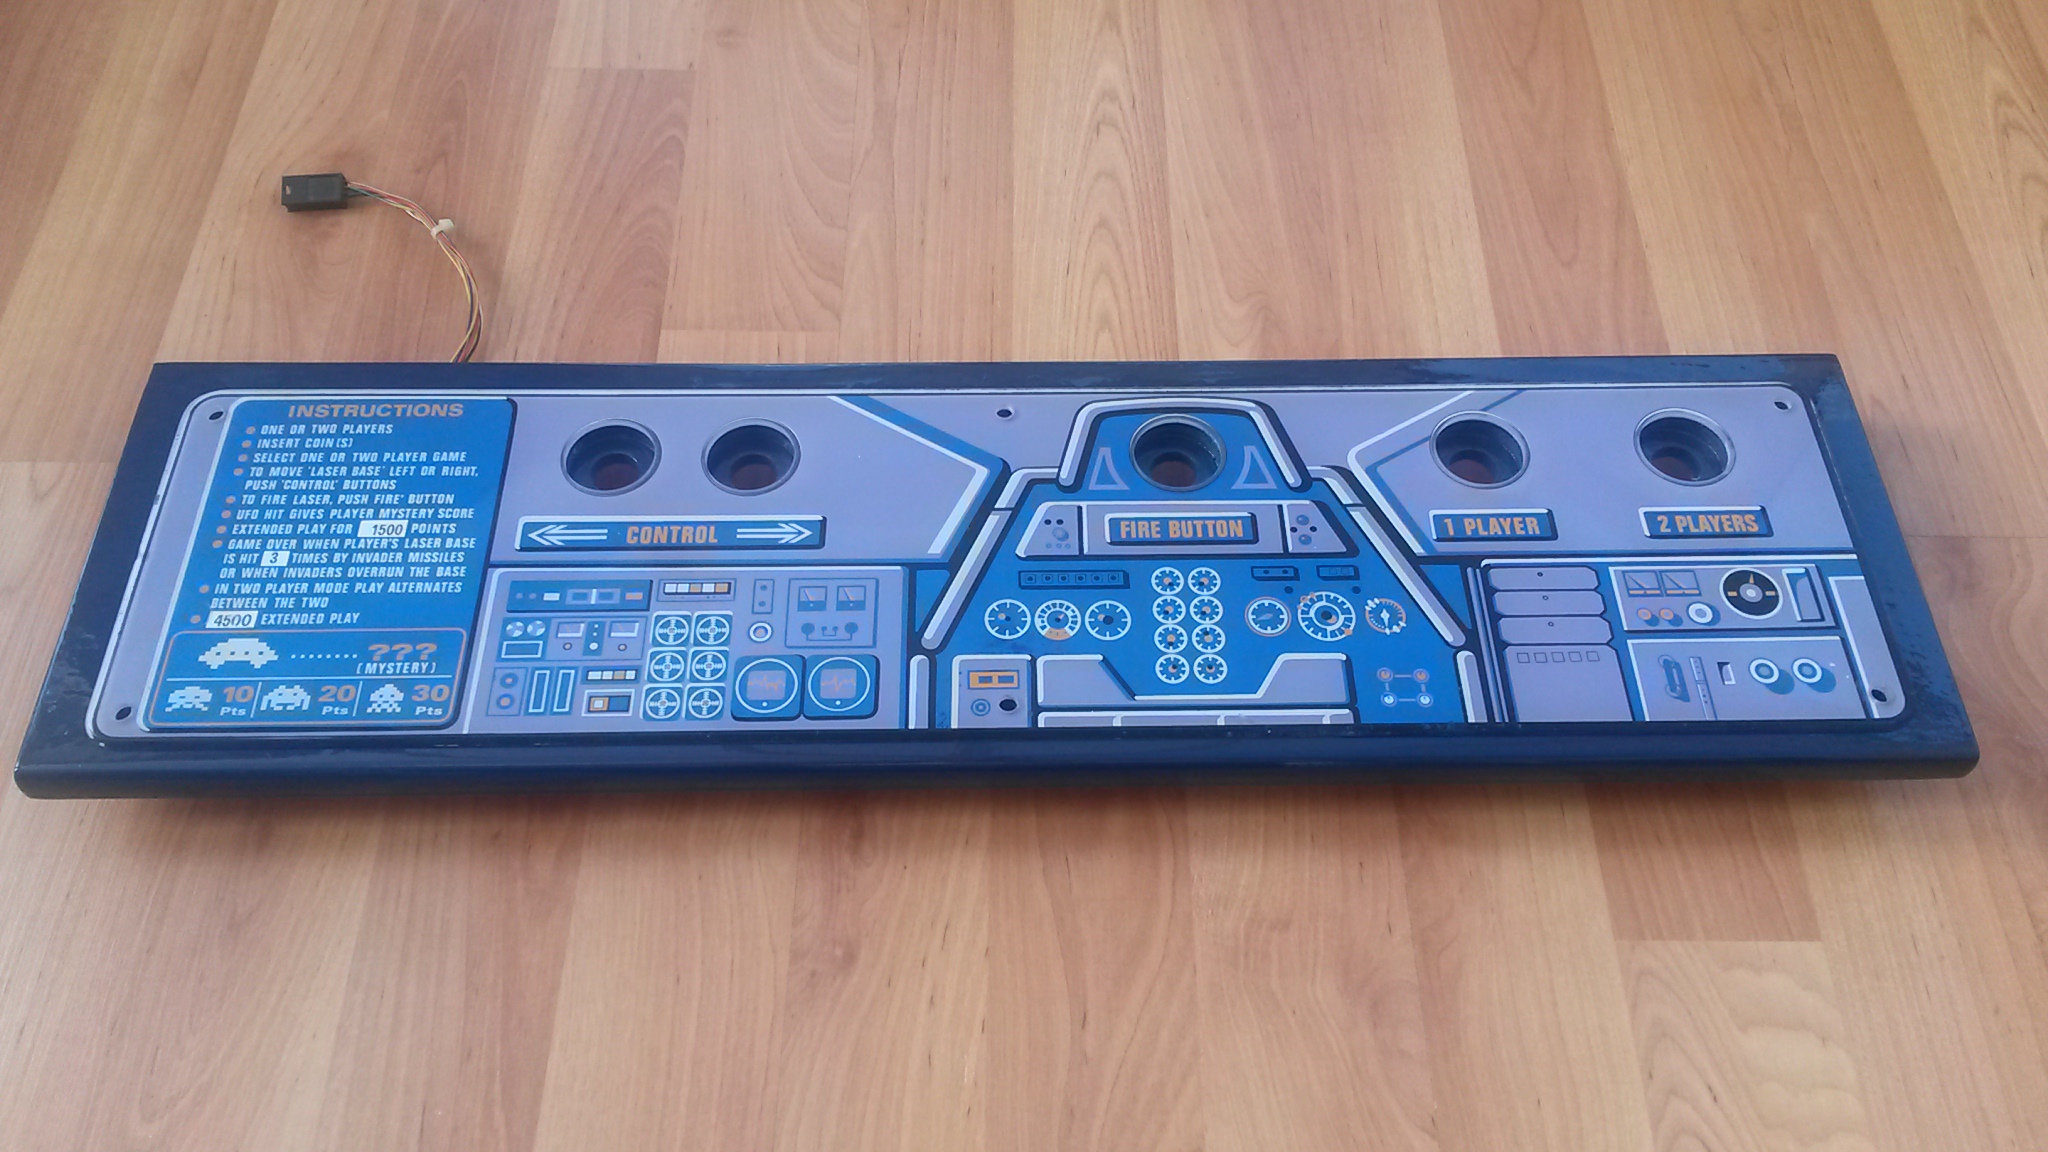
Been really busy with work last few days and little time to do much or post much in relation to Zacc, but have managed a bit so here's how the CP now looks, happy with the outcome.
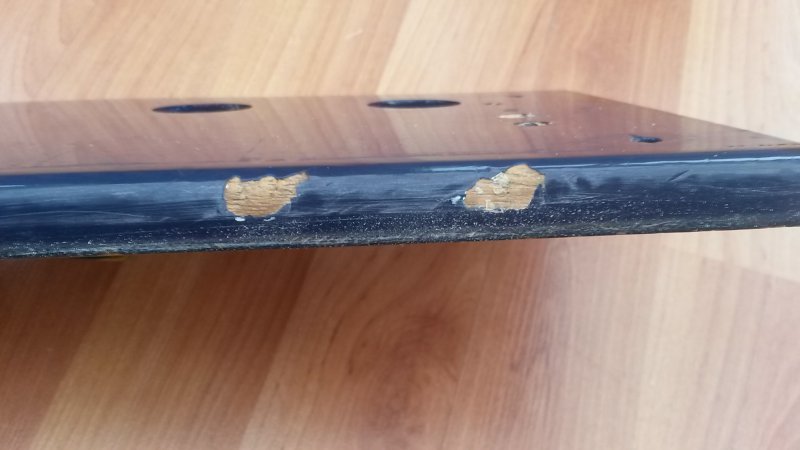
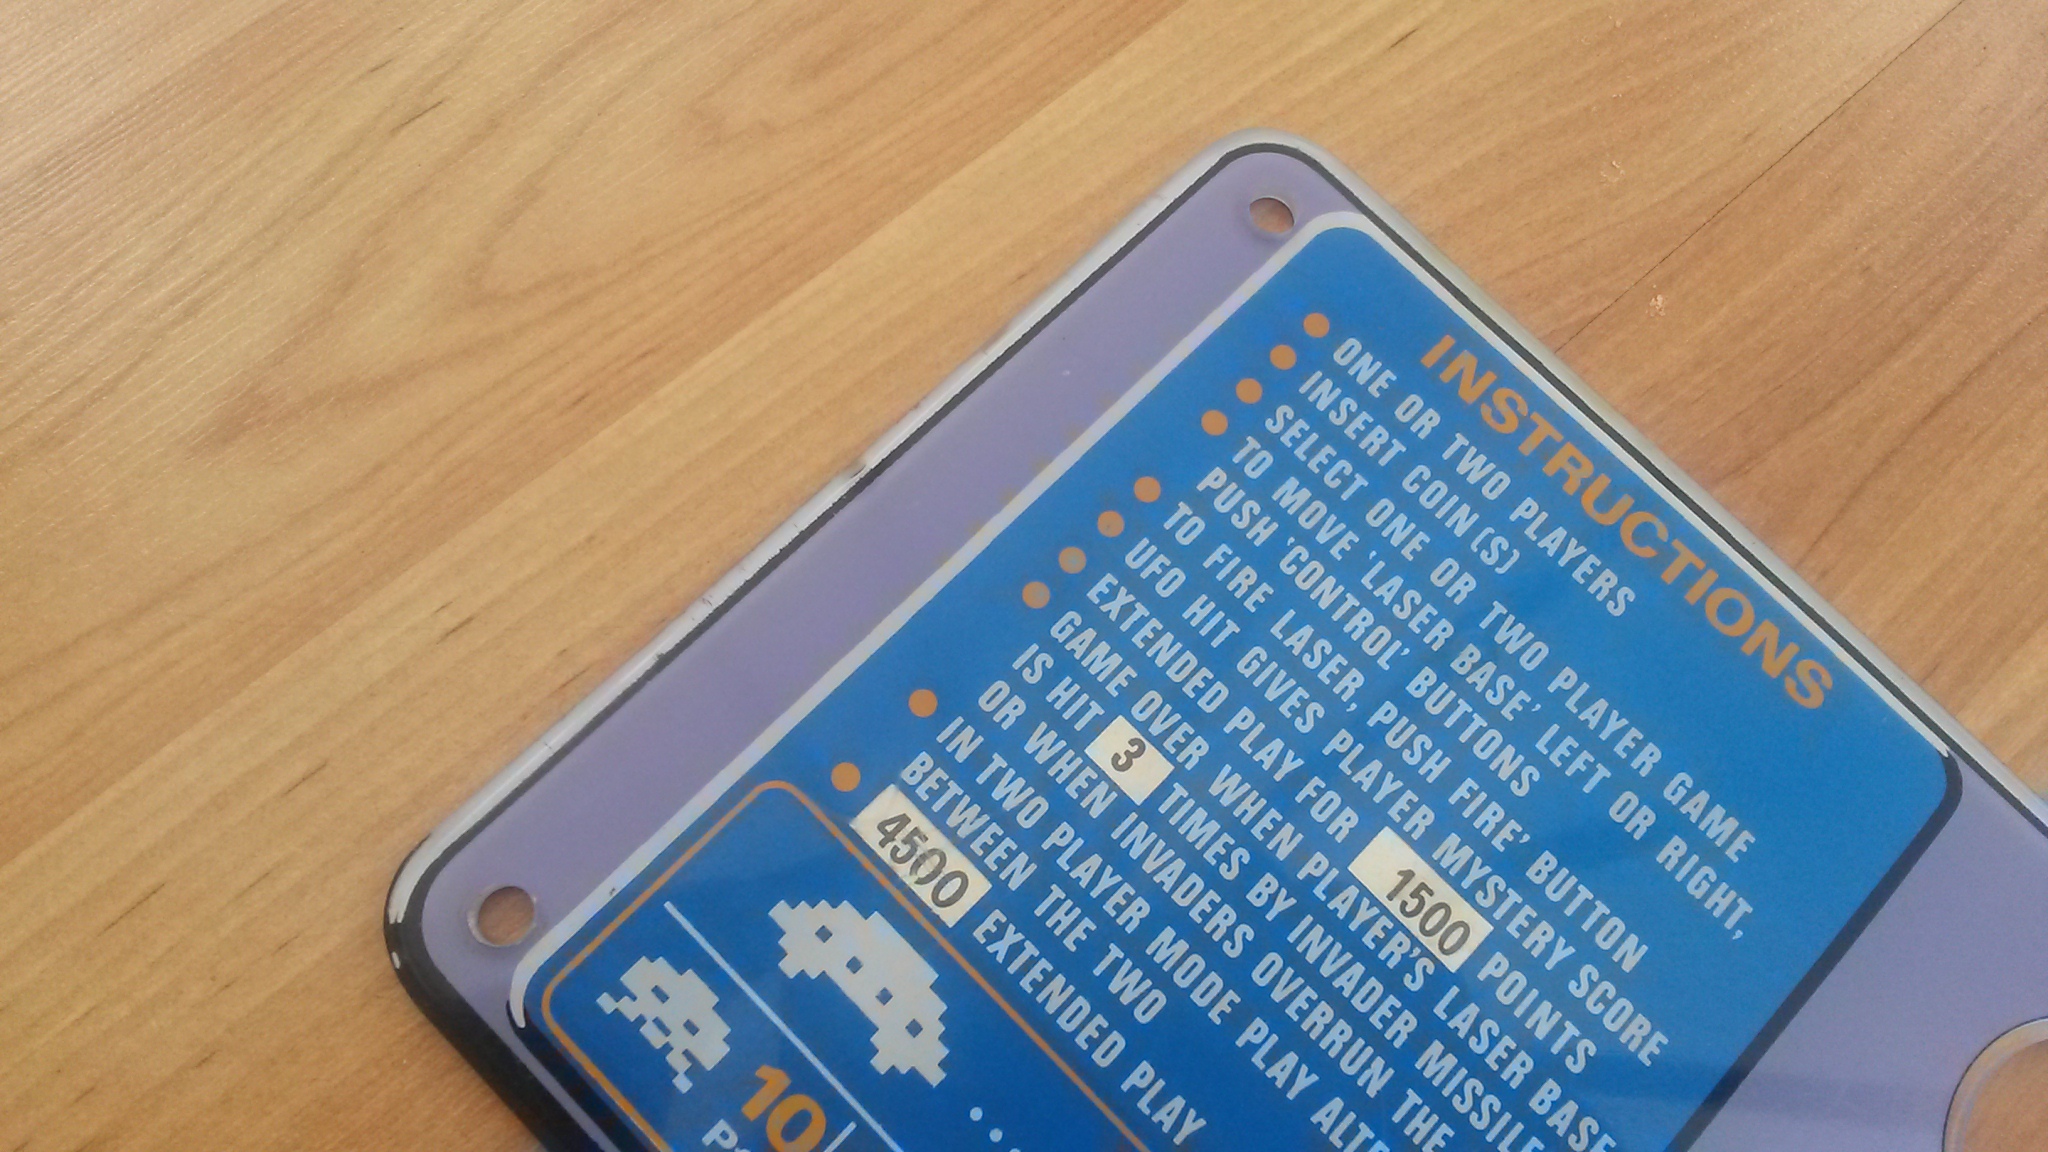
Biggest faults were the cig burns on the acrylic and the painted wood to each side, some fairly significant chips and dent to the wooden panel.
Before photos;


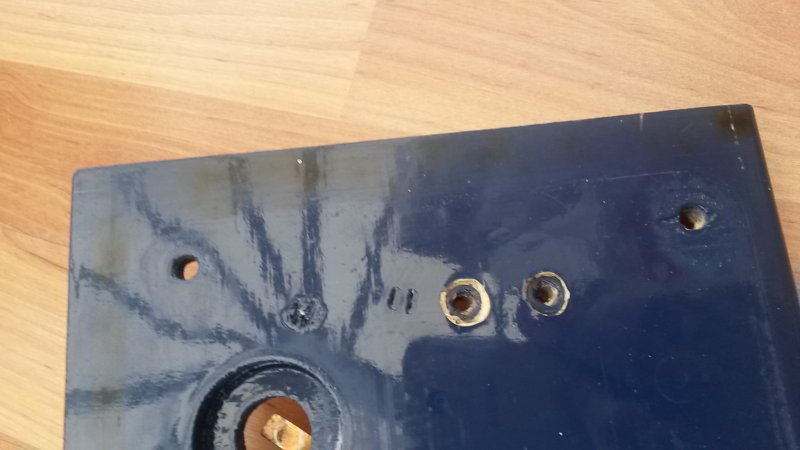
Here's the wooden board with one coat of new paint, then sanded back to really show the faults and filler applied.
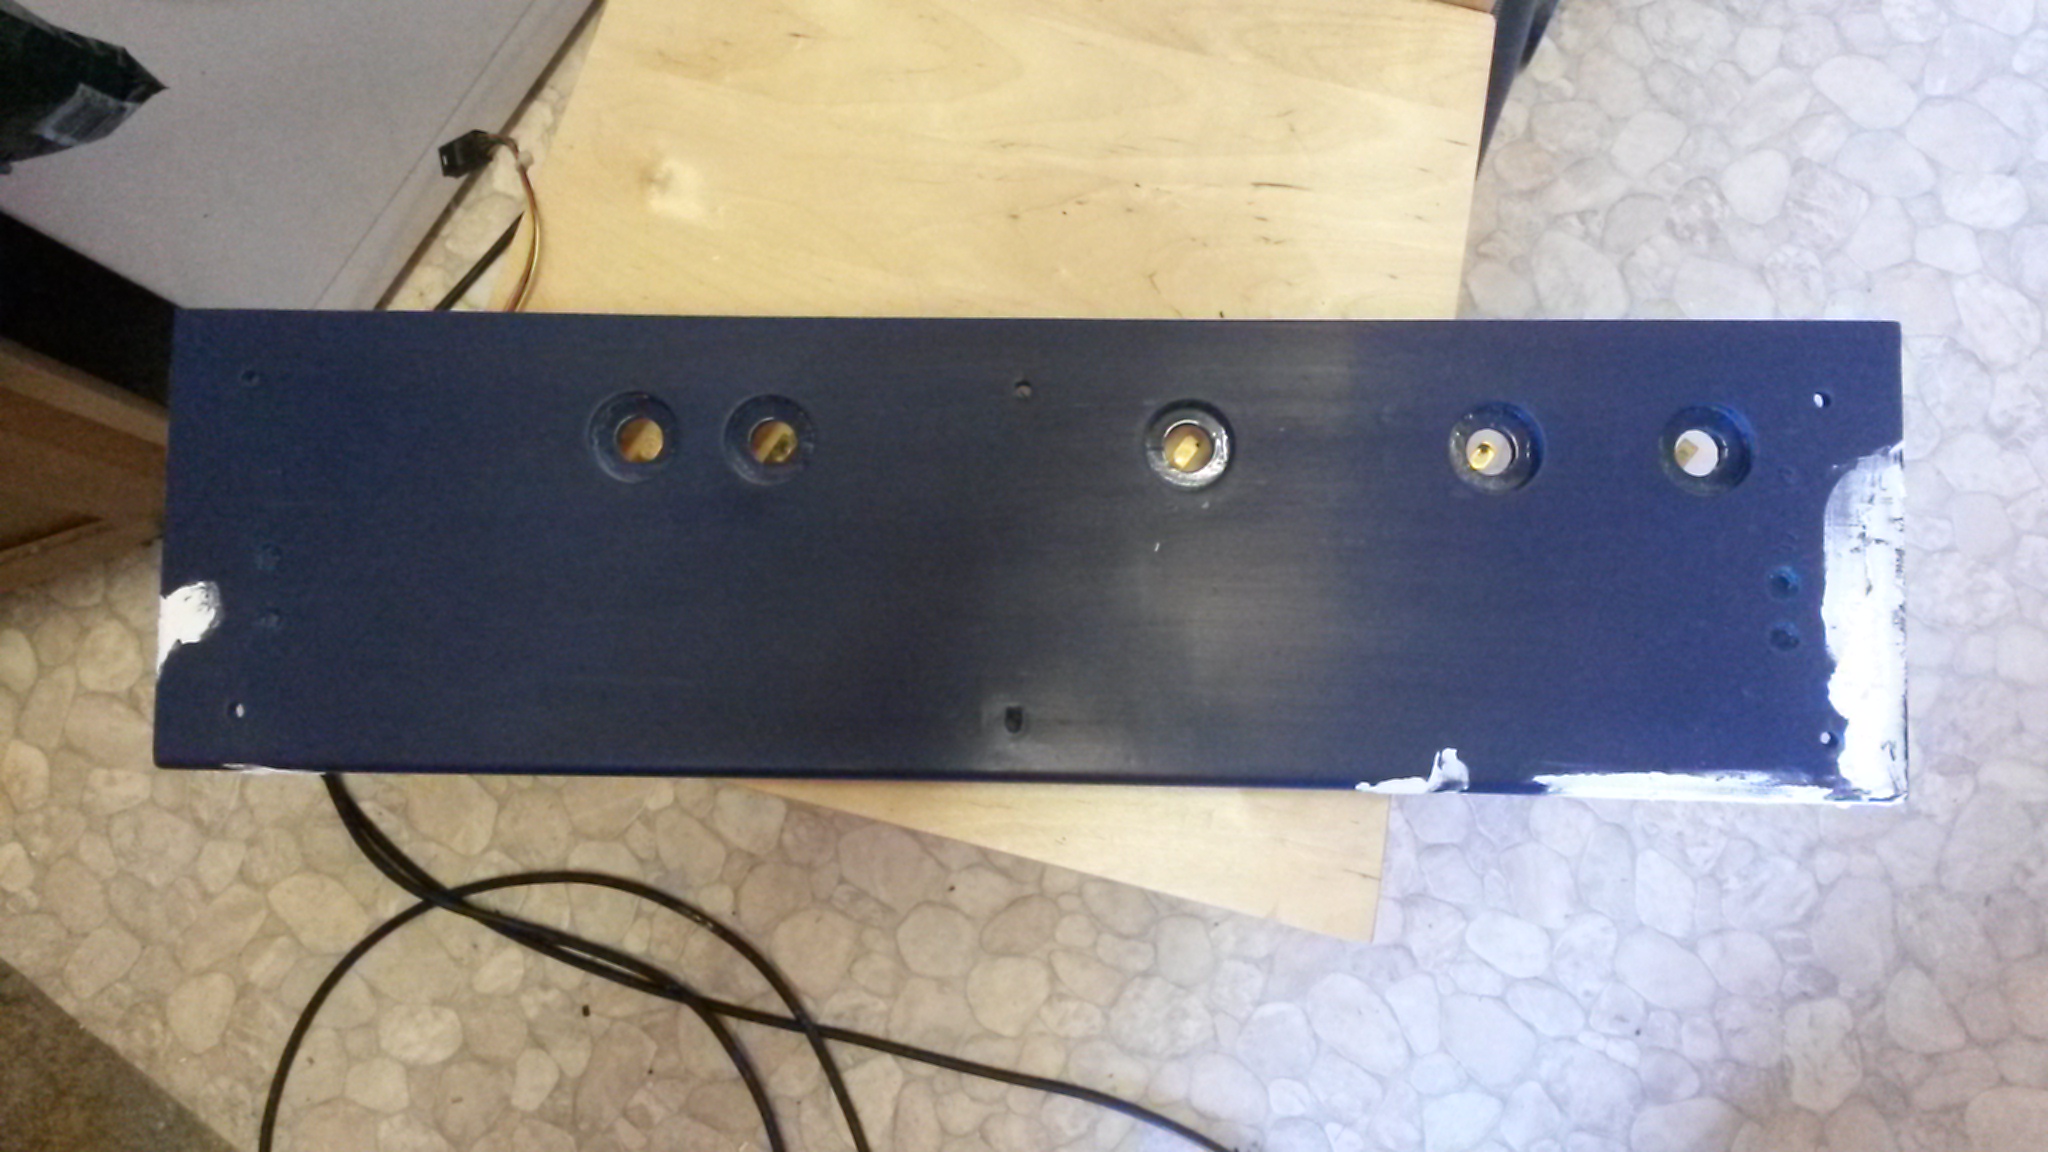
Lots more sanding and more coats applied using 1200grit wet sanding in between. Then onto the CP itself. Used some very fine wire wool to take back the acrylic past the cig burns, then used some high grade car polish that I had to polish out the wire wool marks and old scratches.
Here's the after photos.
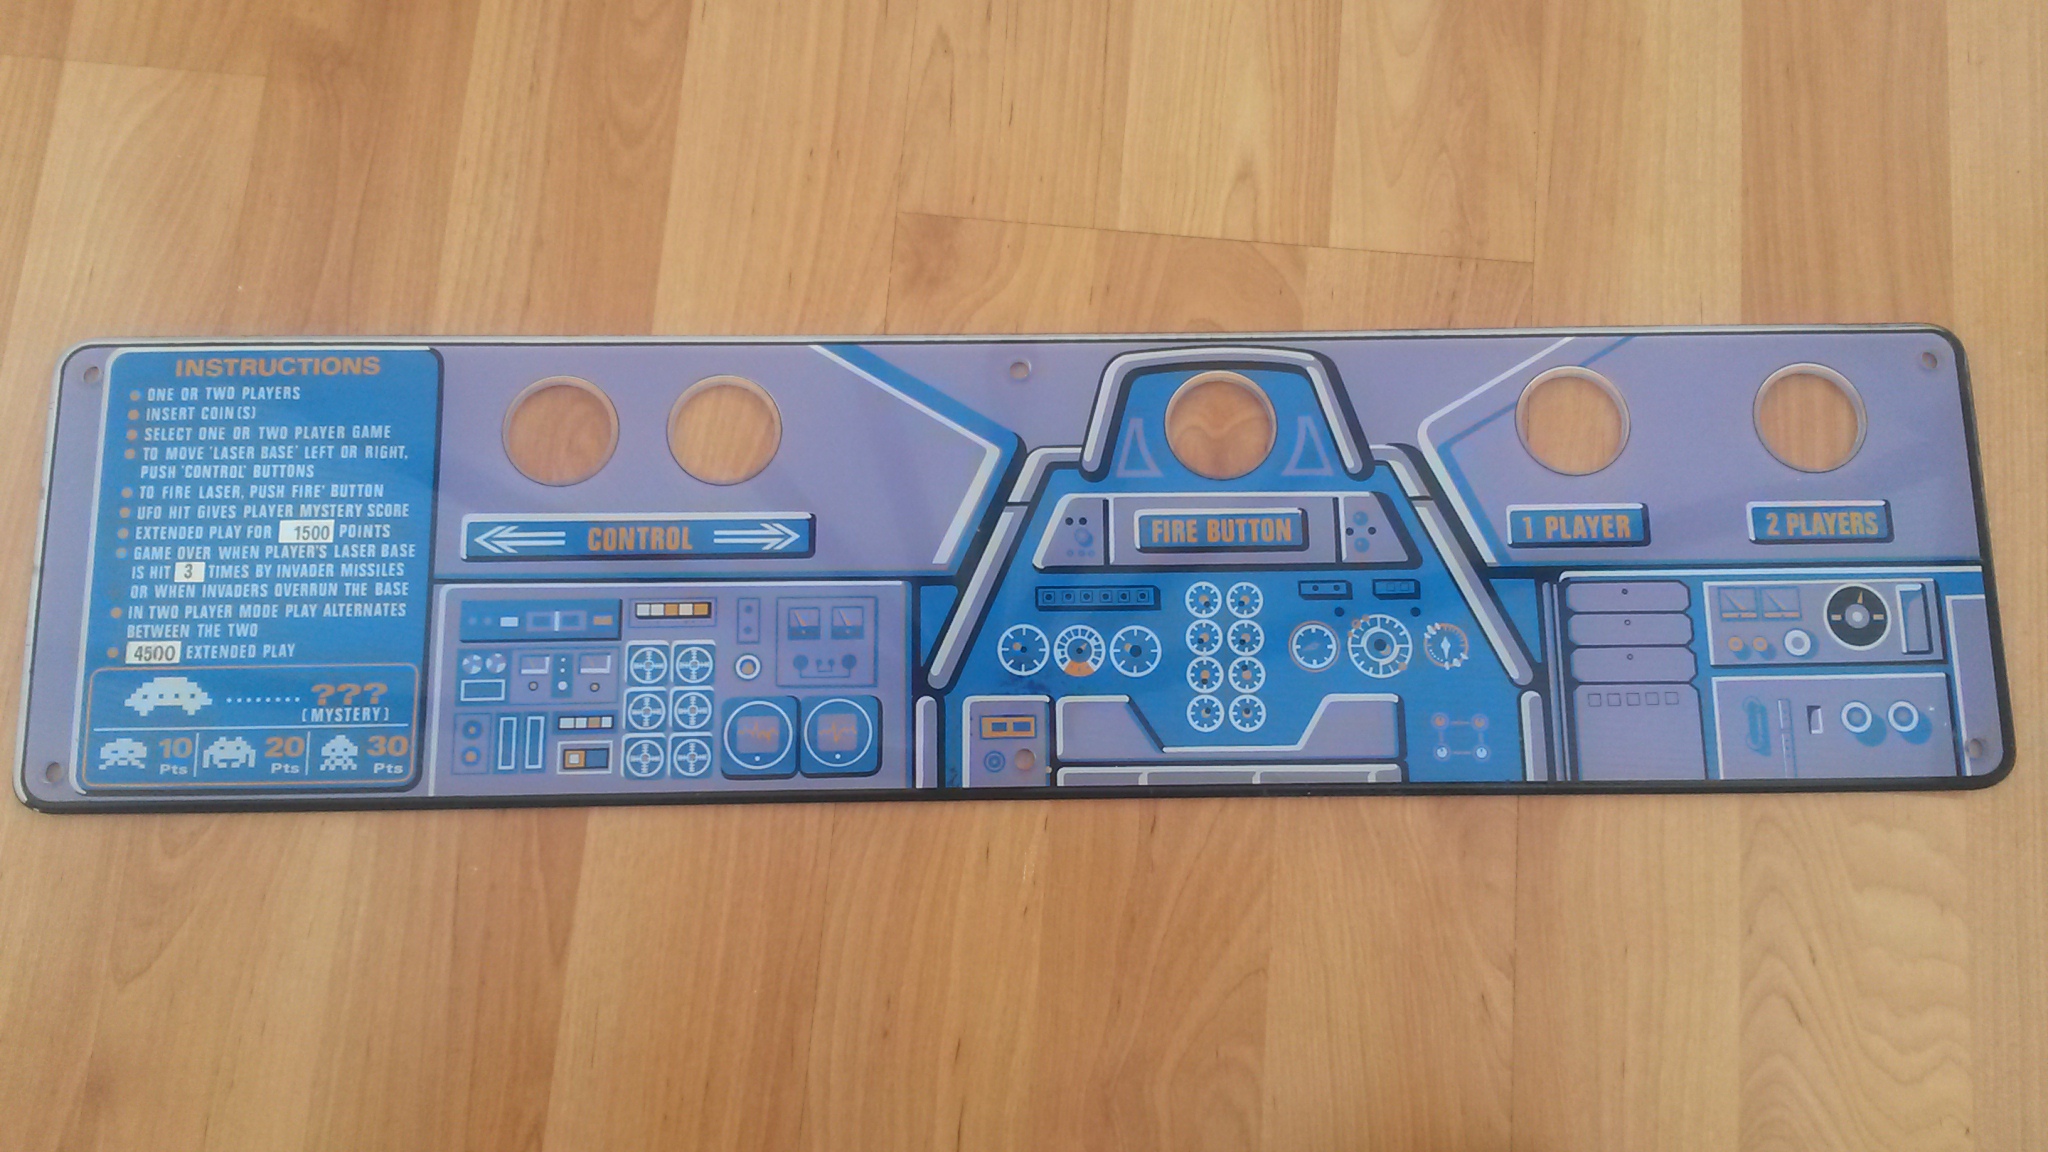
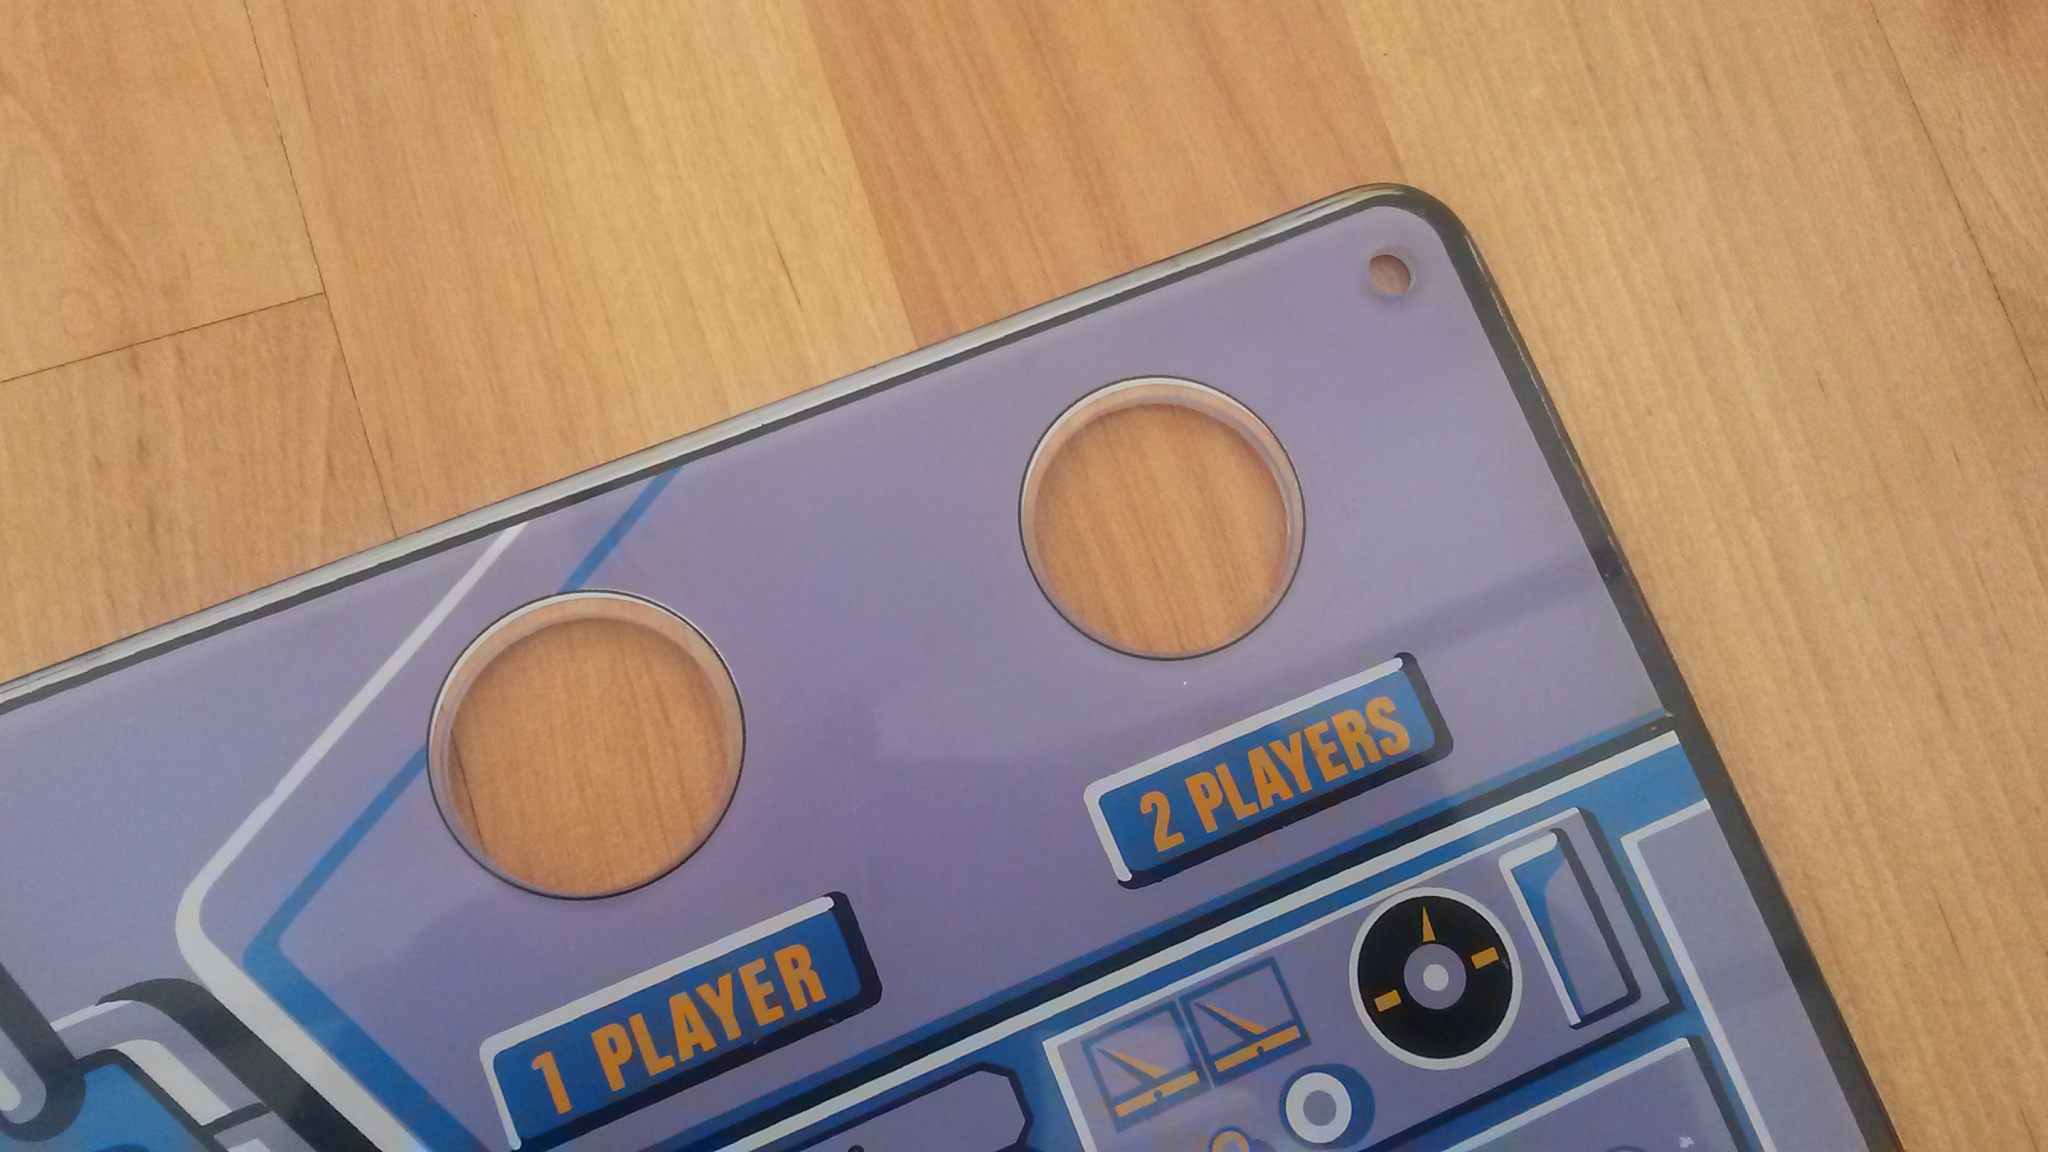
And finally back together, having polished up the bolt heads and back into the cab.
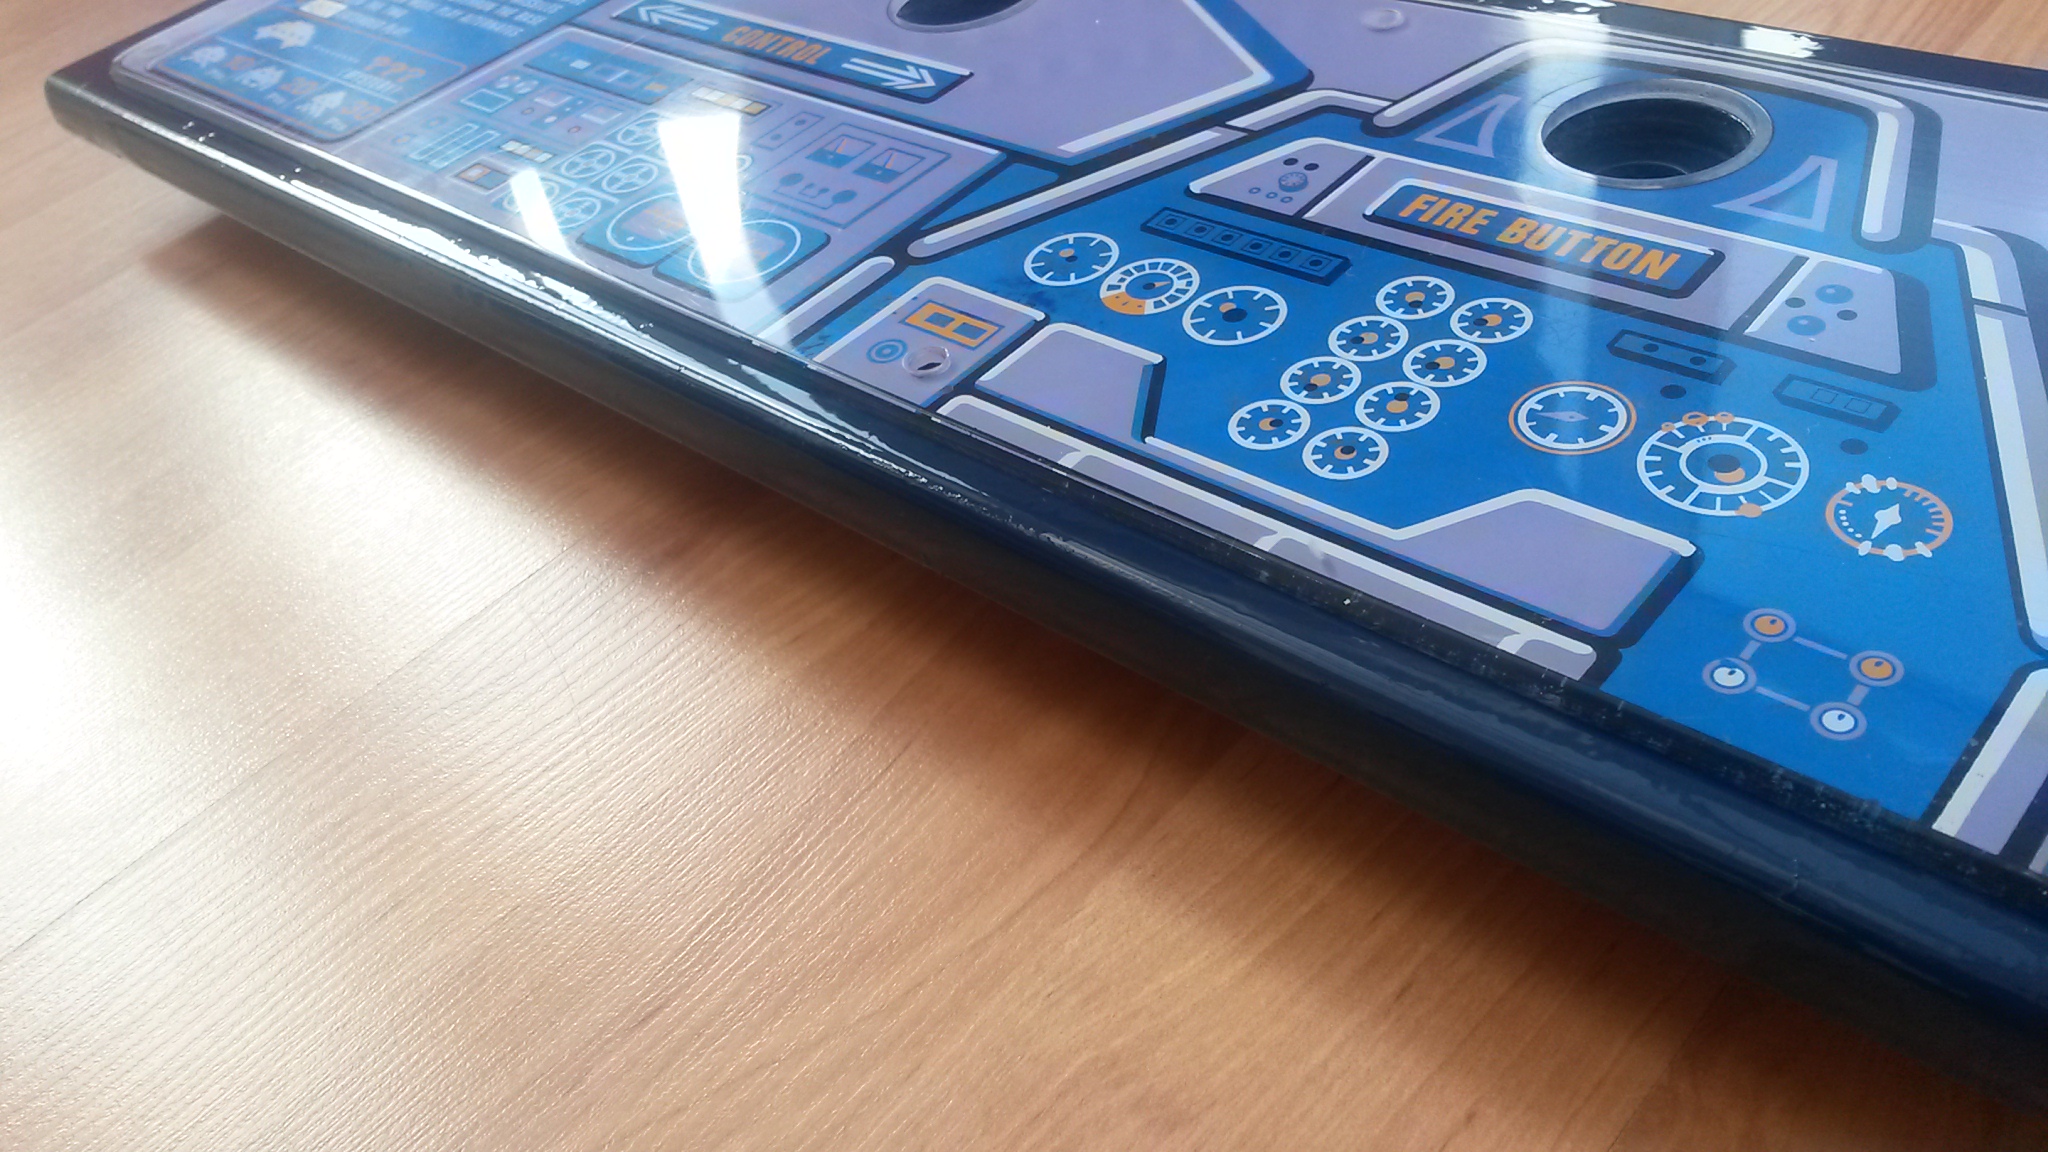
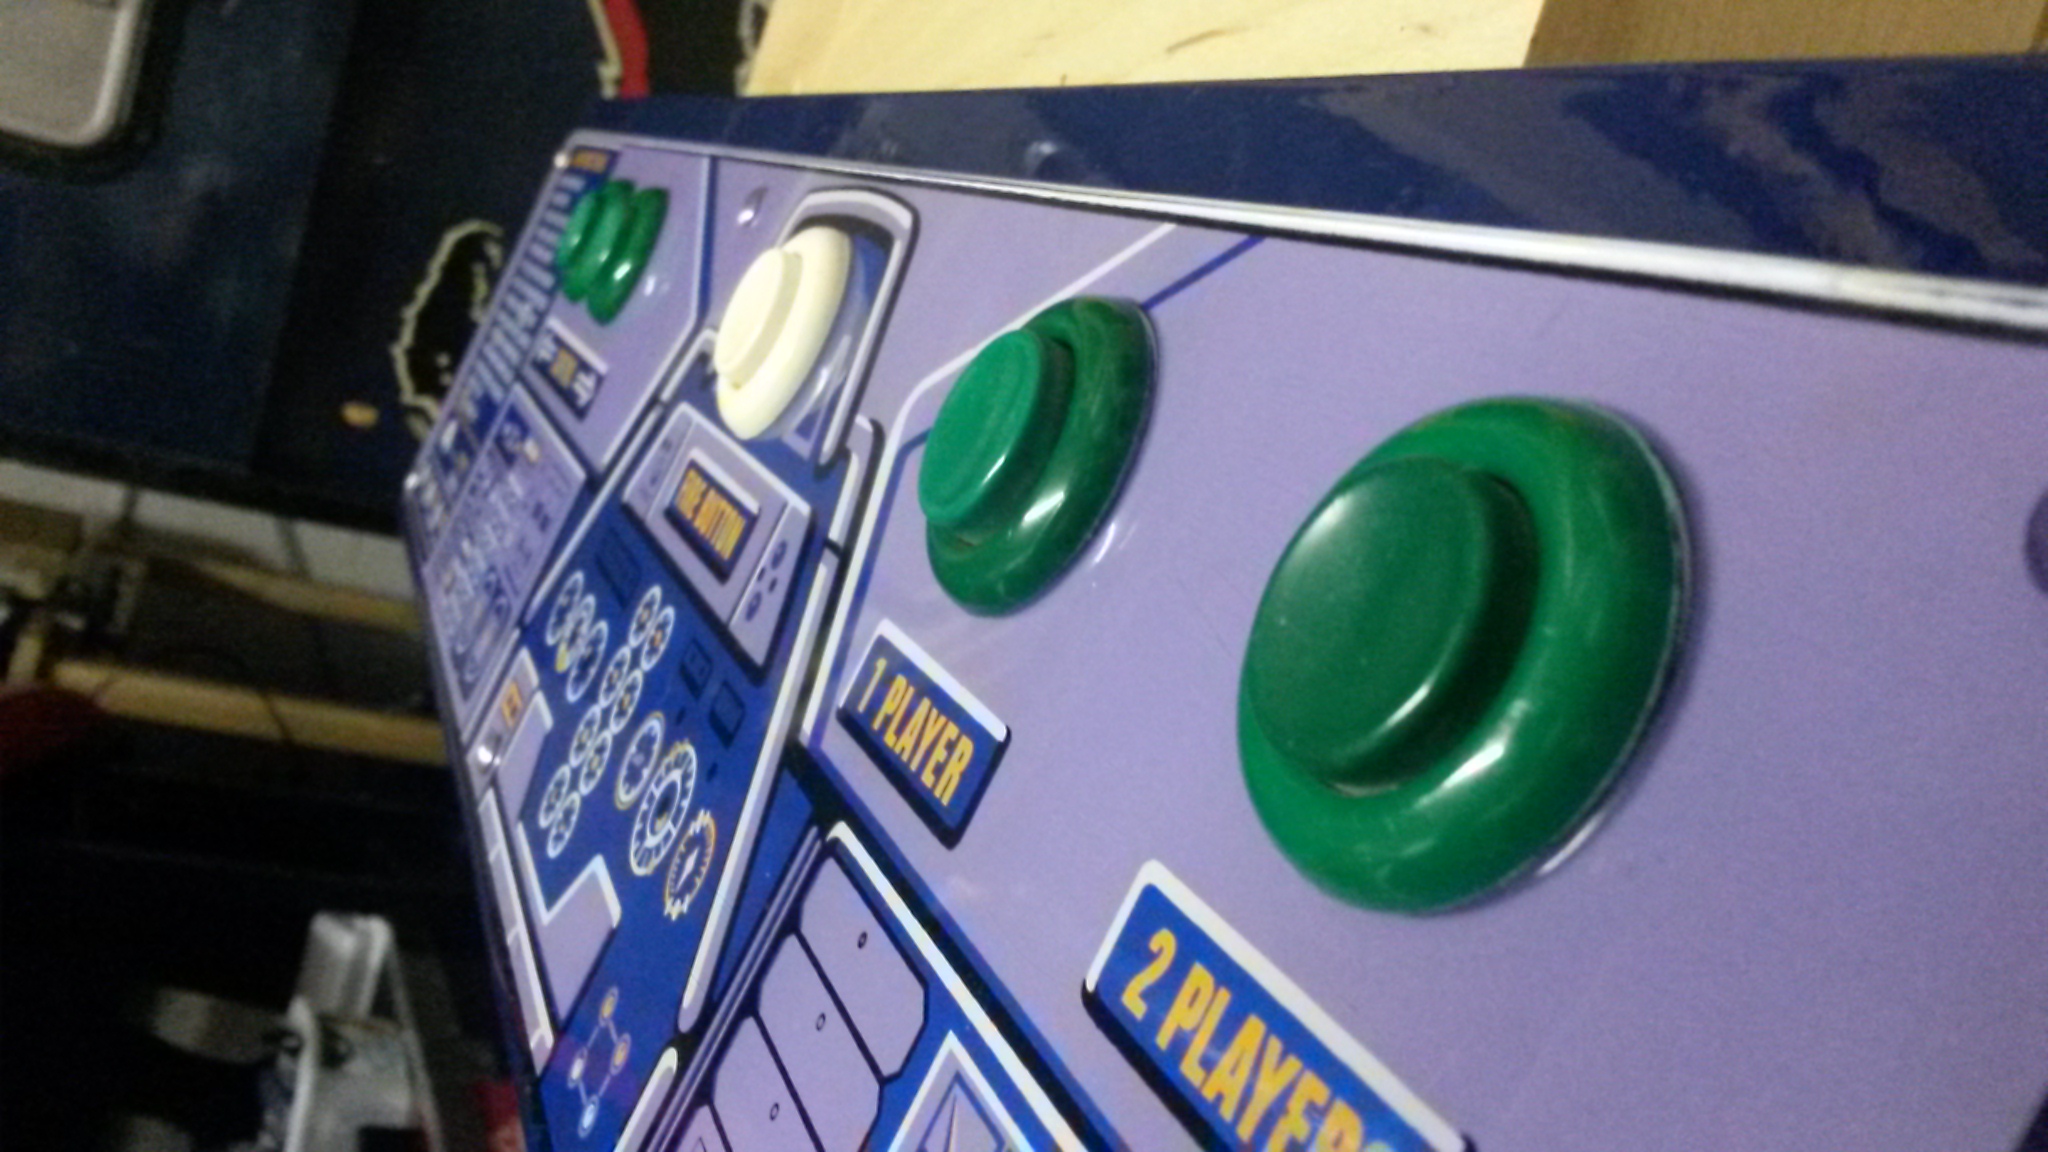

That's it for now, nursery run beckons.
More to post soon.
Neil
Been really busy with work last few days and little time to do much or post much in relation to Zacc, but have managed a bit so here's how the CP now looks, happy with the outcome.
Biggest faults were the cig burns on the acrylic and the painted wood to each side, some fairly significant chips and dent to the wooden panel.
Before photos;
Here's the wooden board with one coat of new paint, then sanded back to really show the faults and filler applied.
Lots more sanding and more coats applied using 1200grit wet sanding in between. Then onto the CP itself. Used some very fine wire wool to take back the acrylic past the cig burns, then used some high grade car polish that I had to polish out the wire wool marks and old scratches.
Here's the after photos.
And finally back together, having polished up the bolt heads and back into the cab.
That's it for now, nursery run beckons.
More to post soon.
Neil

Nice work on the plastic, there were some pretty bad marks on there!
Gaming Heaven
Active member
great work I will look at mine this weekend!
Hi guys,
Working all BH Weekend so not gonna get much done, but just thought I would post this helpful update I received from Syrup2407 after asking him for a couple of measurements of the coloured film monitor overlay.
It has certainly given me everything I need, couple with some photos, I snagged from Google. I've found a hopeful seller on Ebay for the film, cheap as chips which I'll post if it arrives fit for purpose.
Here's the email..
-----------------------------------------------------------------------------------------------------------------------------
All measurements are in mm.
On my monitor I have two coloured strips, a red stripe (which is at the top of the monitor (the end closest to the player) and a green, shaped strip (located at the end furthest away from the player). I have measured from the top of the monitor from the inside of the black frame around the edge of the monitor glass), hope this makes sense.
The red strip is 67mm from inside edged of the monitor frame and is 40mm in height at its widest point. It is not the same thickness along this length but I think a 40mm strip would suffice (they may have just been lazy on the day they made mine!).
The green, shaped strip is 267mm from the edge of the monitor frame and is shaped as per the diagram below.

Hope this helps others too.
Thanks Gav.
Working all BH Weekend so not gonna get much done, but just thought I would post this helpful update I received from Syrup2407 after asking him for a couple of measurements of the coloured film monitor overlay.
It has certainly given me everything I need, couple with some photos, I snagged from Google. I've found a hopeful seller on Ebay for the film, cheap as chips which I'll post if it arrives fit for purpose.
Here's the email..
-----------------------------------------------------------------------------------------------------------------------------
All measurements are in mm.
On my monitor I have two coloured strips, a red stripe (which is at the top of the monitor (the end closest to the player) and a green, shaped strip (located at the end furthest away from the player). I have measured from the top of the monitor from the inside of the black frame around the edge of the monitor glass), hope this makes sense.
The red strip is 67mm from inside edged of the monitor frame and is 40mm in height at its widest point. It is not the same thickness along this length but I think a 40mm strip would suffice (they may have just been lazy on the day they made mine!).
The green, shaped strip is 267mm from the edge of the monitor frame and is shaped as per the diagram below.
Hope this helps others too.
Thanks Gav.
Sweet Neil, looking very nice
 Now I know how to Polish my CP when I get round to it

One thing, when you screw the Moon back into place, be sure to use Washers if there are none like mine as it will crack the Plastic! I had to replace my Moon as it was cracked when I got the machine.
bbz1492015-05-02 14:06:47
One thing, when you screw the Moon back into place, be sure to use Washers if there are none like mine as it will crack the Plastic! I had to replace my Moon as it was cracked when I got the machine.
bbz1492015-05-02 14:06:47
bbz149 said:One thing, when you screw the Moon back into place, be sure to use Washers if there are none like mine as it will crack the Plastic! I had to replace my Moon as it was cracked when I got the machine.
Cheers pal, I read this somewhere else I think, but yes, mine has no washers - but will have soon.
Neil.
Hi Guys, so it’s been a wee while since I updated this post, but have been busy, busy, busy. However I hope you will agree that the wait will prove to have been worth it.
So earlier on in this thread I mentioned having found the world’s most amenable TV repair man, still operating and literally a stones throw from my home. Well I duly delivered Zacc to him last week so he could give the electronics a MOT and check the repair on the monitor.
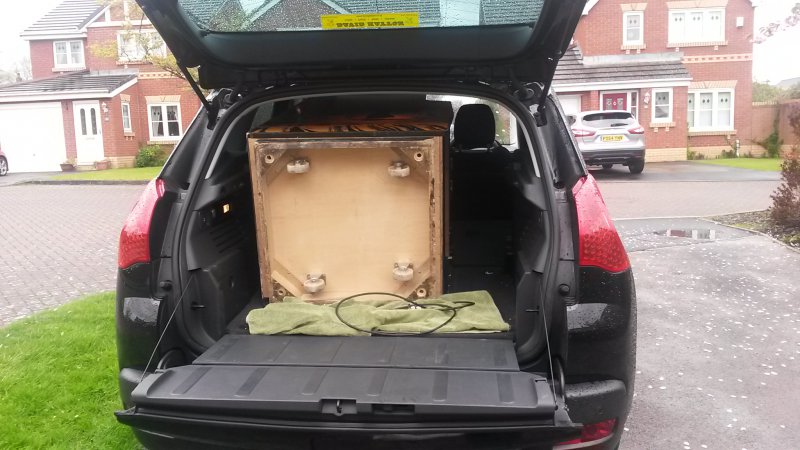
Not only is this incredibly fortunate (for me), I also found out that Zacc and therefore, hopefully, most other uprights will actually fit in my car!! Which, if I know I don’t need to factor in delivery costs, coupled with TV repair man firmly onside, could, open up future purchases no end!!!
Here’s proof that Zacc does indeed fit...
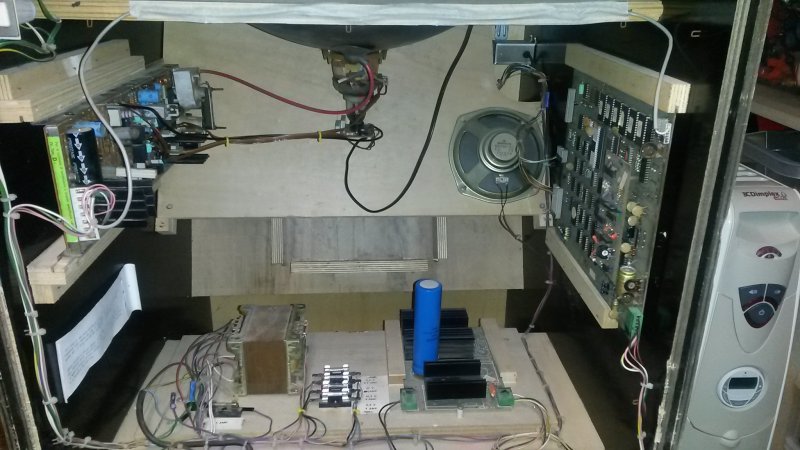
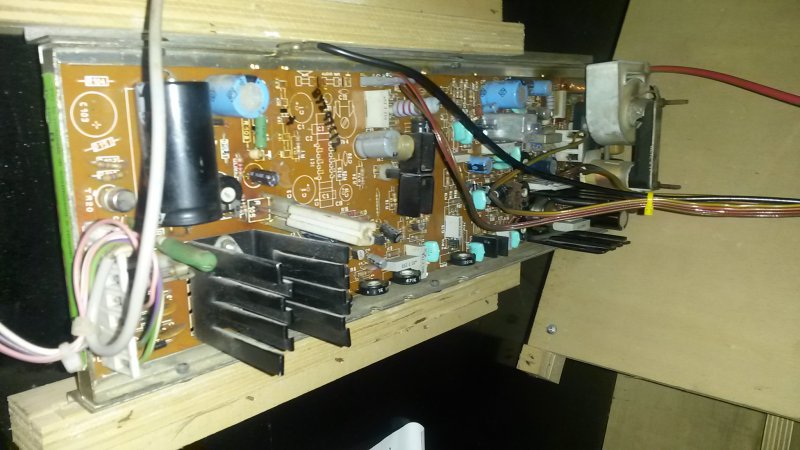
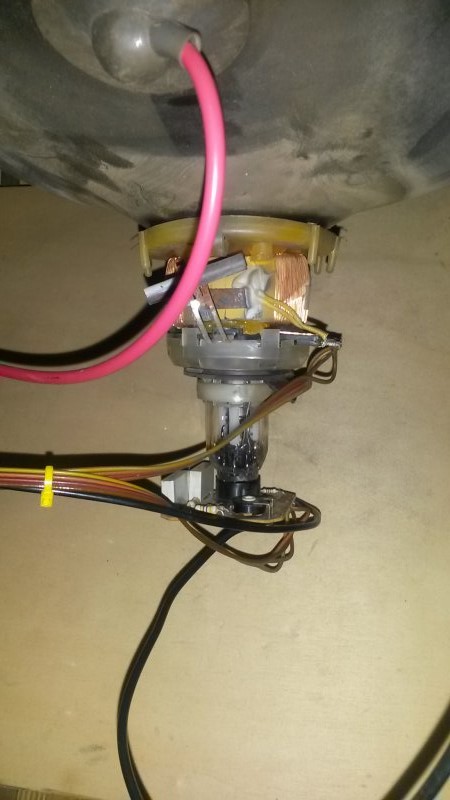
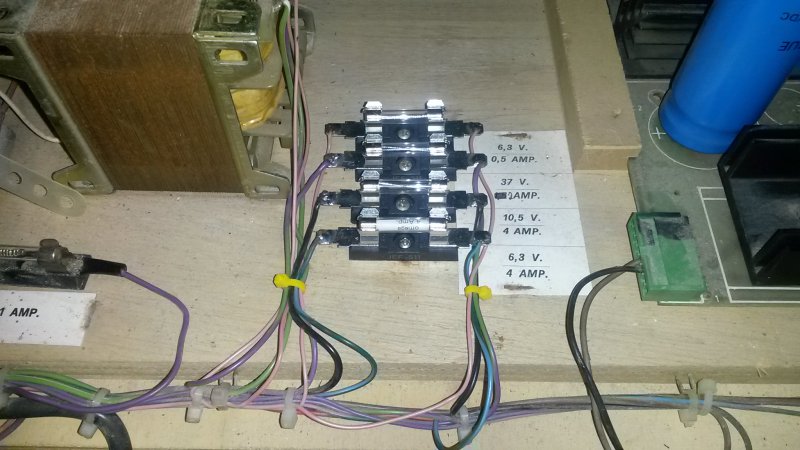
A couple of days later, I got the call to come and collect Zacc. The prognosis had been a wee bit more troublesome than first thought. There had been several faults on the main monitor chassis, but also some others found on the neck board and some other stuff that I didn’t pretend to understand. But true to his word, all fixed and for an unbelievably reasonable sum. Zacc even has a nice green PAT Test label stuck to him, with all the internals fully serviced/checked. Also got hold of some new fuse holders as per all the earlier advice, from Maplins which also got fitted...
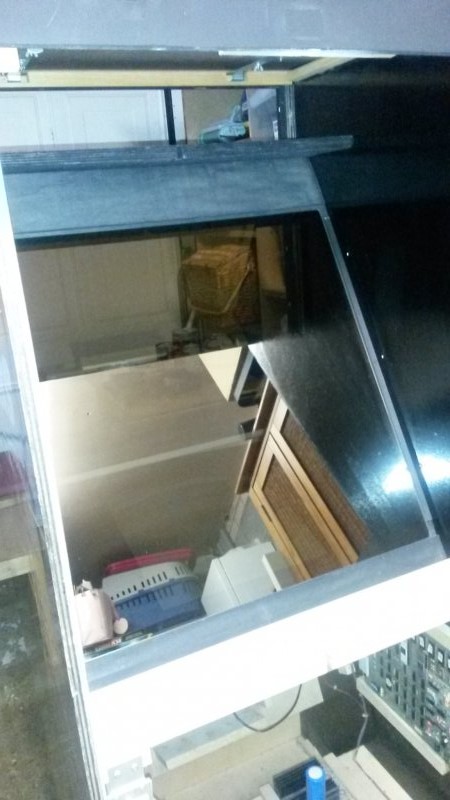
So with Zacc safely back home, it was time to reassemble all the breakable bits I had removed/cleaned prior to sending off for repair. First up the mirror, erm highly reflective..
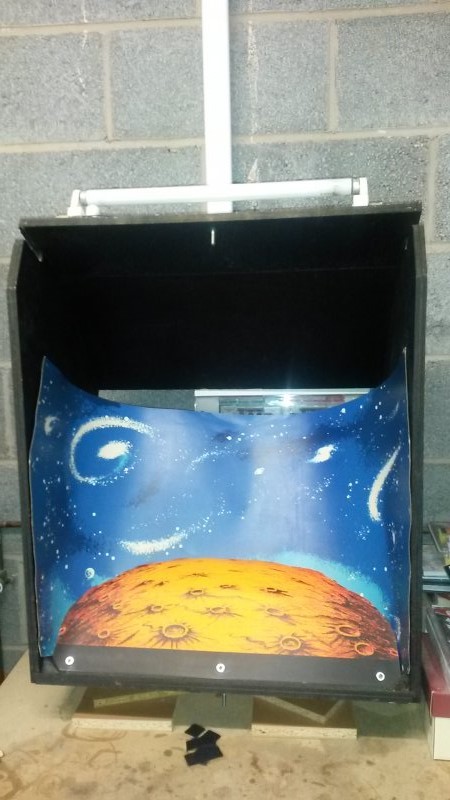
Next up, the refitting of the moon – washers used as per advice given – and the space backdrop. I have used sticky back black Velcro to fix this and the monitor surround so that they can be more easily removed for maintenance if needed. I just thought this made more sense than stapling it again.
Of course I have teased you all with the promise of Zacc actually having had life breathed back into him but have given you little evidence of such, until now. Here’s the money shot…
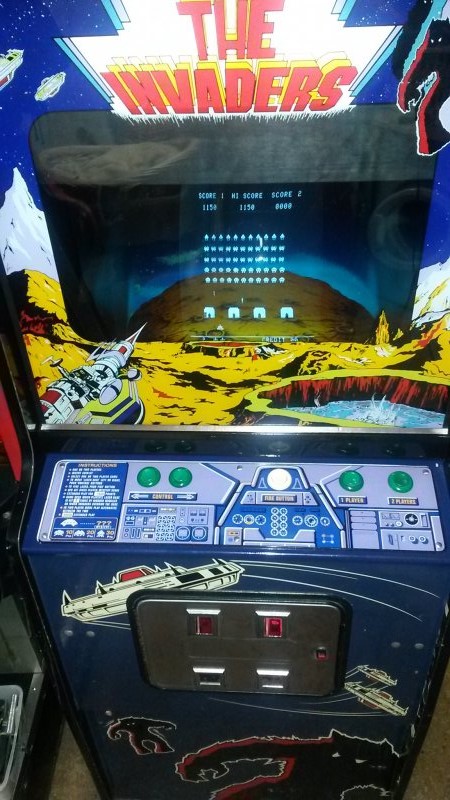
And again, because I can...
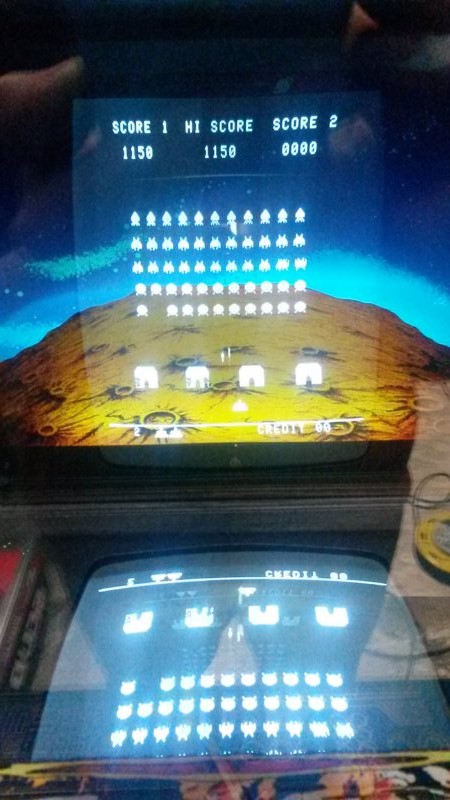
Those more eagled eyed will notice a new shiny red button on the coin door. Zacc never had a barrel lock in his coin door when I got him, and after speaking to RGP at the Arcade Club the other week he showed me how to wire up a button to the coin mech to enable a free play alternative. I loved this idea and have implemented it on Zacc, even though it has a fully working coin mech and coin box, it’s just easier.
Next up will be a post to show what I have achieved so far, from the original post, what I still need/want to do (coloured monitor film, TMold, etc) and some new bits that I have discovered since getting inside Zacc.
And that brings you up to date, off to invade some space !!
Neil.
So earlier on in this thread I mentioned having found the world’s most amenable TV repair man, still operating and literally a stones throw from my home. Well I duly delivered Zacc to him last week so he could give the electronics a MOT and check the repair on the monitor.
Not only is this incredibly fortunate (for me), I also found out that Zacc and therefore, hopefully, most other uprights will actually fit in my car!! Which, if I know I don’t need to factor in delivery costs, coupled with TV repair man firmly onside, could, open up future purchases no end!!!
Here’s proof that Zacc does indeed fit...
A couple of days later, I got the call to come and collect Zacc. The prognosis had been a wee bit more troublesome than first thought. There had been several faults on the main monitor chassis, but also some others found on the neck board and some other stuff that I didn’t pretend to understand. But true to his word, all fixed and for an unbelievably reasonable sum. Zacc even has a nice green PAT Test label stuck to him, with all the internals fully serviced/checked. Also got hold of some new fuse holders as per all the earlier advice, from Maplins which also got fitted...
So with Zacc safely back home, it was time to reassemble all the breakable bits I had removed/cleaned prior to sending off for repair. First up the mirror, erm highly reflective..
Next up, the refitting of the moon – washers used as per advice given – and the space backdrop. I have used sticky back black Velcro to fix this and the monitor surround so that they can be more easily removed for maintenance if needed. I just thought this made more sense than stapling it again.
Of course I have teased you all with the promise of Zacc actually having had life breathed back into him but have given you little evidence of such, until now. Here’s the money shot…
And again, because I can...
Those more eagled eyed will notice a new shiny red button on the coin door. Zacc never had a barrel lock in his coin door when I got him, and after speaking to RGP at the Arcade Club the other week he showed me how to wire up a button to the coin mech to enable a free play alternative. I loved this idea and have implemented it on Zacc, even though it has a fully working coin mech and coin box, it’s just easier.
Next up will be a post to show what I have achieved so far, from the original post, what I still need/want to do (coloured monitor film, TMold, etc) and some new bits that I have discovered since getting inside Zacc.
And that brings you up to date, off to invade some space !!
Neil.

Alpha1 said:Not sure how I missed this thread!
Awesome work on the cab - especially love the CPO polishing!
Thanks Alpha, high praise indeed.
I miss threads all the time, even though I'm on here all the time.
Just picked up on a couple of threads both relating to Sega Dinoking conversions which have blown me away, especially one from FrancoB over on J+.
My kids would love one of those, hmmmmmm
neil16372015-05-09 15:41:04
Okay guys,
Just a little further update to show the progress from first post to now and to show what is still left.
The original post included this check list so let’s see where I am;
Bad Points;
Outside Zacc;
1. T Moulding needs replaced as gouged and buckled in areas - STILL TO DO
2. Top front edge of cab has large scrapes/gouges in it - SORTED
3. Metal holder for bezel is heavily pitted/rusted - SORTED
4. Wooden CPO base has burns and gouges in it - SORTED
5. Plastic CPO cover has slight melting to it in areas - SORTED
6. CPO buttons will need replaced as heavily marked/scratched - SORTED
7. Coin slots need new inlays - STILL TO DO
8. Base frame and castors have seen better days - STILL TO DO
9. Every panel has stencilled paint on it from previous owner - SORTED
10. Every panel has deep gouges in it at through to bare wood - STILL TO DO
11. Artwork has been scratched on every panel, some very deep/wide gouges. - STILL TO DO
Inside Zacc;
1. Monitor needs colour film replacing - STILL TO DO
2. Was bought with fault to monitor (not working at all) - SORTED
3. Cardboard moon background has slight buckling to the top/middle - SORTED
4. Cardboard moon background has slight tearing around fixing staples - SORTED
5. Interior cardboard monitor surround needs replaced - SORTED
6. May need visible interior area repainted black - SORTED
Getting there and obviously happy that Zacc is once again working, although there is now decidedly more play and less work going on now. Just to add to the list however, whilst sorting some of the above points I inevitably found some more things to add to the list;
1. One of the coin mech bulbs needs replaced
2. The coin box is heavily rusted and will need sanded back and repainted
3. The coin door needs a good polish
4. The rear of the cab will need sanded, filled and painted.
All, relatively minor things, other than trying to remedy the larger gouges in the sides of the cab, which have gone right through the artwork. This will get the gouge smoothened out, filled with fine filler, sanded down, masking off the surround intact artwork, then hand painted to match.
Also, Zacc is currently on 4 castors, which can be seen on the ‘in car’ photo earlier. I don’t like this.
a) The castors mean that the cab is a bit wobbly when playing, nothing too bad but still noticeable.
b) The base frame is very badly dinged and worn in places.
So, whilst considering options I found a really good alternative base solution here; CLICKY LINK
I think this ticks all the boxes for me, personally, as I need to replace the base frame or at least remove it to repair it; I don’t particularly want nor need it permanently on castors; the option of castors makes moving around much easier when needed.
I would be keen to hear opinions on this.
Neil
Just a little further update to show the progress from first post to now and to show what is still left.
The original post included this check list so let’s see where I am;
Bad Points;
Outside Zacc;
1. T Moulding needs replaced as gouged and buckled in areas - STILL TO DO
2. Top front edge of cab has large scrapes/gouges in it - SORTED
3. Metal holder for bezel is heavily pitted/rusted - SORTED
4. Wooden CPO base has burns and gouges in it - SORTED
5. Plastic CPO cover has slight melting to it in areas - SORTED
6. CPO buttons will need replaced as heavily marked/scratched - SORTED
7. Coin slots need new inlays - STILL TO DO
8. Base frame and castors have seen better days - STILL TO DO
9. Every panel has stencilled paint on it from previous owner - SORTED
10. Every panel has deep gouges in it at through to bare wood - STILL TO DO
11. Artwork has been scratched on every panel, some very deep/wide gouges. - STILL TO DO
Inside Zacc;
1. Monitor needs colour film replacing - STILL TO DO
2. Was bought with fault to monitor (not working at all) - SORTED
3. Cardboard moon background has slight buckling to the top/middle - SORTED
4. Cardboard moon background has slight tearing around fixing staples - SORTED
5. Interior cardboard monitor surround needs replaced - SORTED
6. May need visible interior area repainted black - SORTED
Getting there and obviously happy that Zacc is once again working, although there is now decidedly more play and less work going on now. Just to add to the list however, whilst sorting some of the above points I inevitably found some more things to add to the list;
1. One of the coin mech bulbs needs replaced
2. The coin box is heavily rusted and will need sanded back and repainted
3. The coin door needs a good polish
4. The rear of the cab will need sanded, filled and painted.
All, relatively minor things, other than trying to remedy the larger gouges in the sides of the cab, which have gone right through the artwork. This will get the gouge smoothened out, filled with fine filler, sanded down, masking off the surround intact artwork, then hand painted to match.
Also, Zacc is currently on 4 castors, which can be seen on the ‘in car’ photo earlier. I don’t like this.
a) The castors mean that the cab is a bit wobbly when playing, nothing too bad but still noticeable.
b) The base frame is very badly dinged and worn in places.
So, whilst considering options I found a really good alternative base solution here; CLICKY LINK
I think this ticks all the boxes for me, personally, as I need to replace the base frame or at least remove it to repair it; I don’t particularly want nor need it permanently on castors; the option of castors makes moving around much easier when needed.
I would be keen to hear opinions on this.
Neil
Gaming Heaven
Active member
all I can say is I have castors on all mine they are heavy duty 360 swivel braked so there is no wobble on a flat surface and they make it easy to service the cabs and eg in a garage lift them a bit from any damp layer, i removed the levelers and just put the castors on the 4 diagonal corners where you have the 4 holes in the photos
your castors look not ideal they are single plane moving only?
on ebay there is a seller who does loads of types you can get fully braked 360 swivel in hard wareing plastic [avoid soft rubber?] for about £10 delivered
unless it is rotten you could just sand and fill if needed and just repaint the base black and I varnished all bare wood just to seal it underneath, including filling the 4 leveler holes
just my opinion why create work for yourself?
the traditional rear only castors are fine just not as easy to move the cabs imo!
Gaming Heaven2015-05-09 23:11:05
your castors look not ideal they are single plane moving only?
on ebay there is a seller who does loads of types you can get fully braked 360 swivel in hard wareing plastic [avoid soft rubber?] for about £10 delivered
unless it is rotten you could just sand and fill if needed and just repaint the base black and I varnished all bare wood just to seal it underneath, including filling the 4 leveler holes
just my opinion why create work for yourself?
the traditional rear only castors are fine just not as easy to move the cabs imo!
Gaming Heaven2015-05-09 23:11:05
Gaming Heaven
Active member
Gaming Heaven
Active member
Neil
I need some help with painting the wooden blue part of my CP, can you explain - did you roller the paint on and how did you get the shade?
thanks
I need some help with painting the wooden blue part of my CP, can you explain - did you roller the paint on and how did you get the shade?
thanks